Consuming Graphs in Power BI¤
Introduction¤
Learn how to consume data from your Corporate Memory Knowledge Graph with our Microsoft Power-BI-Connector.
This manual and tutorial describes how you can consume data from your knowledge graph in Microsoft Power BI through our Corporate Memory Power-BI-Connector.
Power BI is a business analytics service by Microsoft. It aims to provide interactive visualizations and business intelligence capabilities with an interface simple enough for end users to create their own reports and dashboards. Power BI can be obtained from the official Microsoft page and/or in the Windows Software Store.
The latest (unsigned) version of our Power-BI-Connector is available from its source repository a version signed by eccenca is available with each Corporate Memory release.
- eccenca github.com repository (unsigned .mez file)
- eccenca Corporate Memory Releases (signed .pqx file)
- Thumbprint of the signature: FB6C562BD0B08107AAA420EDDE94507420C7FE1A


Installation¤
- Download the
.pqxor.mezfile from the locations linked above. - Move the file into the folder
Documents\Power BI Desktop\Custom Connectors. - Create the folder if it does not exist.
- In case you are running Windows on Parallels Desktop: Do not use the Local
Disk\Users\UserName\Documentsfolder but your shared folder with macOS. - Register the Thumbprint (for .pqx) or setup PowerBI Desktop to allow any 3rd party connector (for .pqx or .mez) (we recommend to register the Thumbprint)
Setup
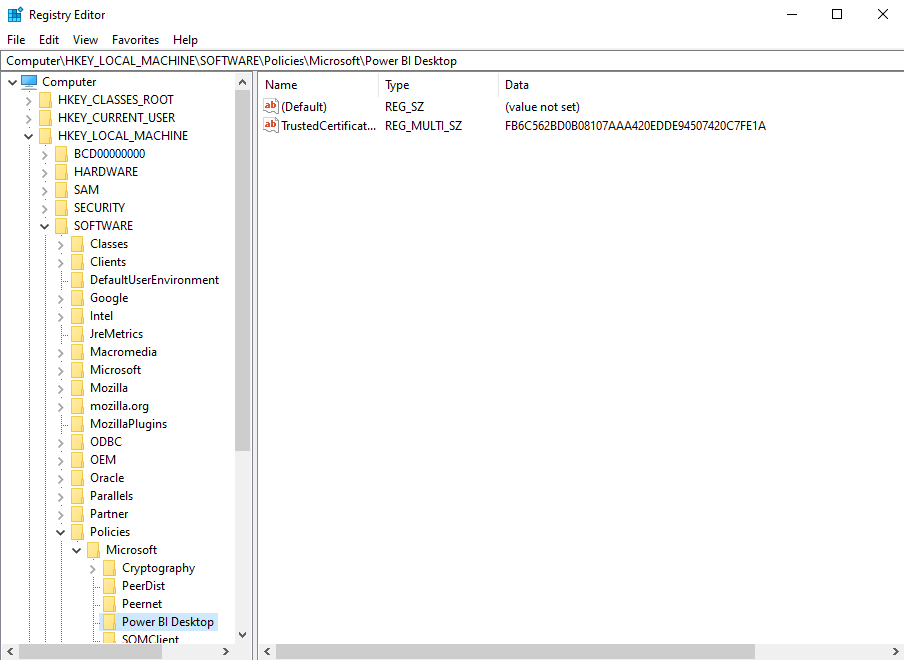
- In order to allow the eccenca Corporate Memory Power-BI-Connector in your Power BI Desktop installation you need to register the Thumbprint of the file signature in the windows registry.
- Cf. official Microsoft documentation
- The registry path is
HKEY_LOCAL_MACHINE\Software\Policies\Microsoft\Power BI Desktop. Make sure the path exists, or create it. - Add a new value under the path specified above. The type should be “Multi-String Value” (
REG_MULTI_SZ), and it should be calledTrustedCertificateThumbprints - Add the thumbprints of the certificates you want to trust. You can add multiple certificates by using “\0” as a delimiter, or in the registry editor, right click → modify and put each thumbprint on a new line.
- (Re-)Start Power BI Desktop
- The registry path is
If you wish to automate this setup you can use the reg windows command line tool to make this entry like:
REM list existing entries in Power BI Desktop > TrustedCertificateThumbprints
reg query ""HKEY_LOCAL_MACHINE\SOFTWARE\Policies\Microsoft\Power BI Desktop" /v TrustedCertificateThumbprints

REM add eccenca Corporate Memory Power-BI-Connector Thumbprint
reg add "HKEY_LOCAL_MACHINE\SOFTWARE\Policies\Microsoft\Power BI Desktop" /v TrustedCertificateThumbprints /t REG_MULTI_SZ /d FB6C562BD0B08107AAA420EDDE94507420C7FE1A
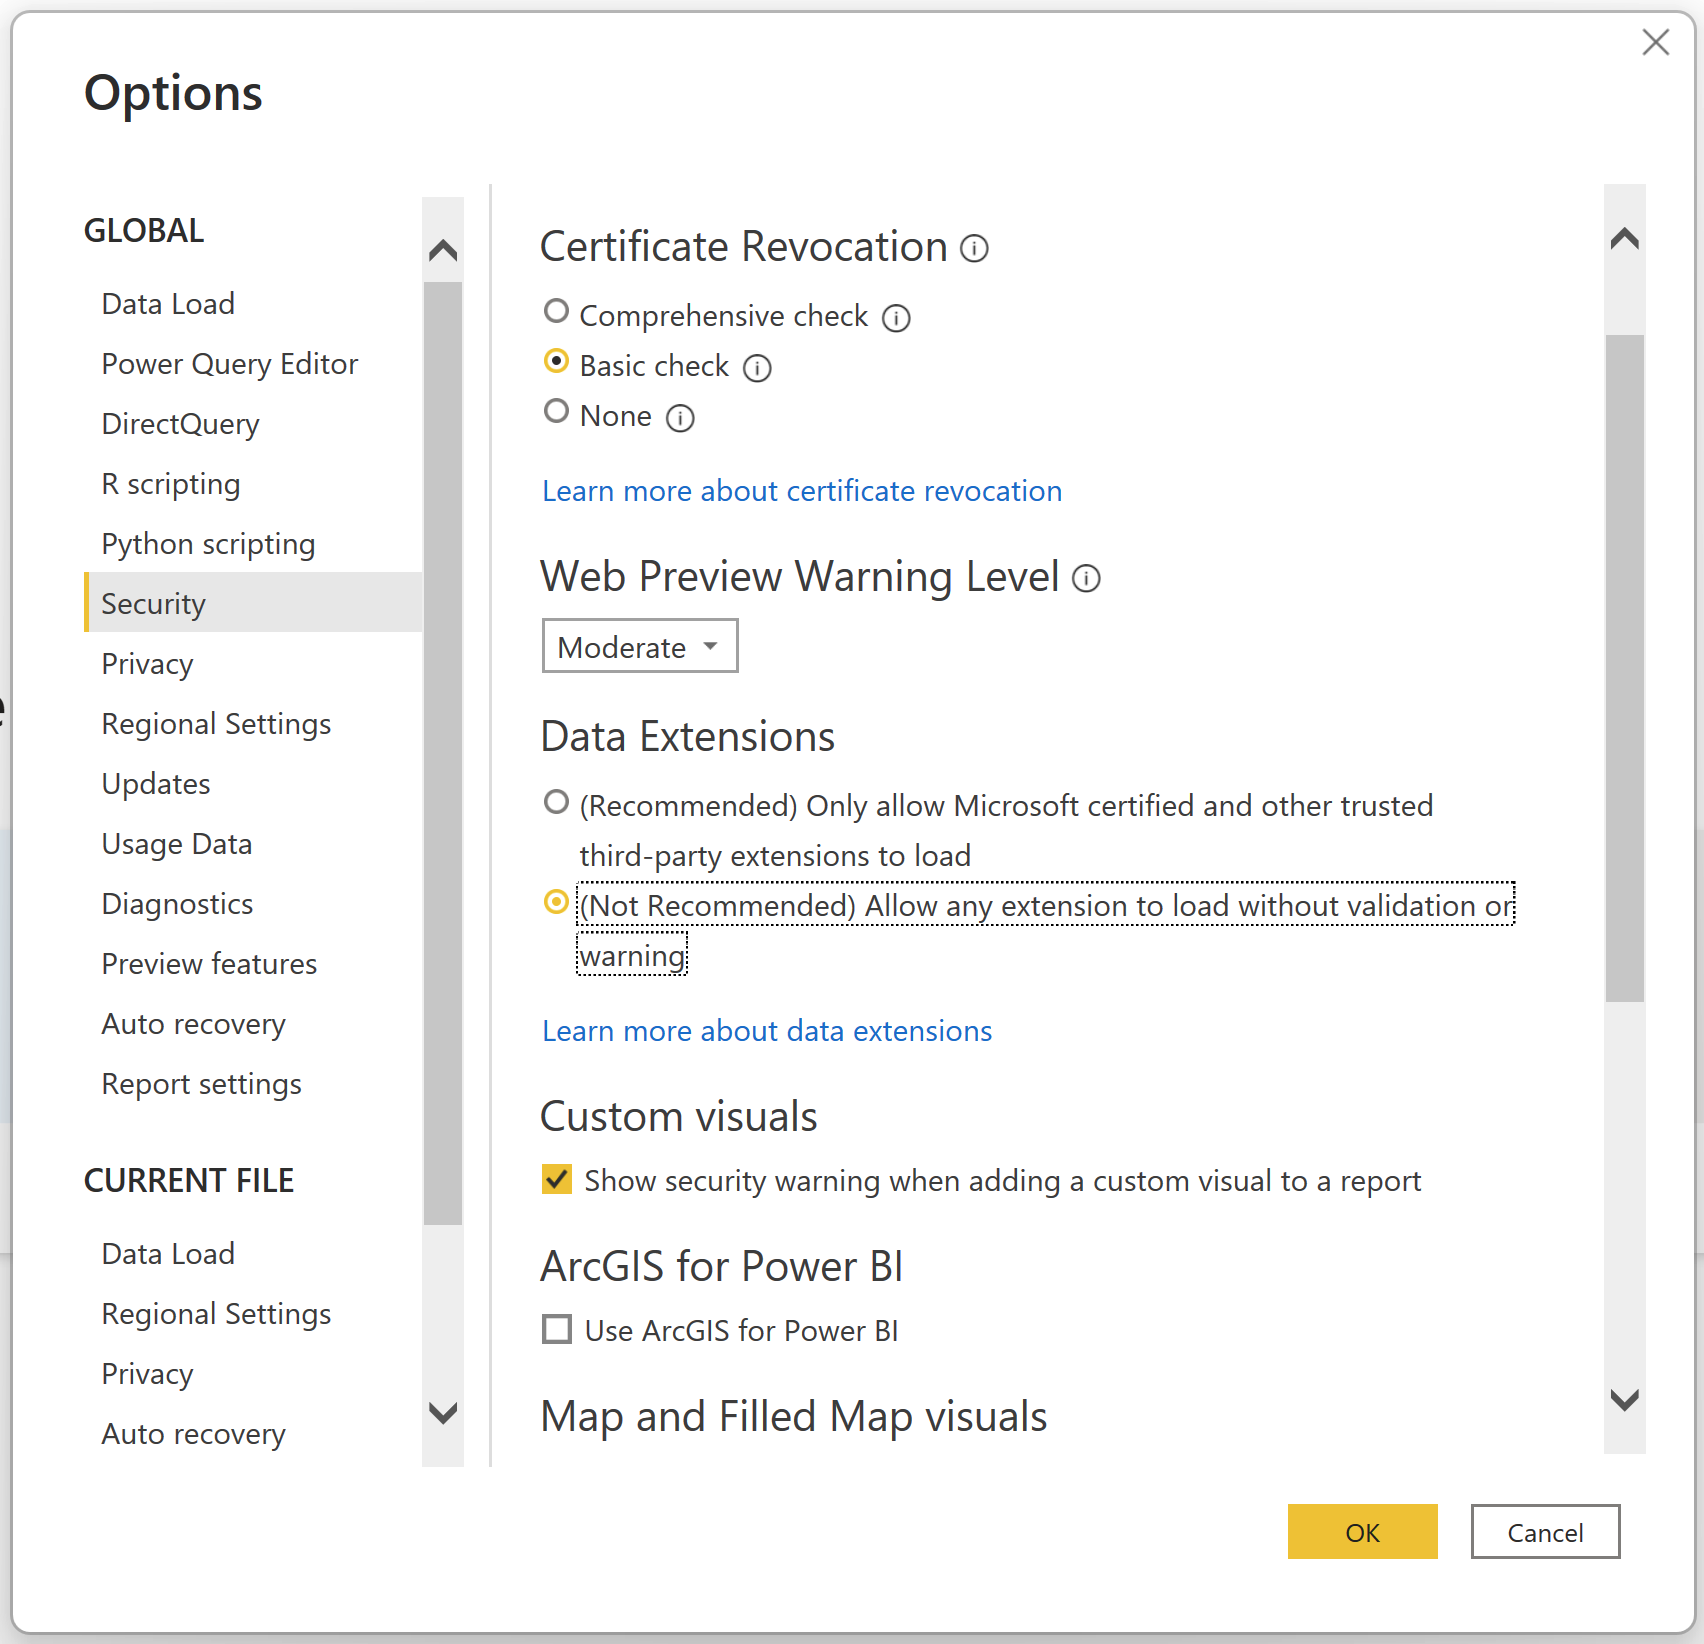
- In case you are using the .mez (works for .pqx file too) file or simply want to trust any third party connector extension
- (Re-)Start Power BI Desktop, go to
File → Options and settings → Options → Security - Under Data Extensions, select(Not Recommended). Allow any extension to load without validation or warning.
- Select OK, and then restart Power BI Desktop.
Add a Data Source¤
Use the Power-BI-Connector to login with your Corporate Memory Instance:
- Open Power BI Desktop
- Click
Edit Queries → New Source(or directly GetData)
- In the dialog search for eccenca
Corporate Memory, which is listed in theDatabasecategory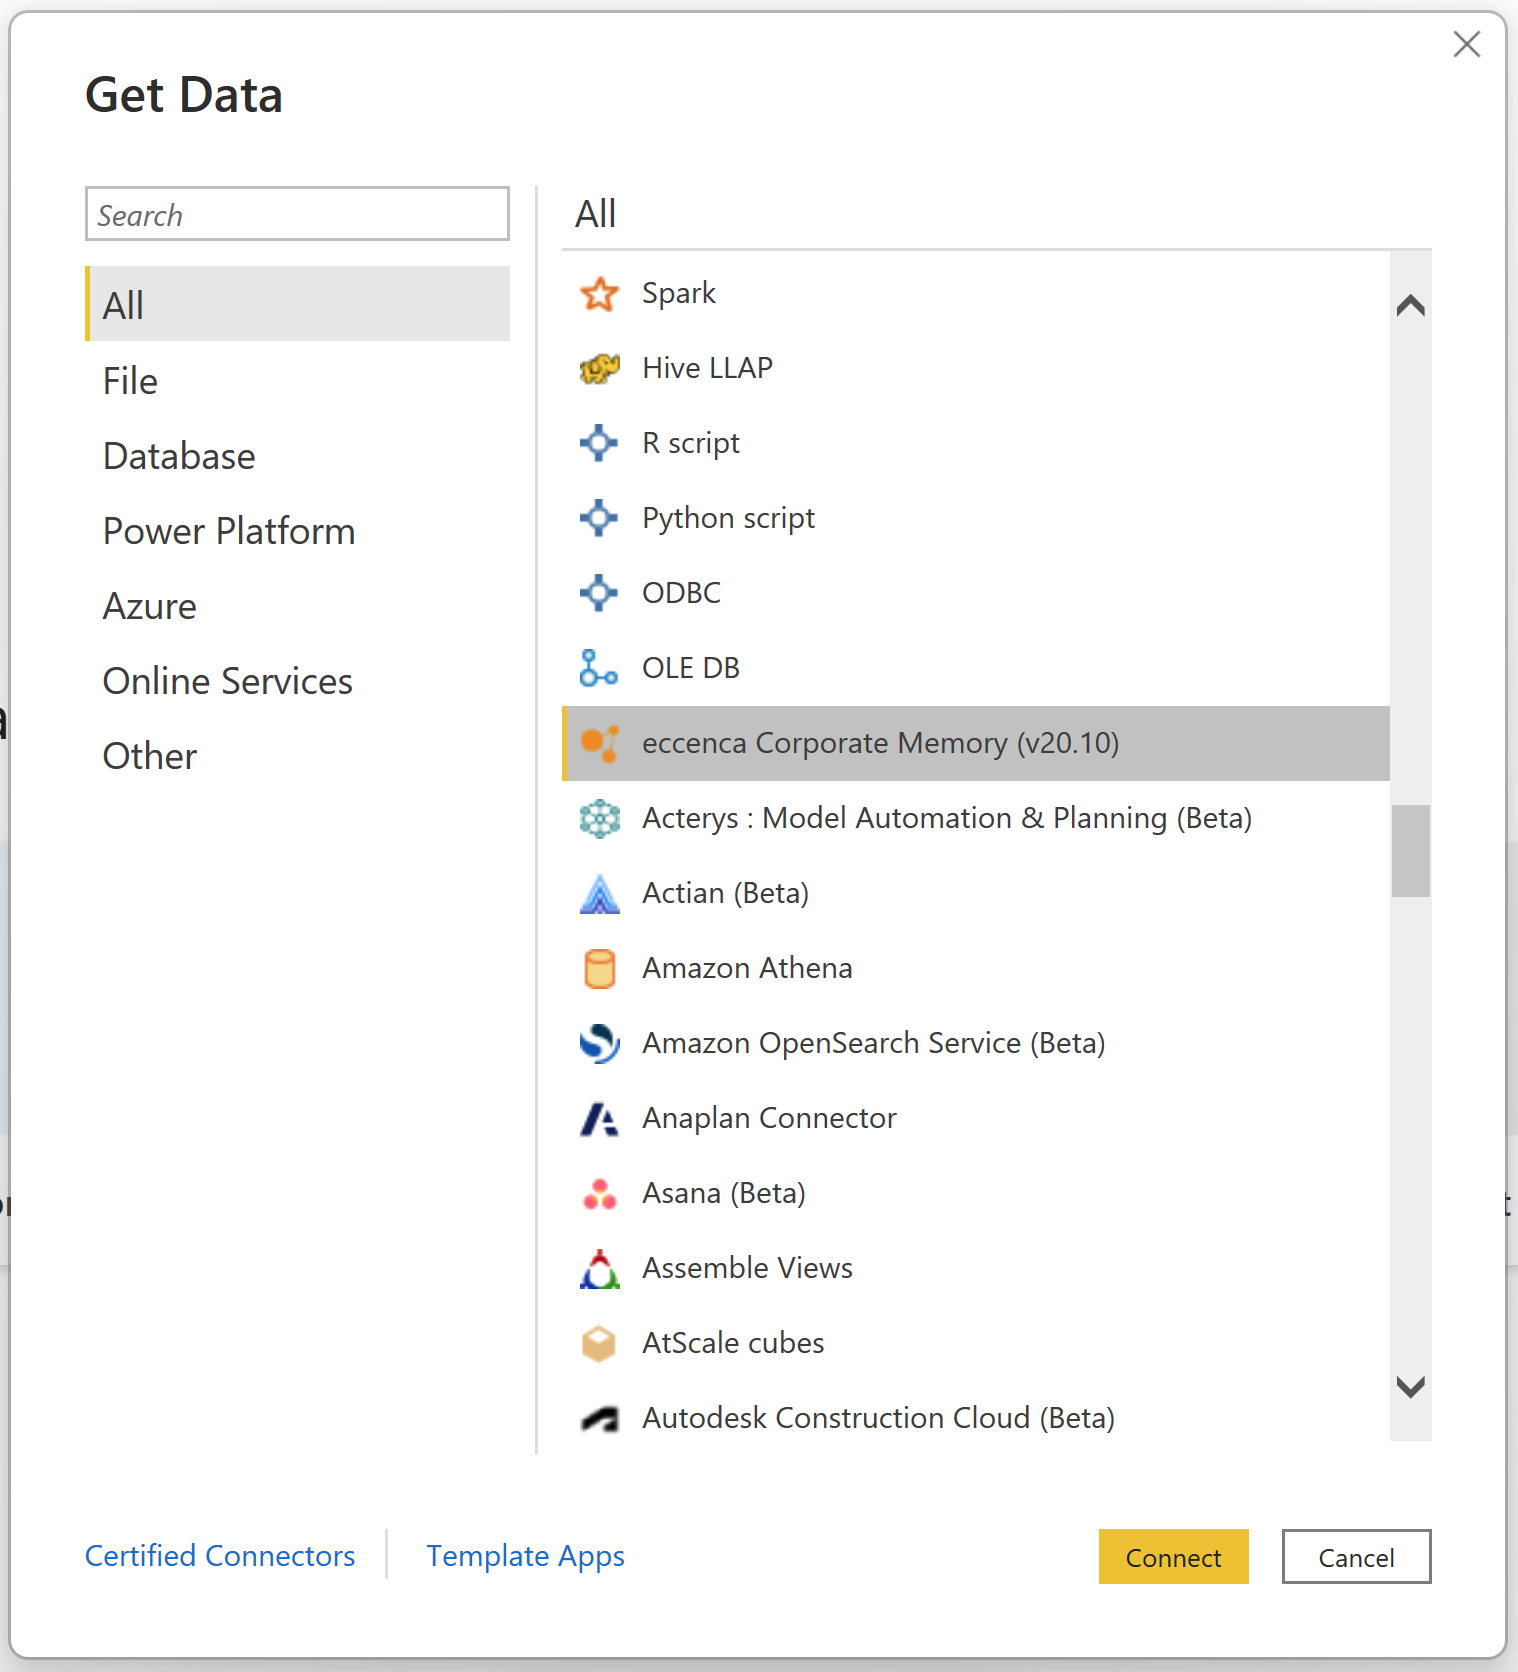
- Select the connector and click
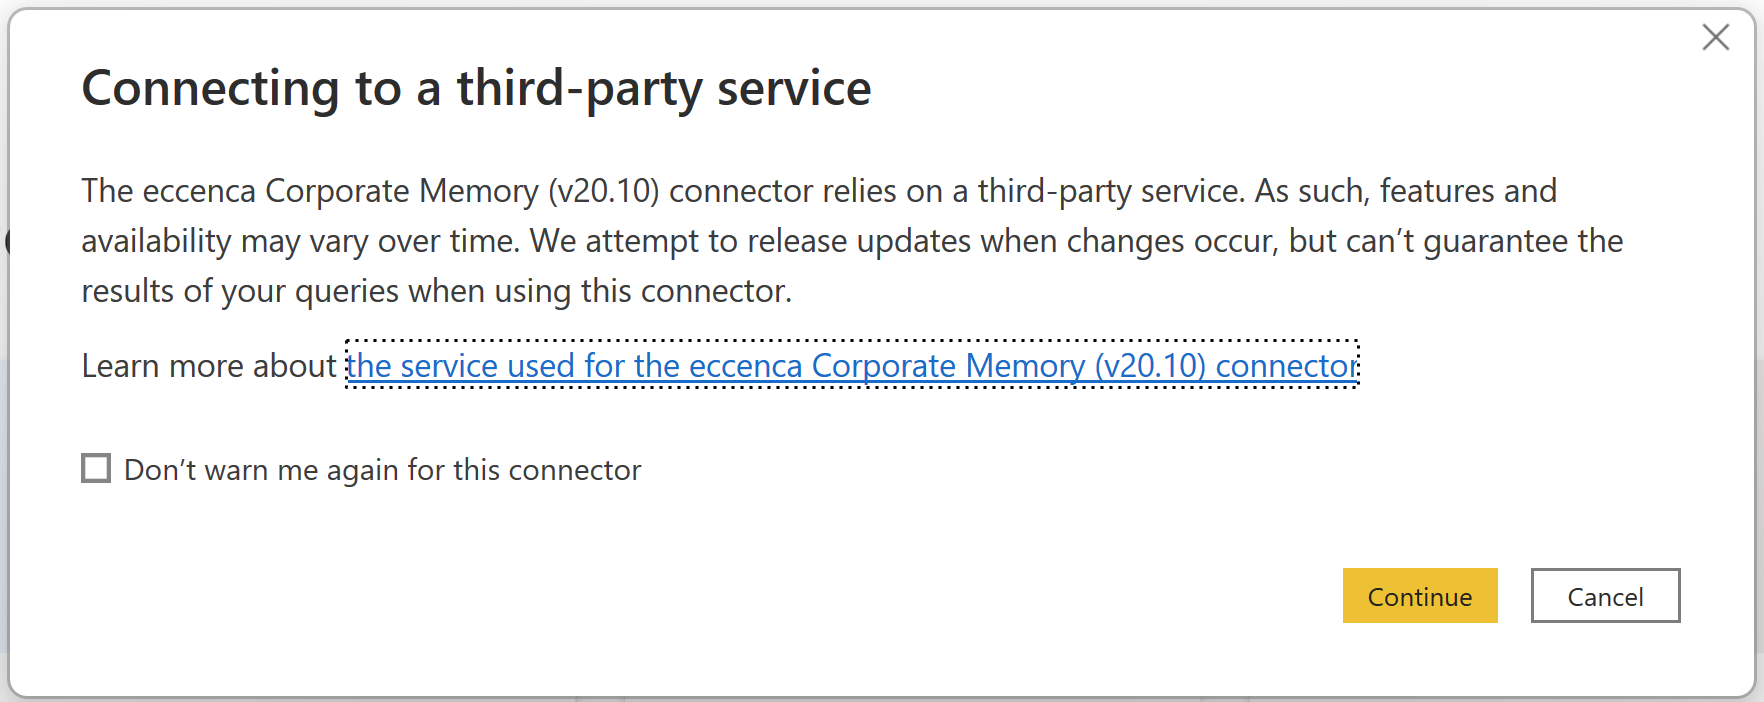
Connect - Read and accept the 3rd party connector notification
- In the following dialog you need to specify the connection and information and access credentials, ask your Corporate Memory administrator for assistance if you miss any of the requested details. You have the option to use username + password or a client secret for login. In case of a custom setup is used advanced configuration can be provided:
Access-configuration
In order to use username + password based login you need to fill the details shown below:
- First Step
- Corporate Memory Base URI
- Grant type = password
- Client ID

- Second Step
- Password / Client Secret
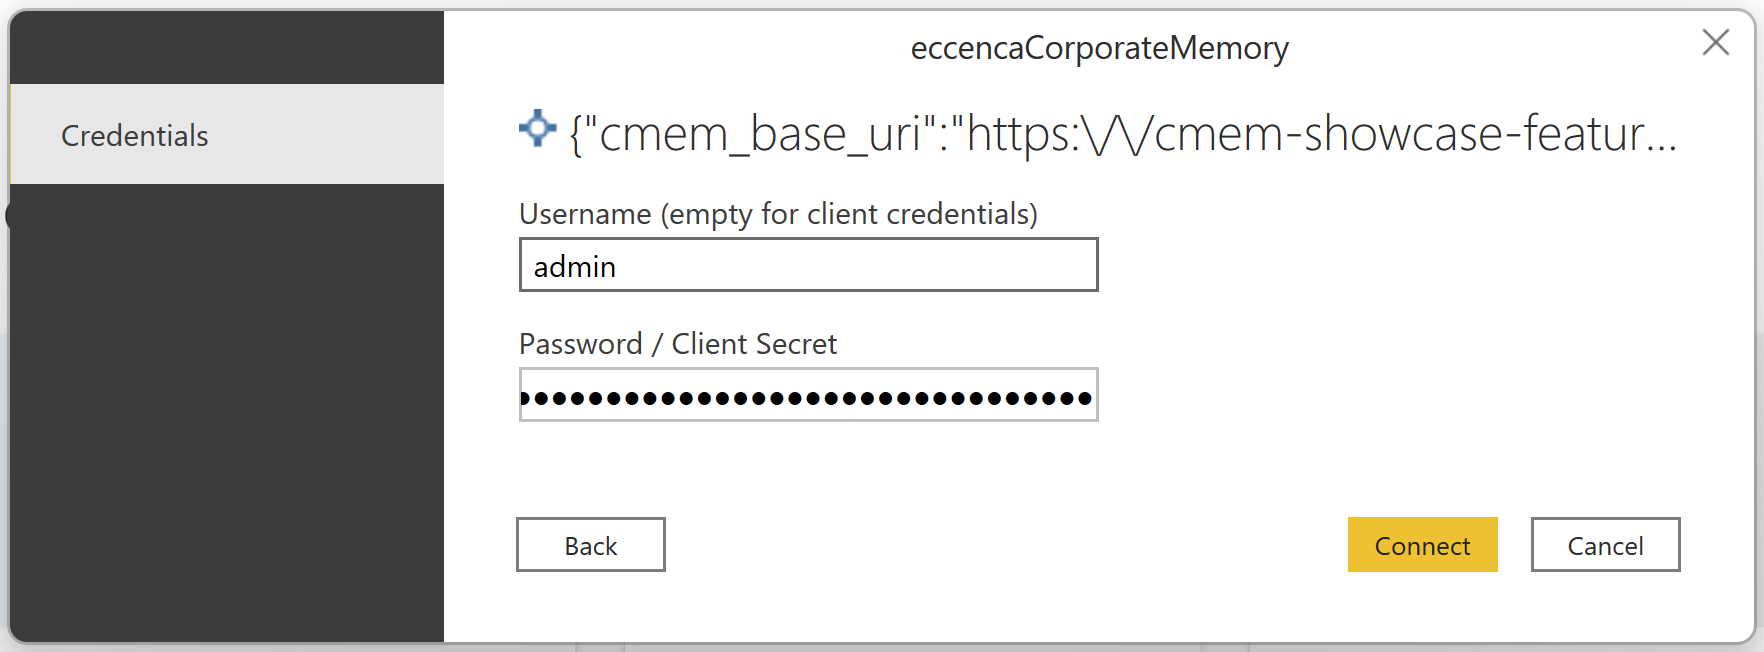
- Password / Client Secret
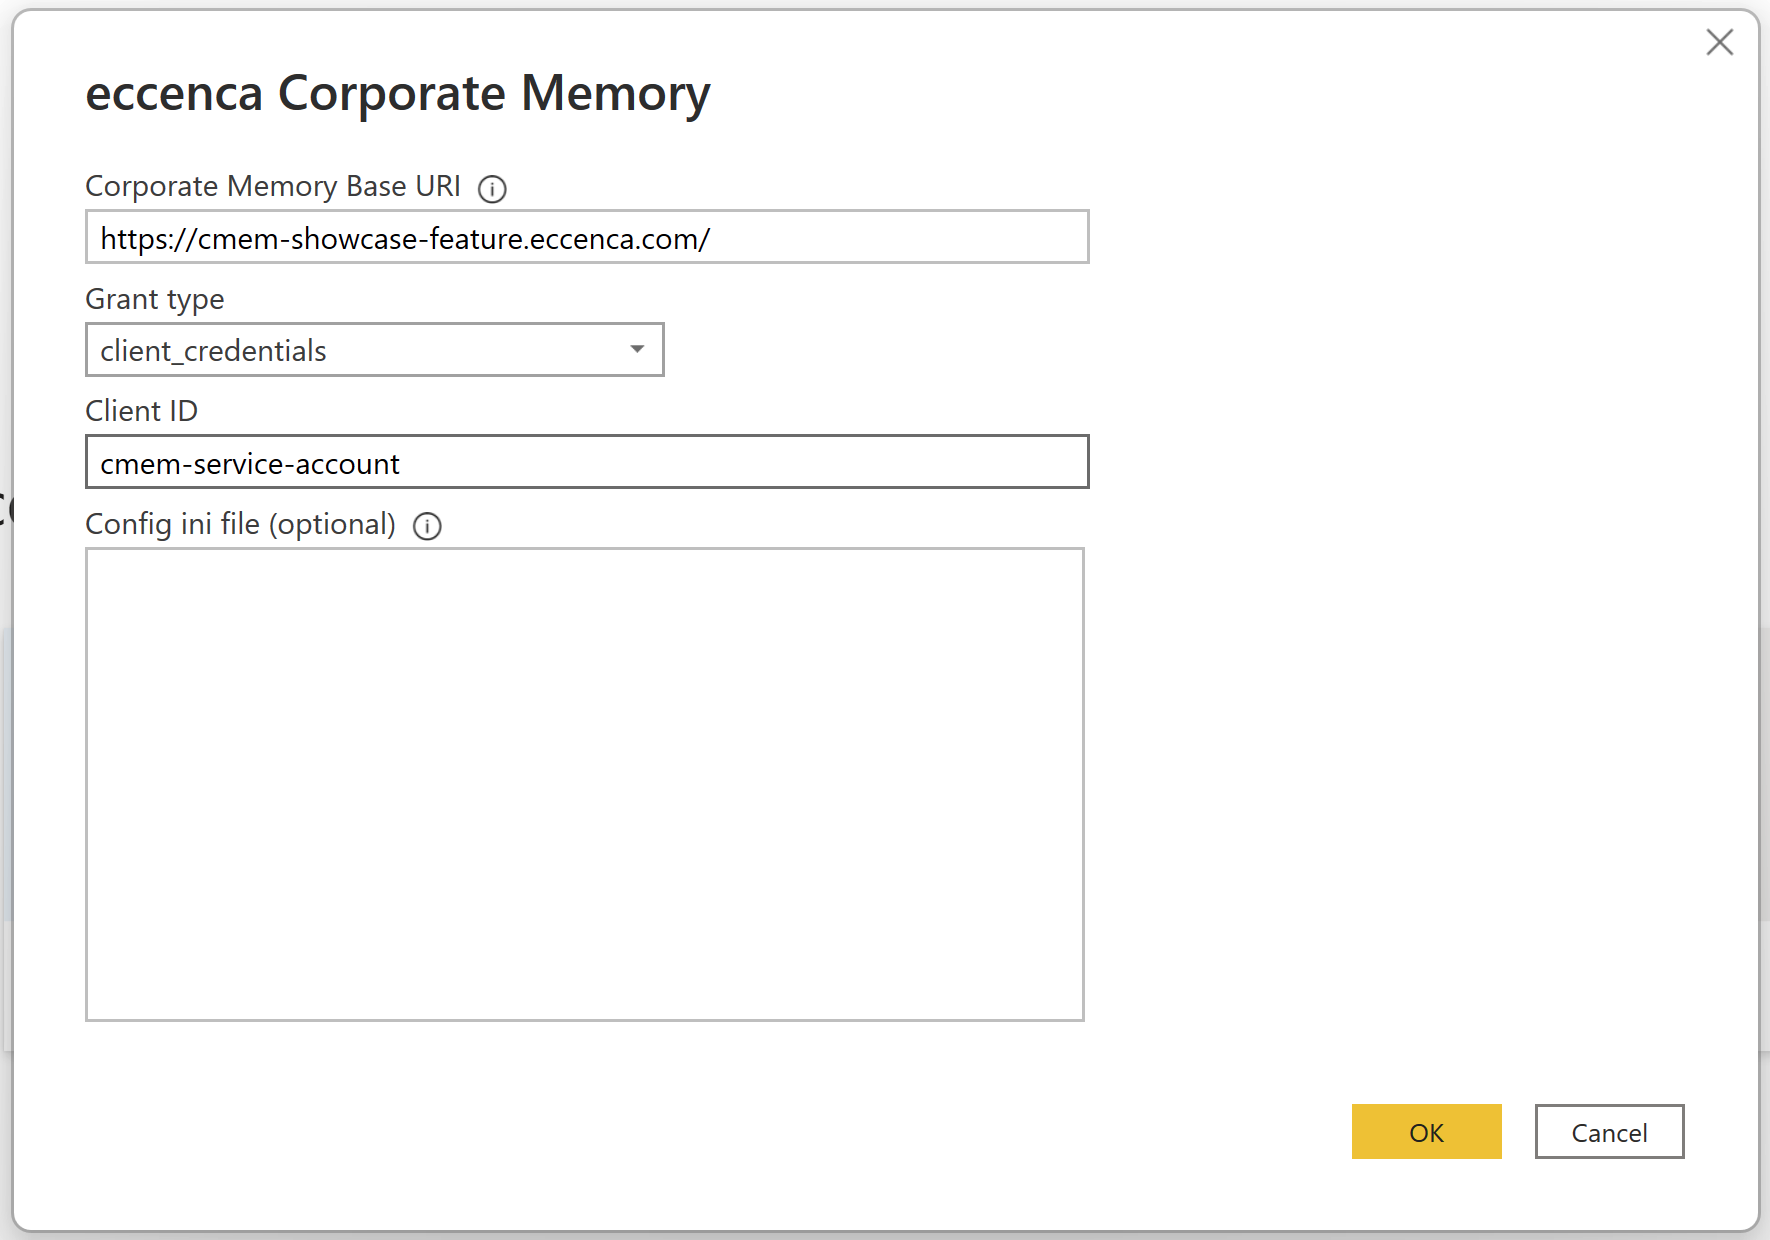
In order to use Client Secret based login you need to fill the details shown below:
- First Step
- Corporate Memory Base URI
- Grant type = client_credentials
- Client ID
- Second Step
- Password / Client Secret
In case you installation uses a custom service endpoint layout the individual URIs for DataPlatform and Keycloak can be configured individually. The configuration keys are the same as for cmemc.
- The following configuration parameter can be provided:
DP_API_ENDPOINT- specifies the DataPlatform URIOAUTH_TOKEN_URI- specifies the keycloak token URISSL_VERIFY- can be used to set certificate verification toFalse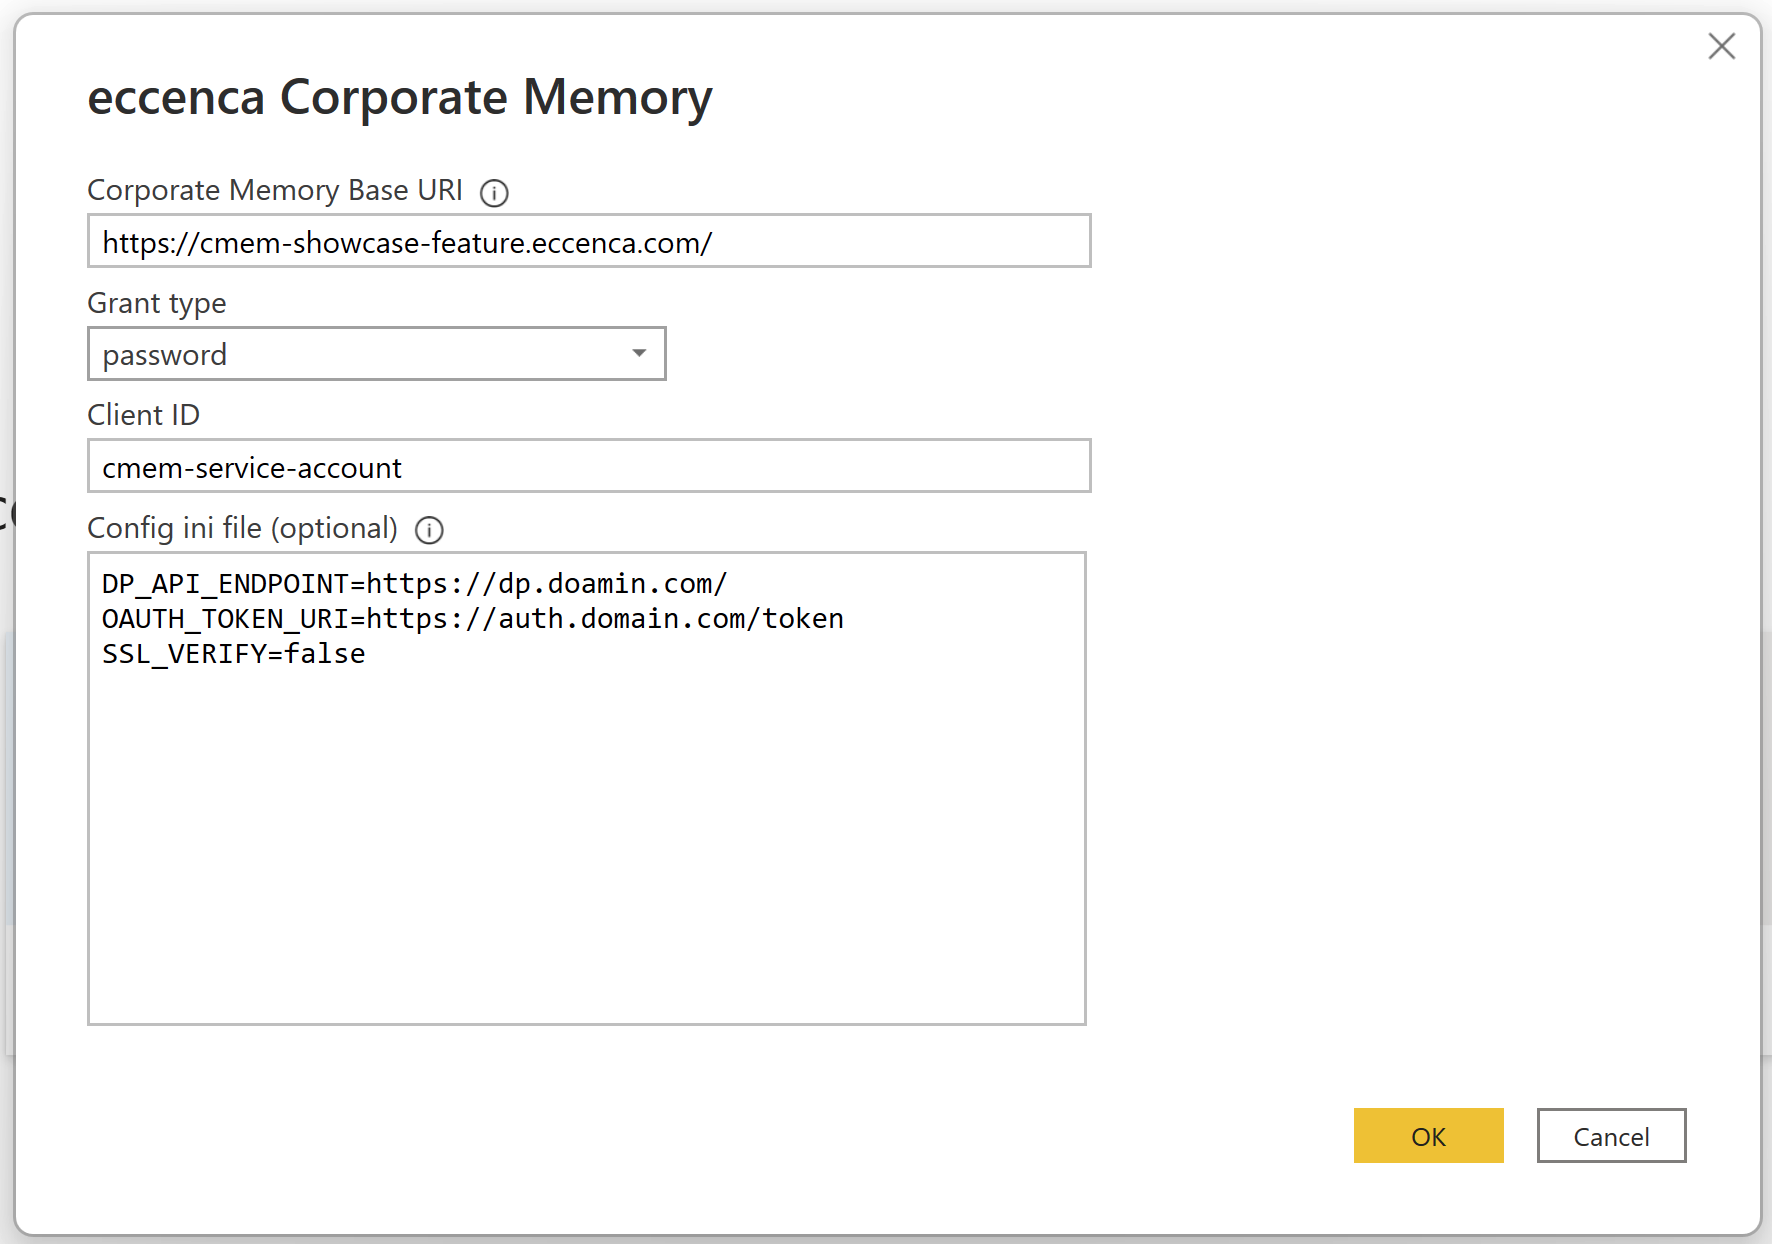
- In case a
Corporate Memory Base URIis configured too, the values from theConfig inisection take precedence
Get Data¤
With the eccenca Corporate Memory Power-BI-Connector you can load data from SELECT queries stored in the query catalog of Corporate Memory. You can use queries without or with placeholders. The steps are different depending if your query uses placeholder:
Queries
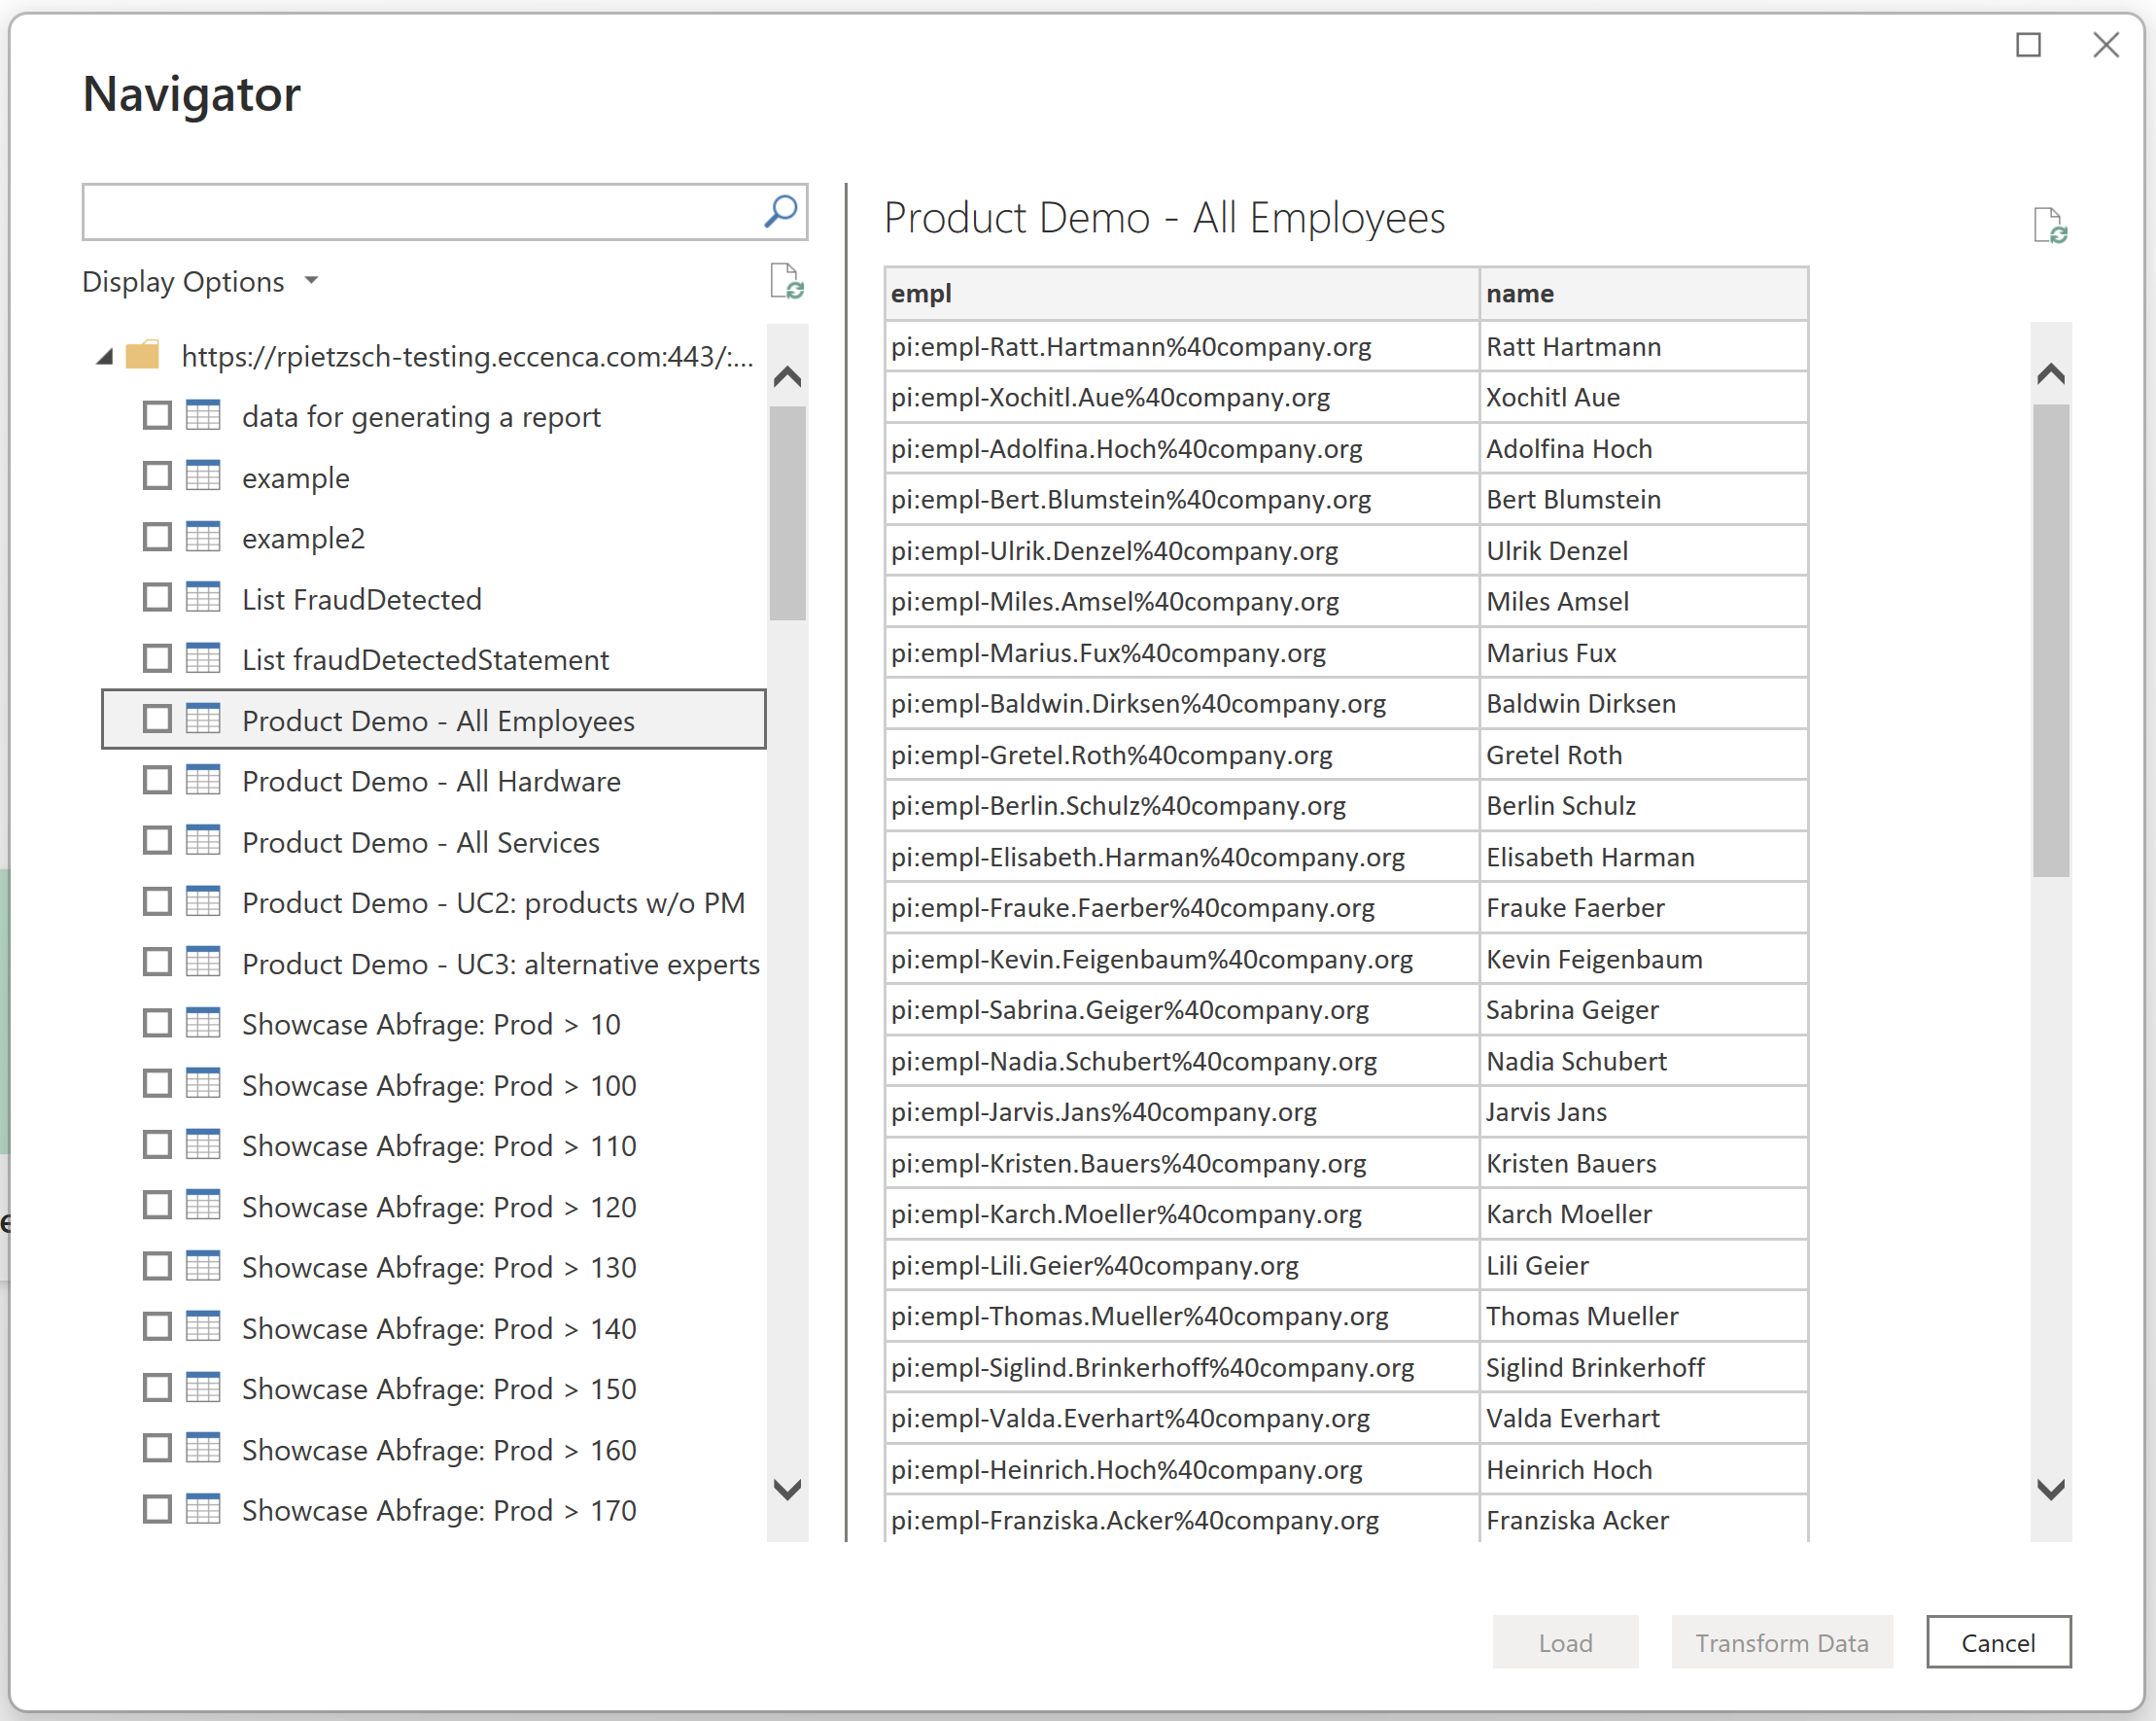
SELECTqueries that use no placeholders are shown with a table icon (e.g. )
)- When selected a preview will be loaded.
- Check the one(s) you want to load and click
OK. - The tables will be added to your list of
queriesand to thefieldsinventory in Power BI - Start using your data in transformations, dashboards and analytics
- SELECT queries that take placeholder arguments are shown with a function icon. (e.g.
 )
)
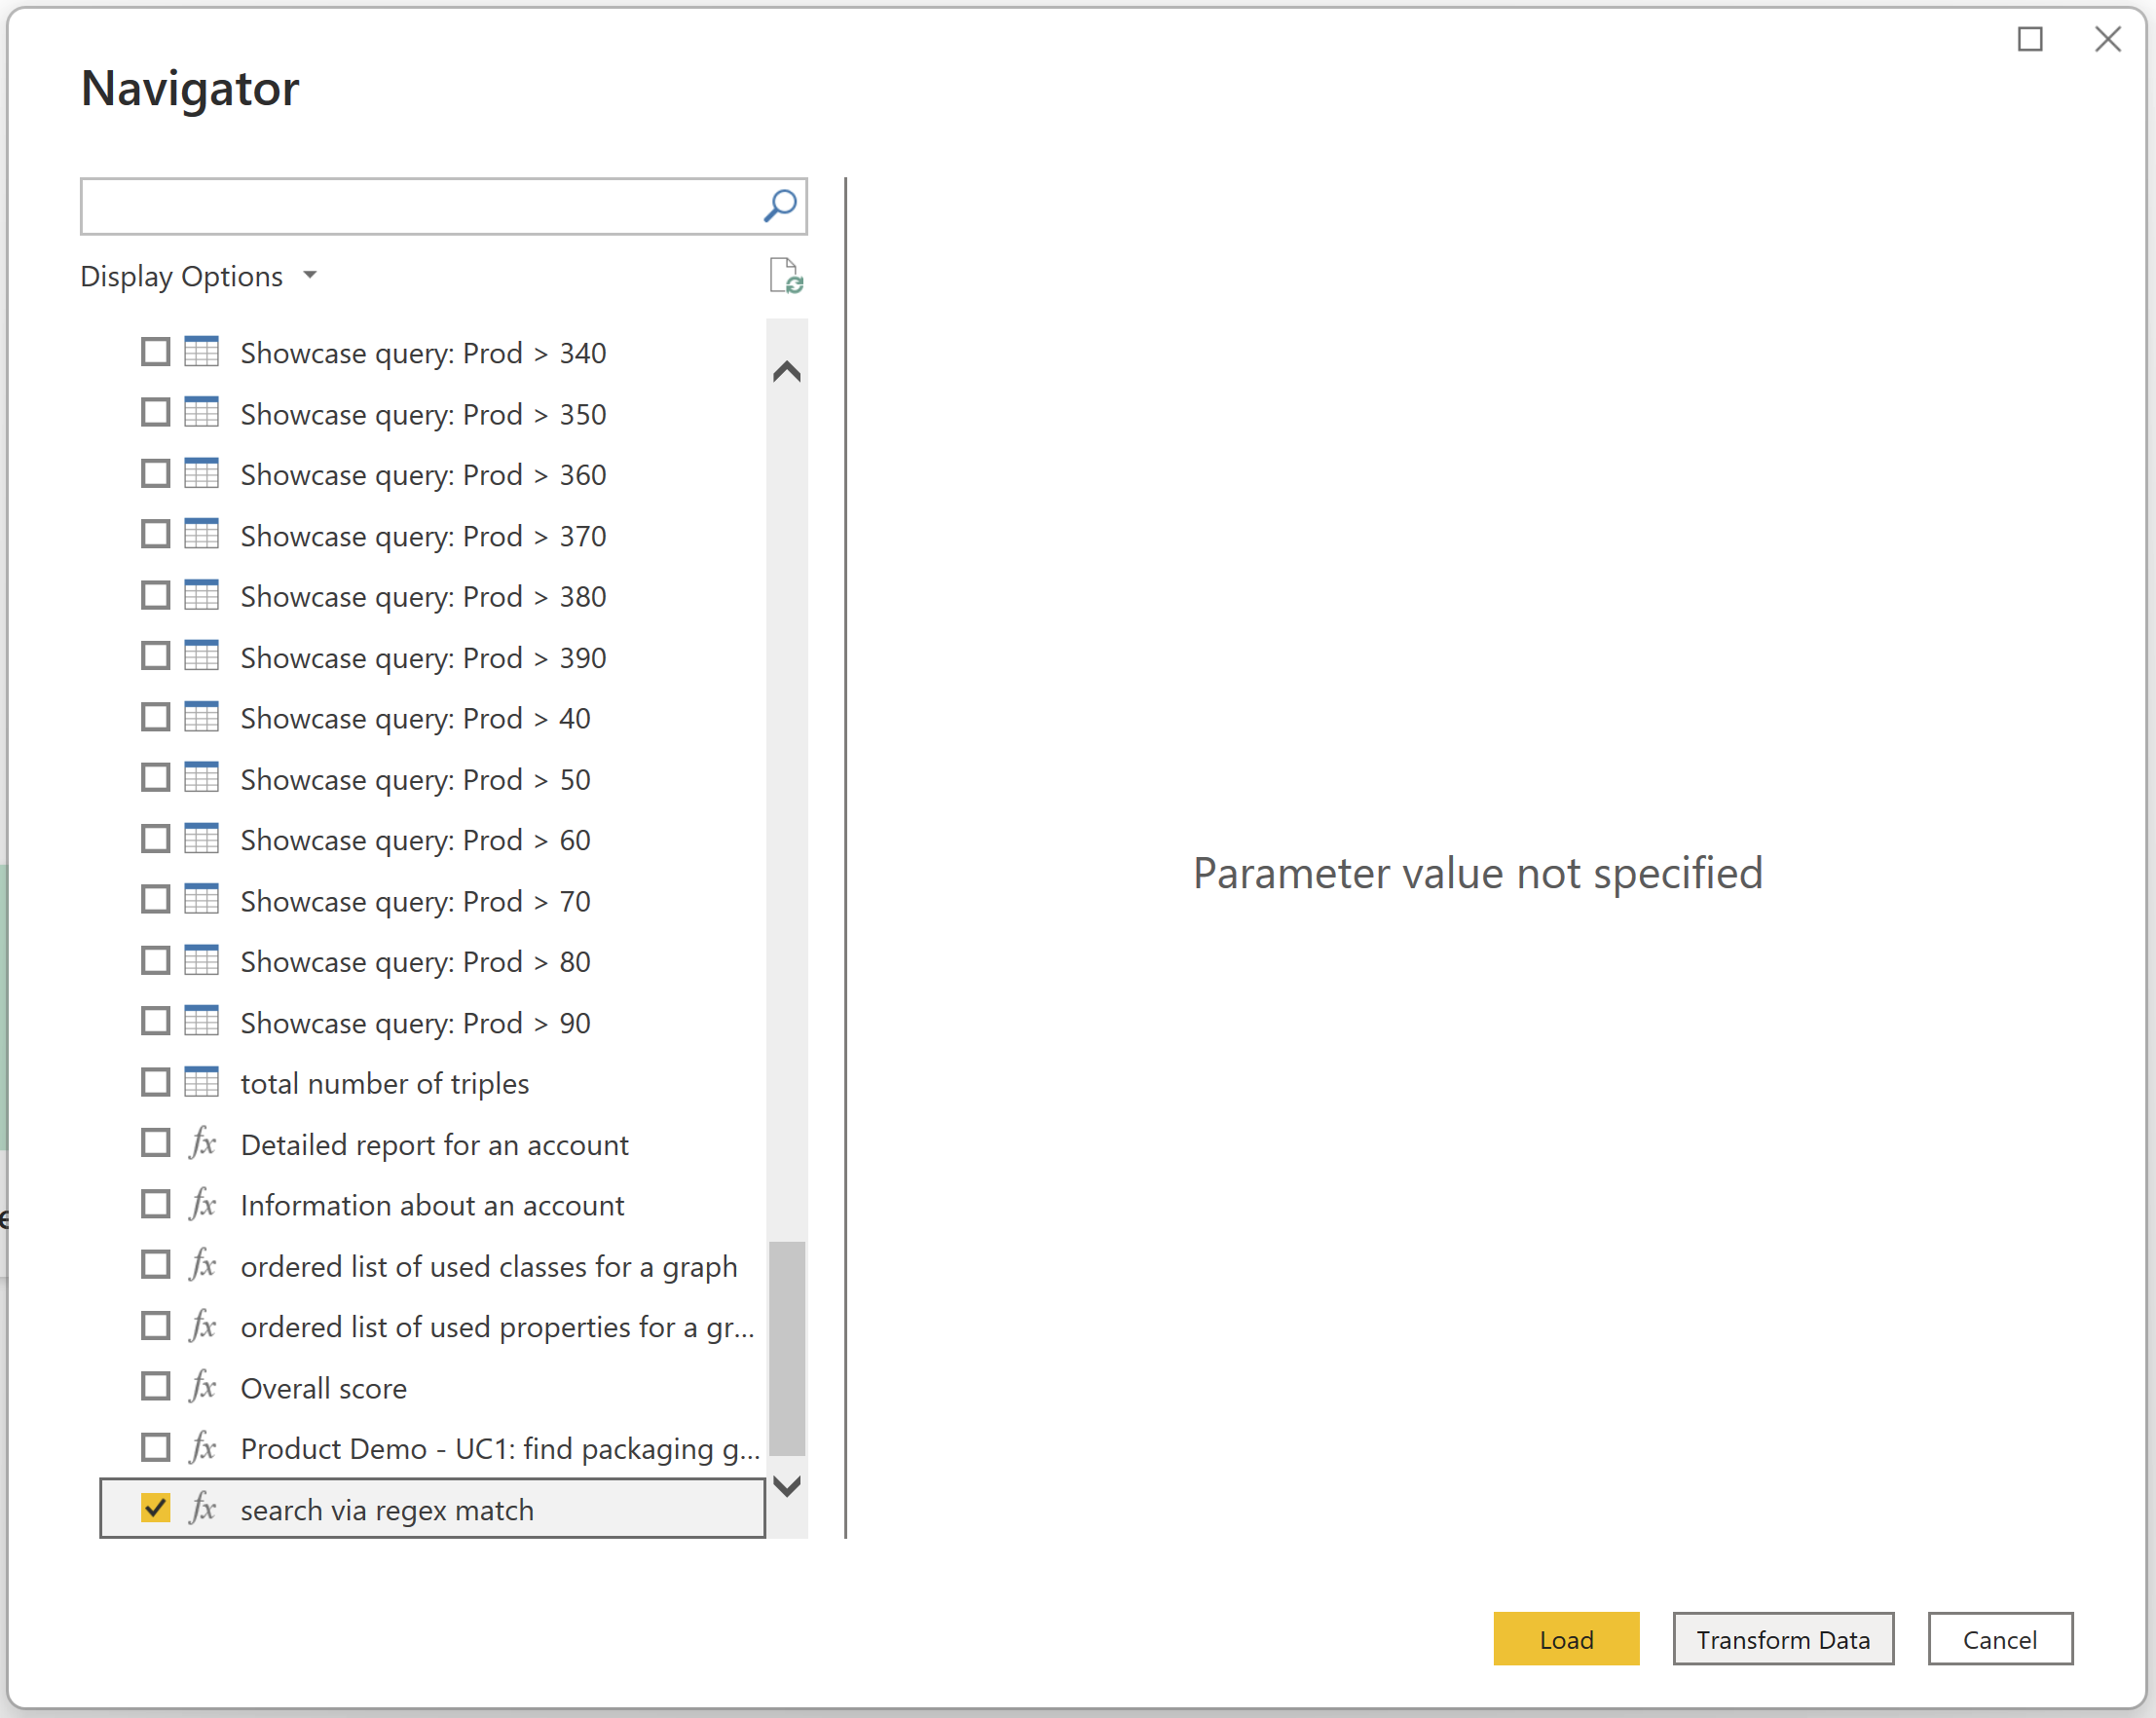
- You need to be in
Edit Queriesmode in Power BI so you can enter the required query parameter. - Check the one(s) to be added.
- Power BI will add the selected query as a
queryentry. - Click “Transform Data” in order to fill in the parameter.
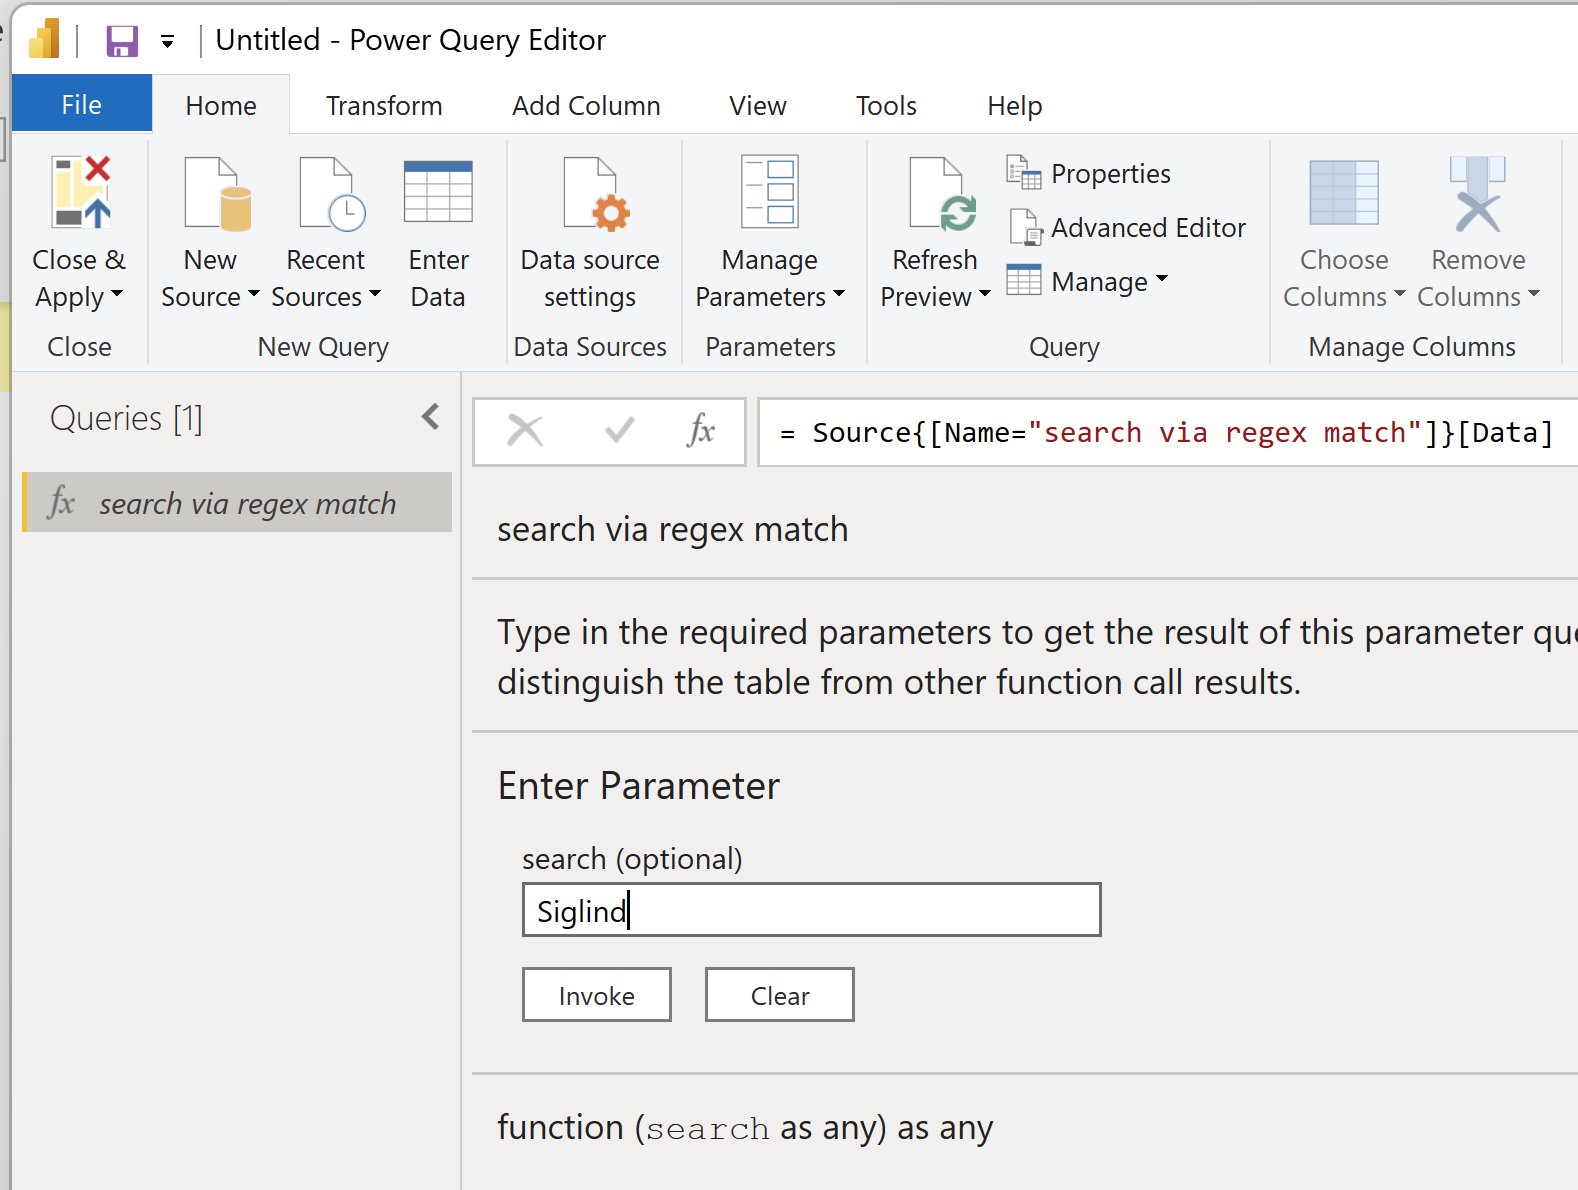
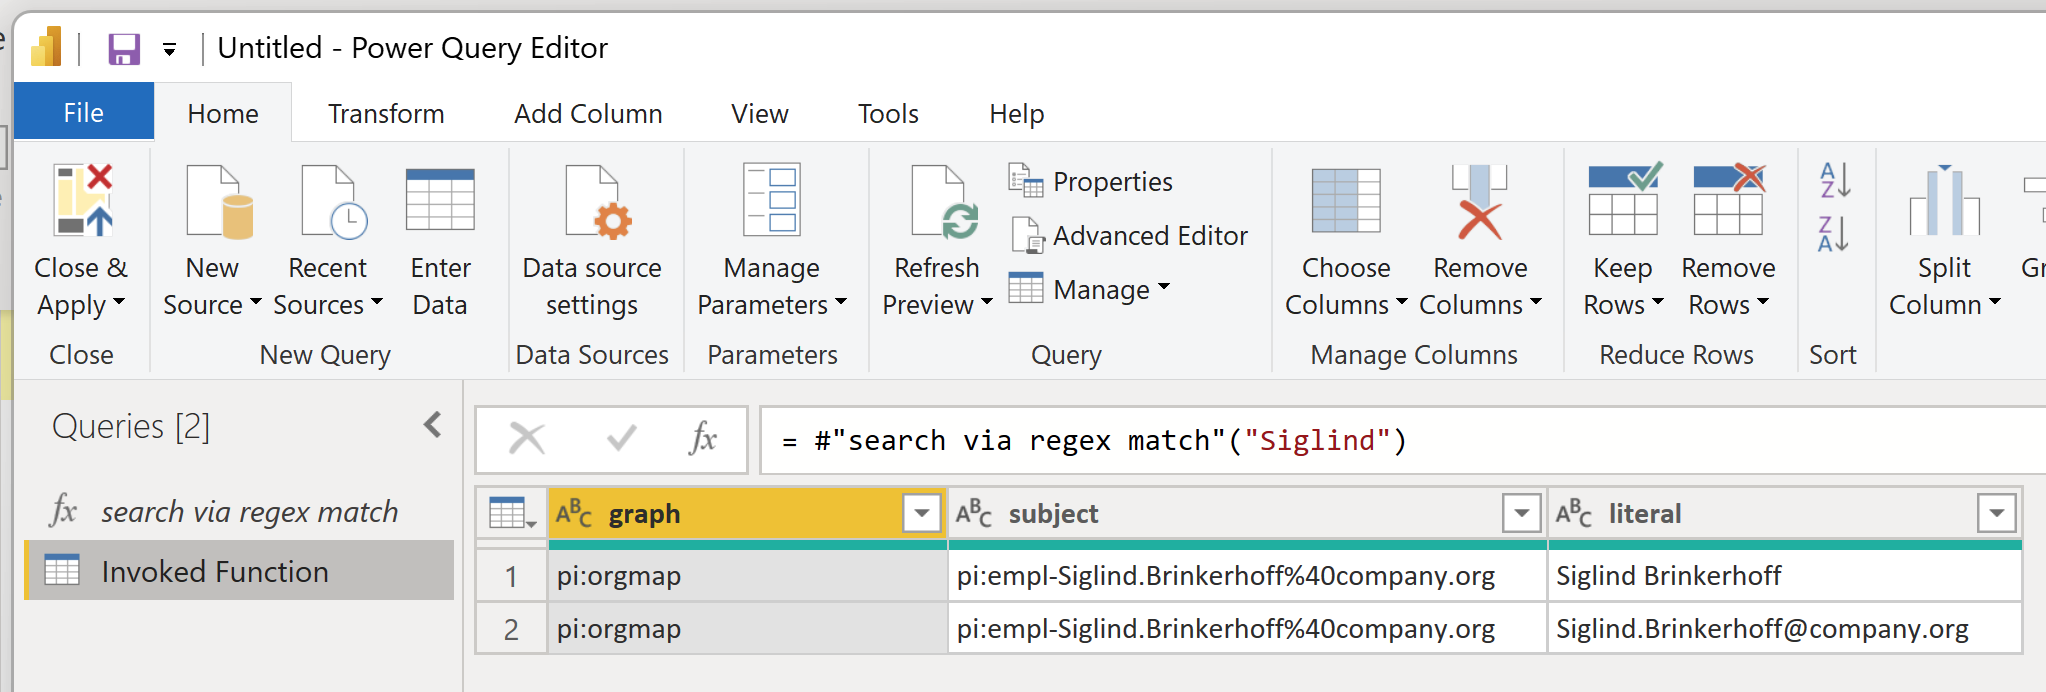
- This adds a new entry to the list of Power BI queries, which contains the actual data you requested. The new entry will be named “Invoked Function”.
- It is recommended to rename this automatic generated name to a more speaking one. Right click on “Invoked Function” or select “Invoked Function” and press F2.
- Rename the table (e.g. to “_search via regex match”). Click “Close & Apply“ to save changes.
Hint
You can call the function multi times with different parameter values to get different result tables into Power BI.
- Start using your data in transformations, dashboards and analytics