Keycloak¤
Introduction¤
This page describes important steps in order to configure Keycloak as an authentication backend for Corporate Memory.
The screenshots displayed in this documentation were taken from Keycloak v20 using the keycloak.v2 theme.
Info
You do not need these instruction in case you followed the documentation on Scenario: Local Installation or Scenario: Single Node Cloud Installation (in this case, everything was done automatically).
However, in case you need to integrate Corporate Memory with an existing Keycloak, this page may help you.
Please also have the Keycloak - Server Administration Guide ready 
Realm configuration¤
Warning
A realm can be im-/exported. However, exported realms will not contain user credentials.
To create a realm, use the drop down menu for choosing a realm on the left side.
- Create a realm
cmem- Select Realm settings
- General tab:
- Change HTML Display name to
<span class="ecc-logo"></span>Corporate Memory - Themes tab
- Switch realm’s login theme to
eccenca - Switch realm’s account theme to
eccenca
Client configuration¤
Clients are used to link users and groups managed in Keycloak to Corporate Memory. There are two different clients used by Corporate Memory:
- The first client is used to authenticate a user for using the web interface (usually named
cmem). - The other client is used as a technical user with the command line interface (typically named
cmem-service-account). Depending on the environment, there might be other use cases, when running background schedules, then a third client, also as technical user, might be useful.
Access conditions, roles and groups¤
Corporate Memory uses access conditions which are related to users or groups. This is described at Access Conditions. To use groups from Keycloak in Corporate Memory access conditions, all Keycloak client configurations need to have attached mappers:
-
For the web interface client (
cmem), the user groups need to get attached to the client. This is done by a Group Membership mapper (described below). With this mapper each group of a user is assigned for the authentication process, so Corporate Memory is aware of the user and group IDs for setting up access conditions. -
For the technical account clients (such as
cmem-service-account), Keycloak does not allow to add groups directly to a client. To work around this limitation, we are using ROLES instead. By creating a mapper to re-define roles from groups, we allow Corporate Memory to read roles as groups attached to the client token.
In the default setup in helm or docker-compose deployments, we often refer to the elds-admins group, acting as a super-admin / root group.
Every user in this group has all possible rights in Corporate Memory, no matter which access conditions are available.
This is configured in the DataPlatform configuration or as an environment variable AUTHORIZATION_ABOX_ADMINGROUP=elds-admins (see also Dataplatform configuration authorization).
Option 1: Import the needed clients from a JSON export¤
To import a pre-configured cmem client for using the web interface, follow these steps:
- Login to Keycloak and select the Corporate Memory realm (
cmem). - Download the client configuration for using the web interface (
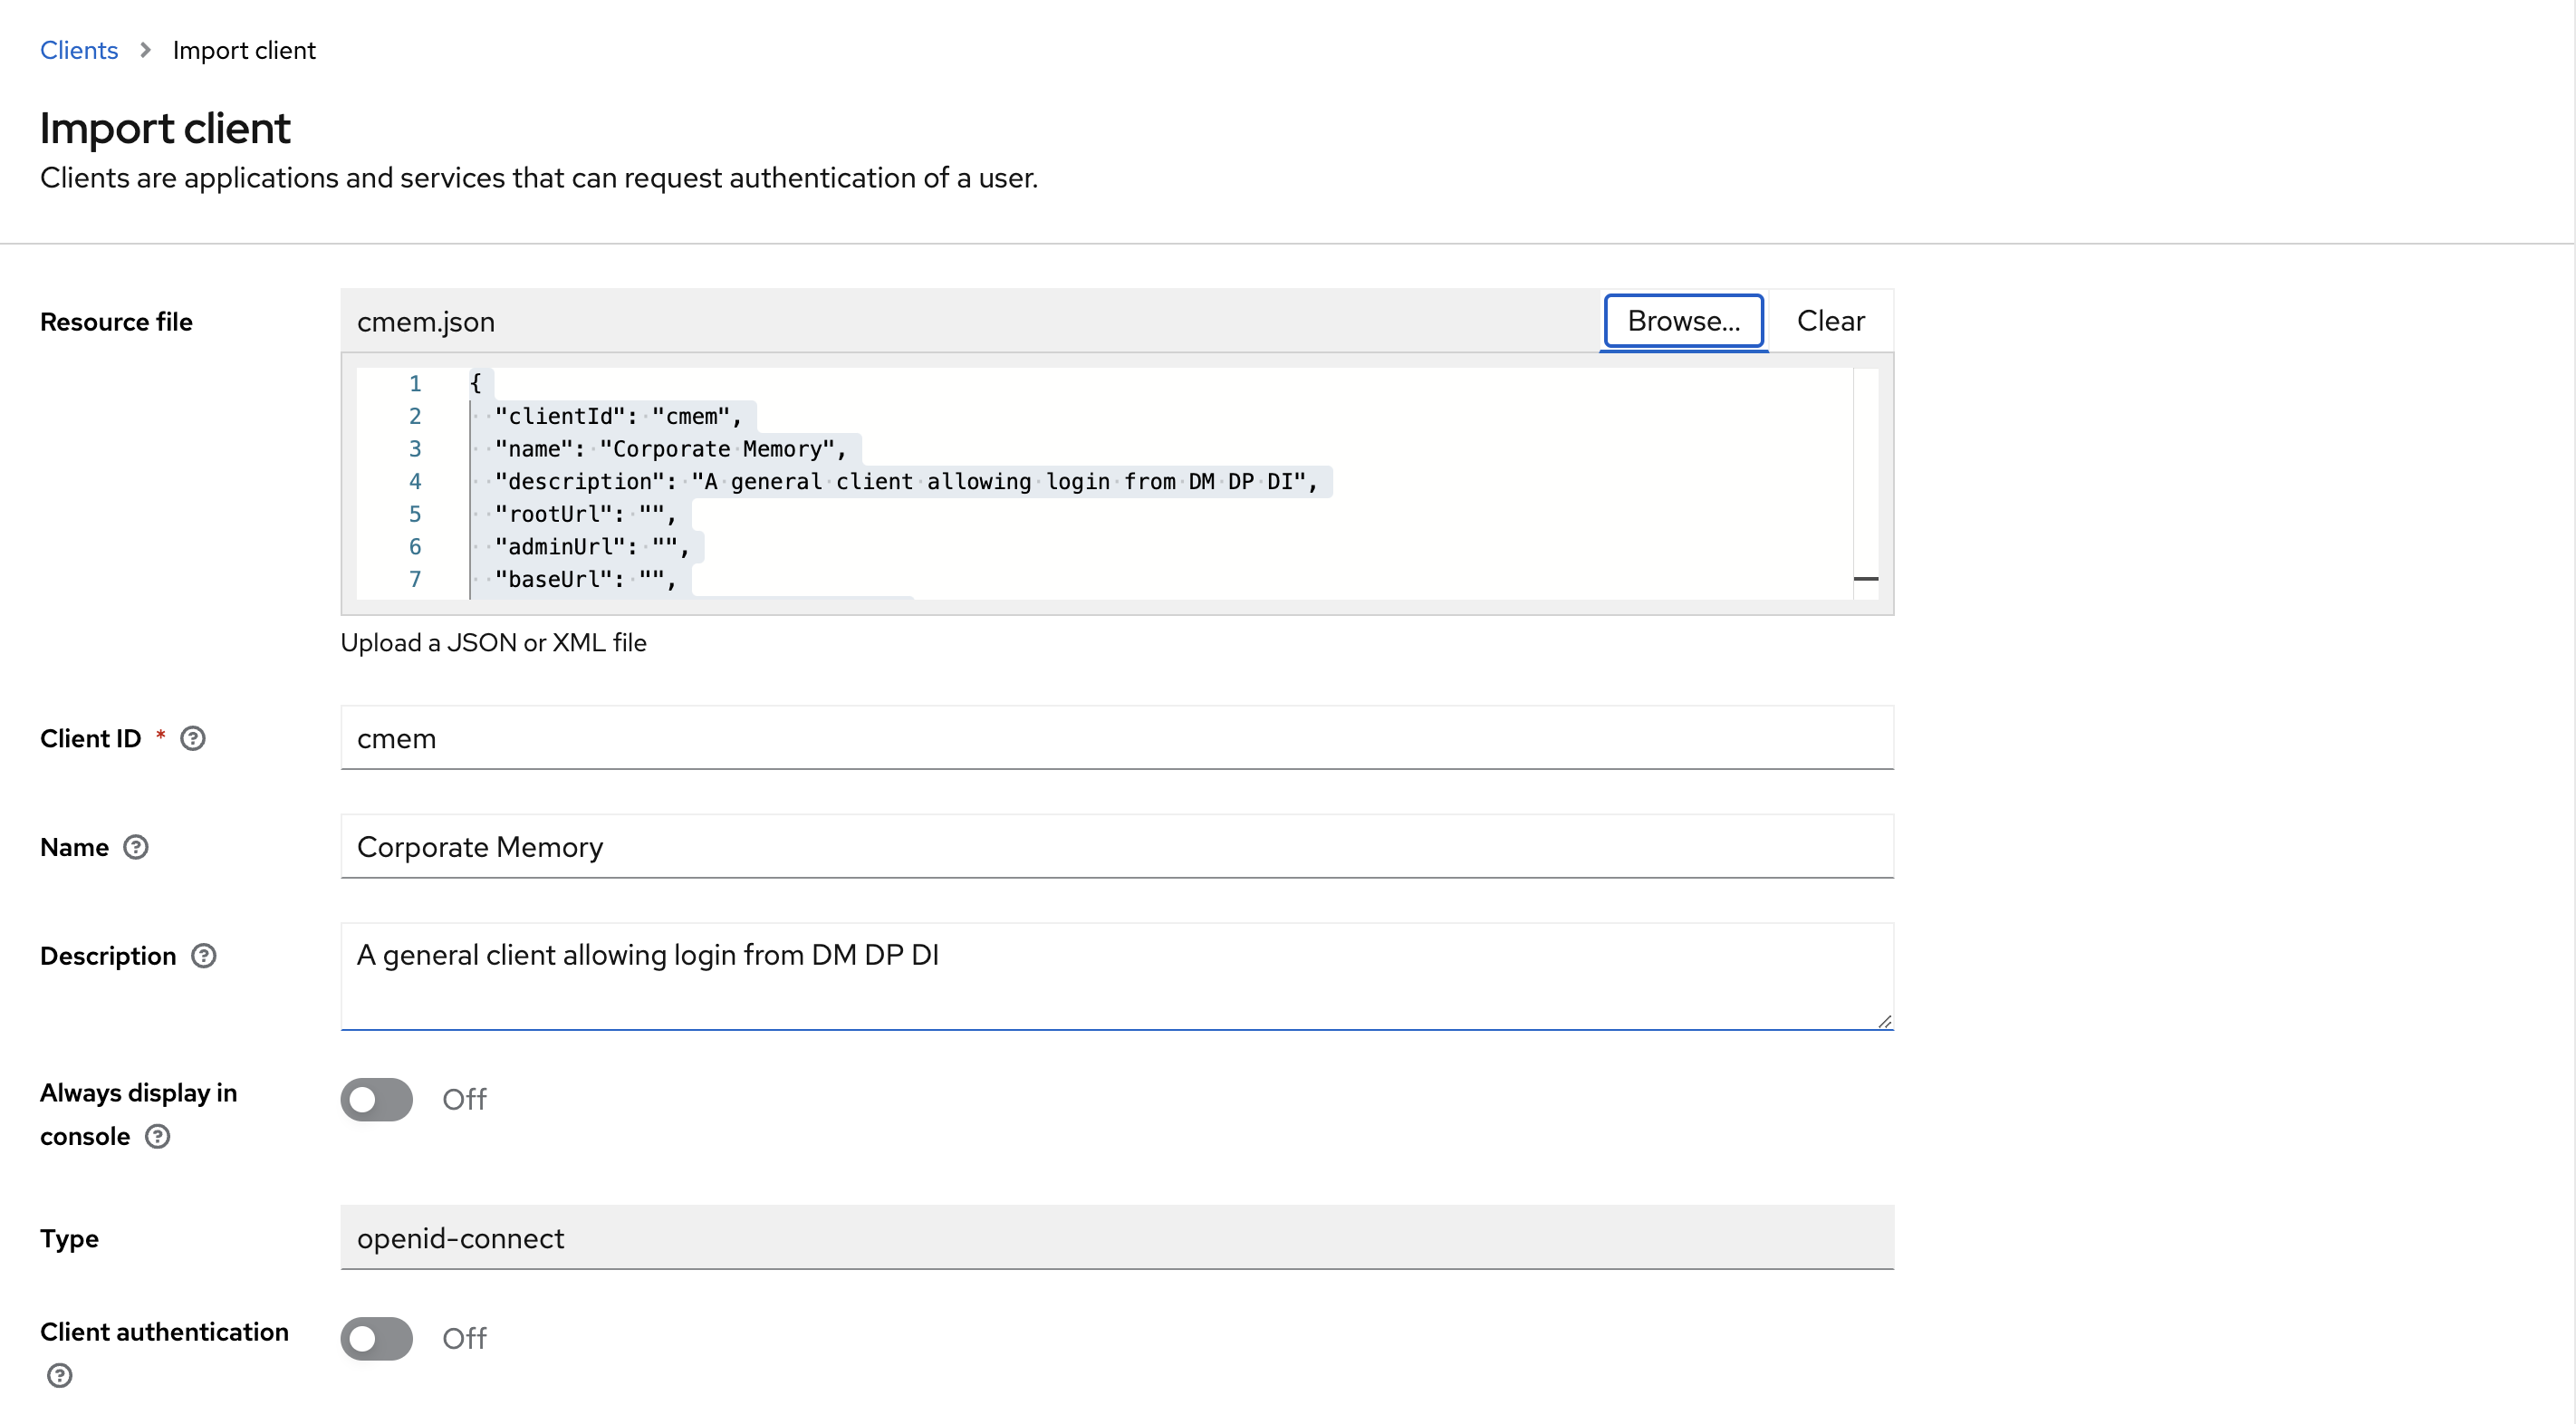
cmem.json). - Select Clients, then Import client.
- Browse for the downloaded
cmem.jsonand select it. - Save new client.
To import a pre-configured cmem-service-account client, repeat the process with the client configuration with credentials for the technical account (cmem-service-account) (cmem-service-account.json).
Option 2: Create client configurations manually¤
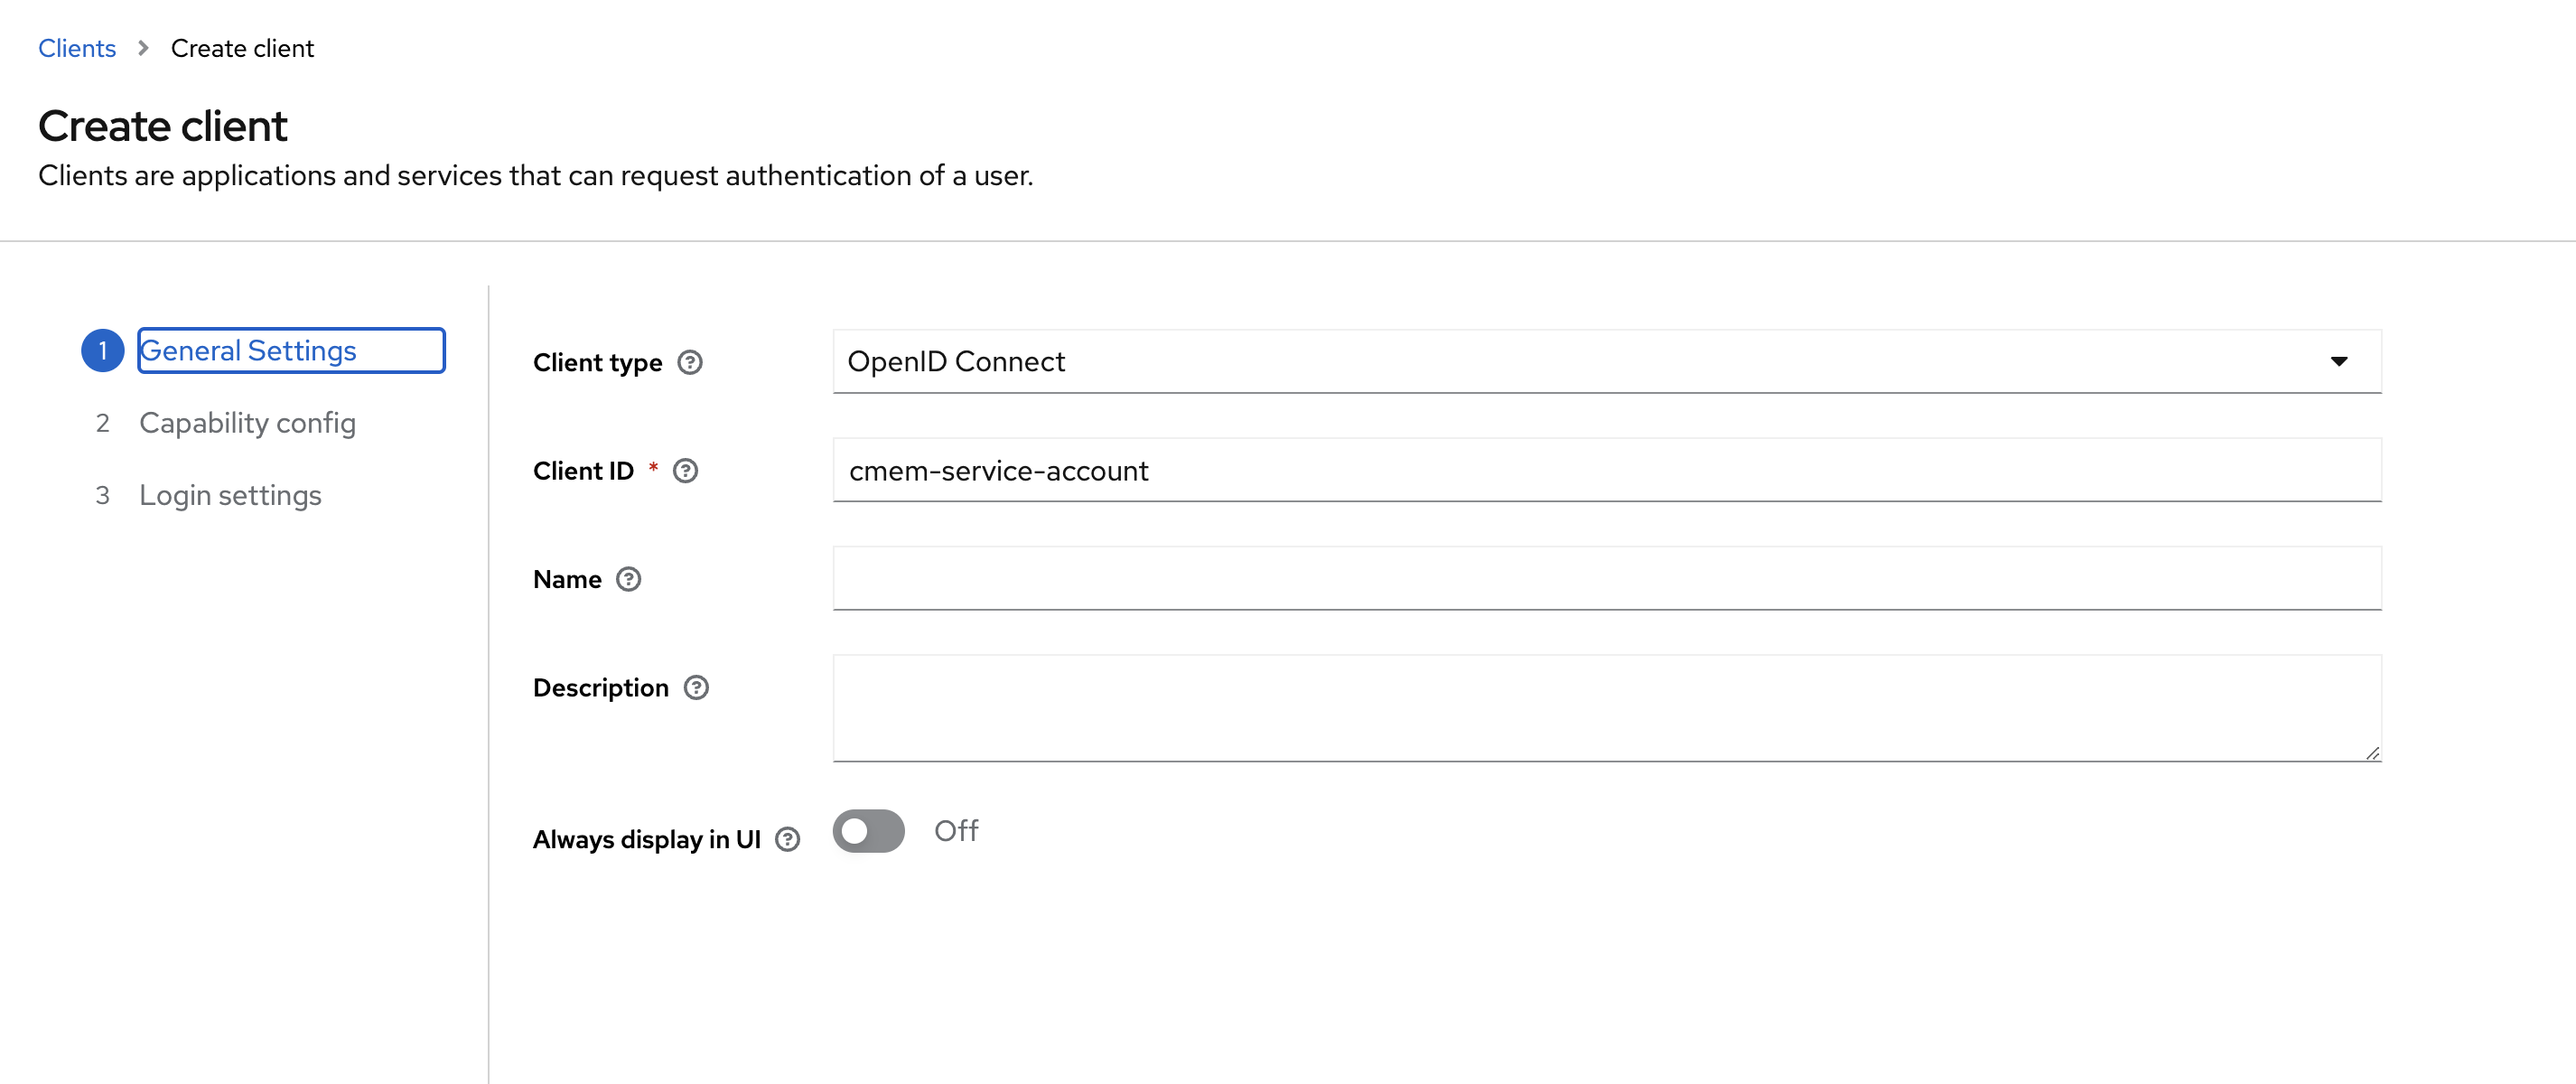
Add the cmem client for using the web interface¤
This client is intended for the usage with DataManager, DataPlatform and DataIntegration (user login):
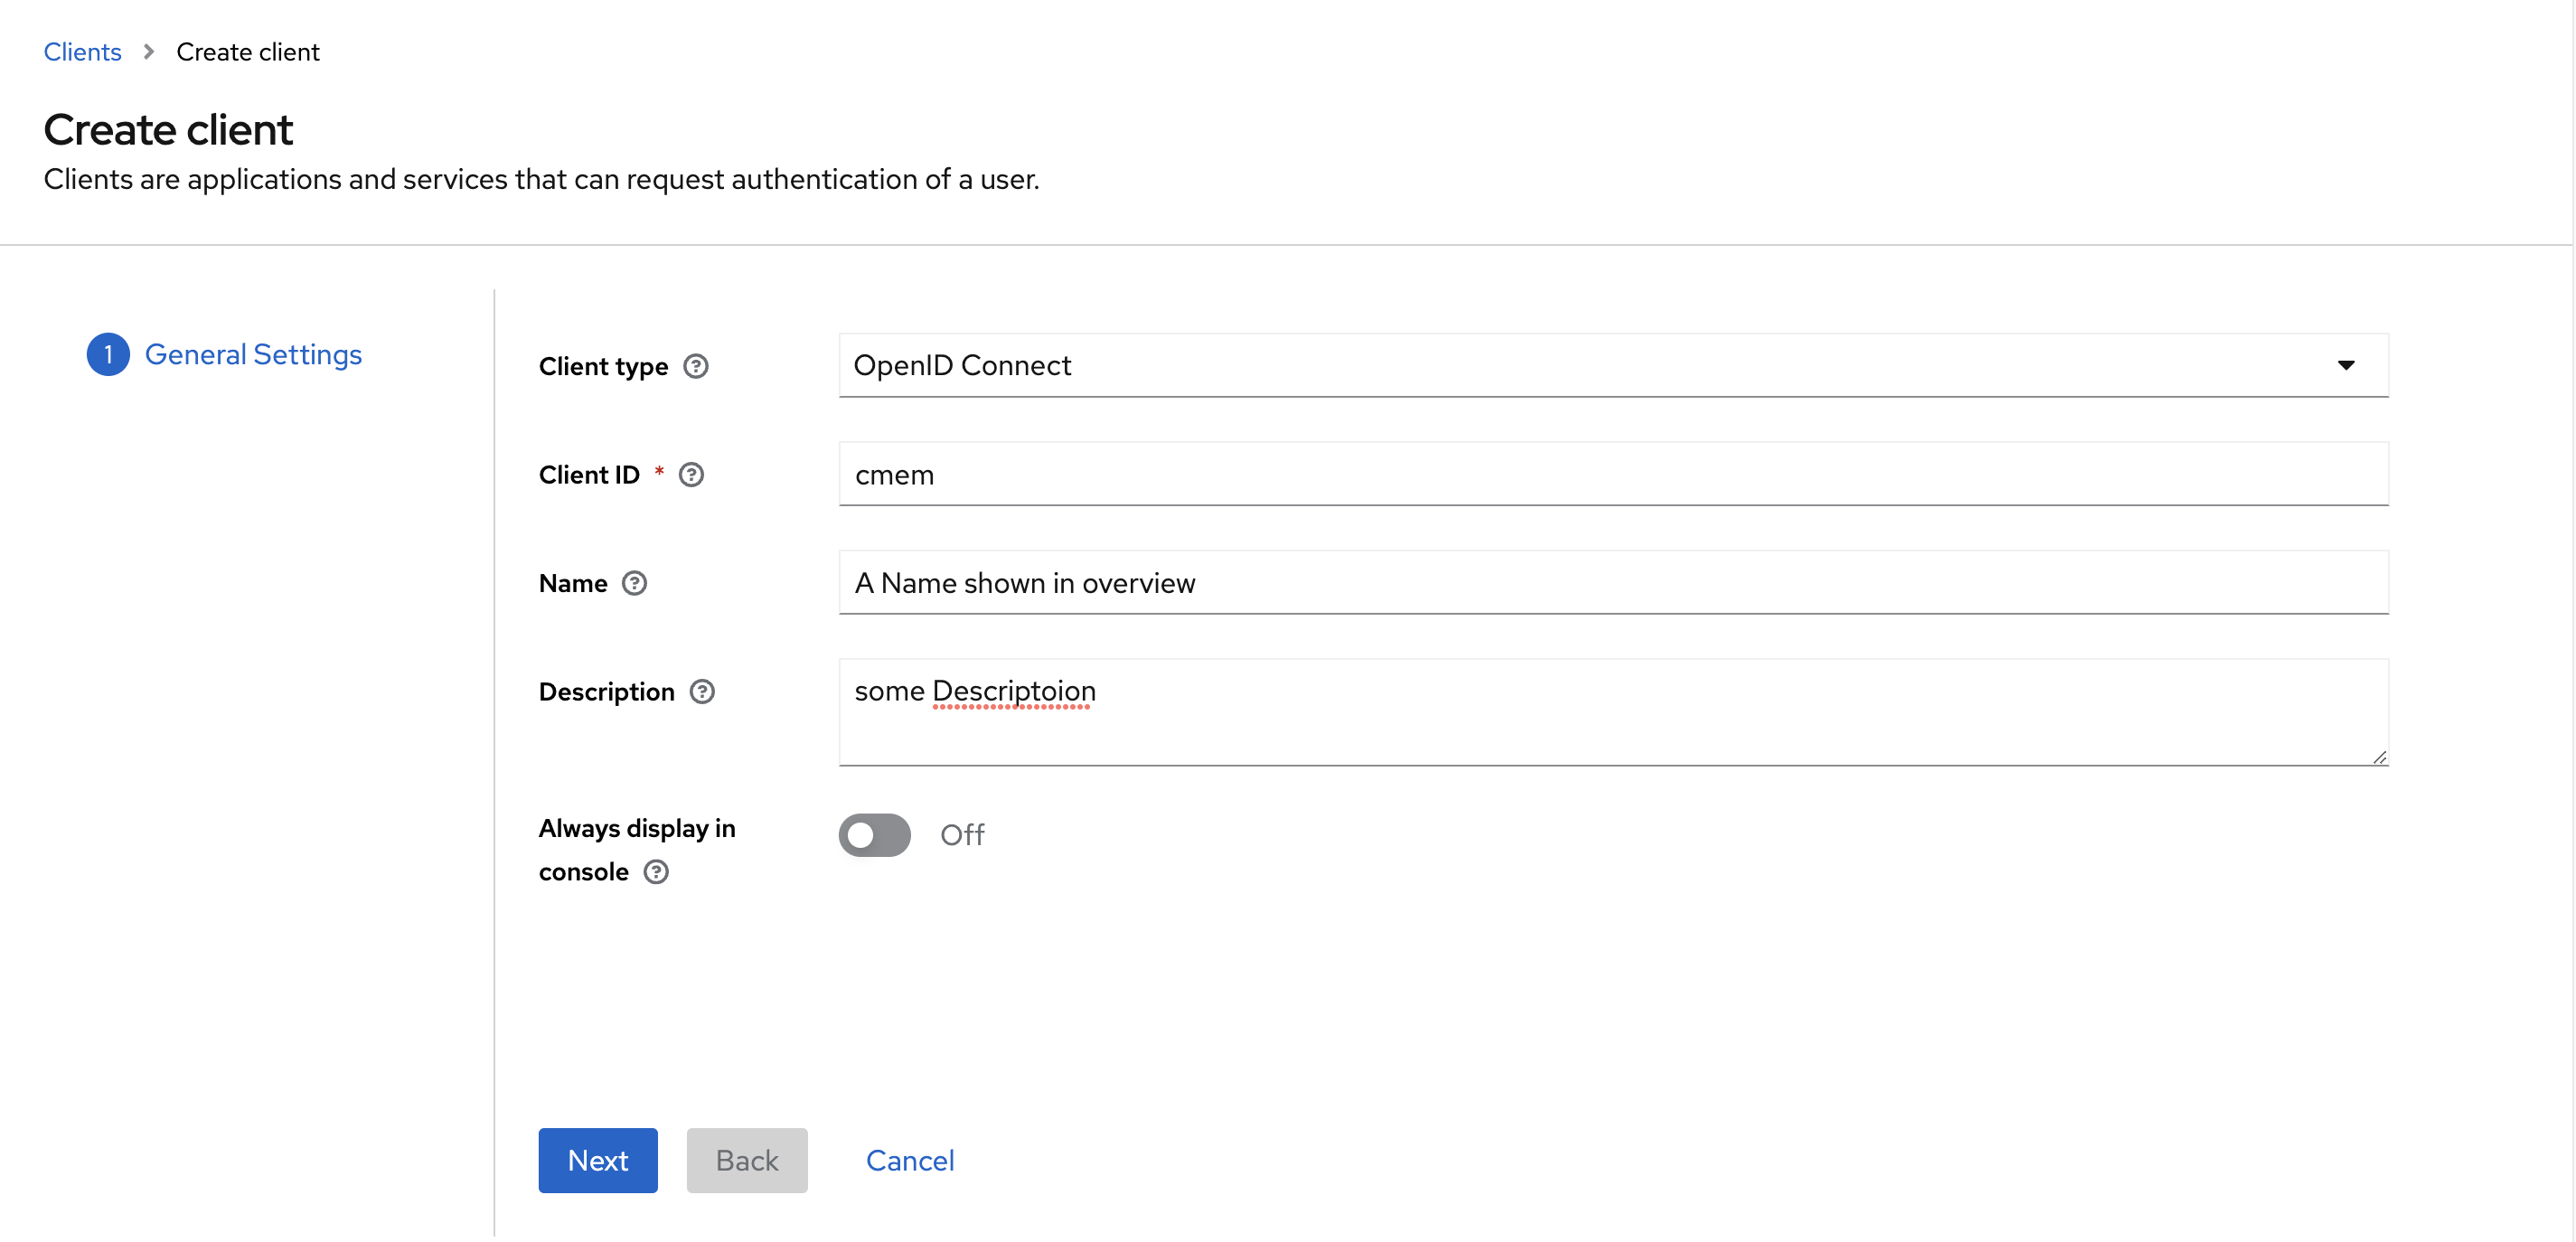
- Client type: OpenID Connect
- Client ID: i.e.
cmem, you need to remember this and use this later - Name and Description: fill as you like
- Select Next
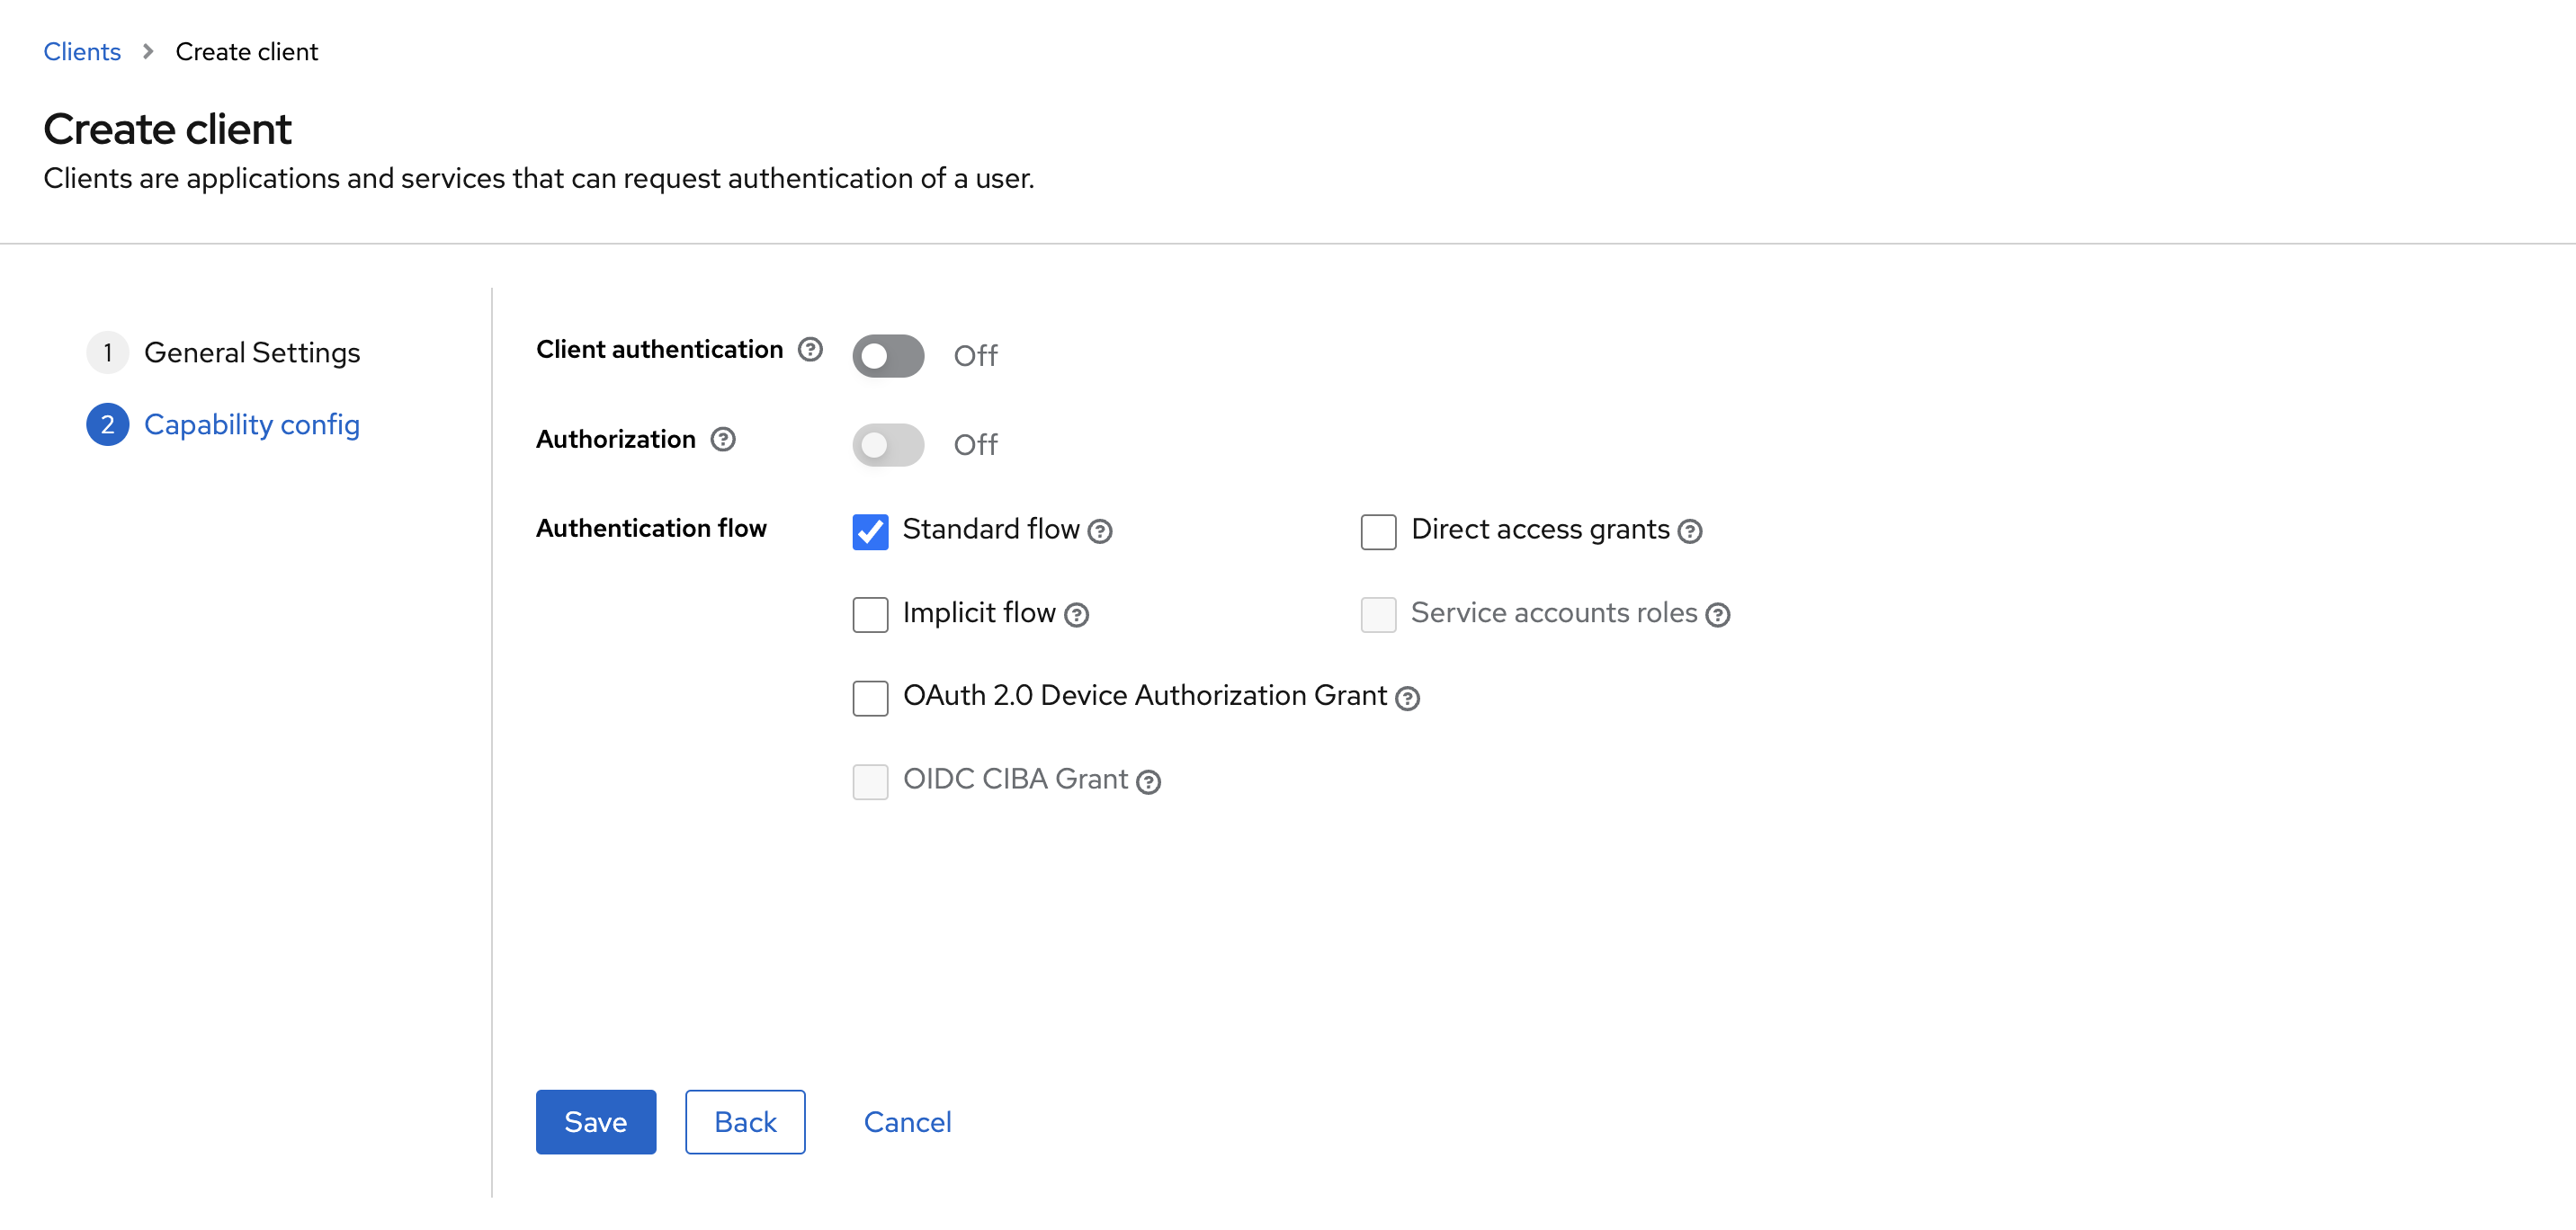
- Client authentication: Off
- Authorization: Off
- Enable Standard Flow Enabled (enables OAuth 2.0 Authorization Code Flow)
- Before v23.1:
- Additionally enable Implicit Flow Enabled
- Save
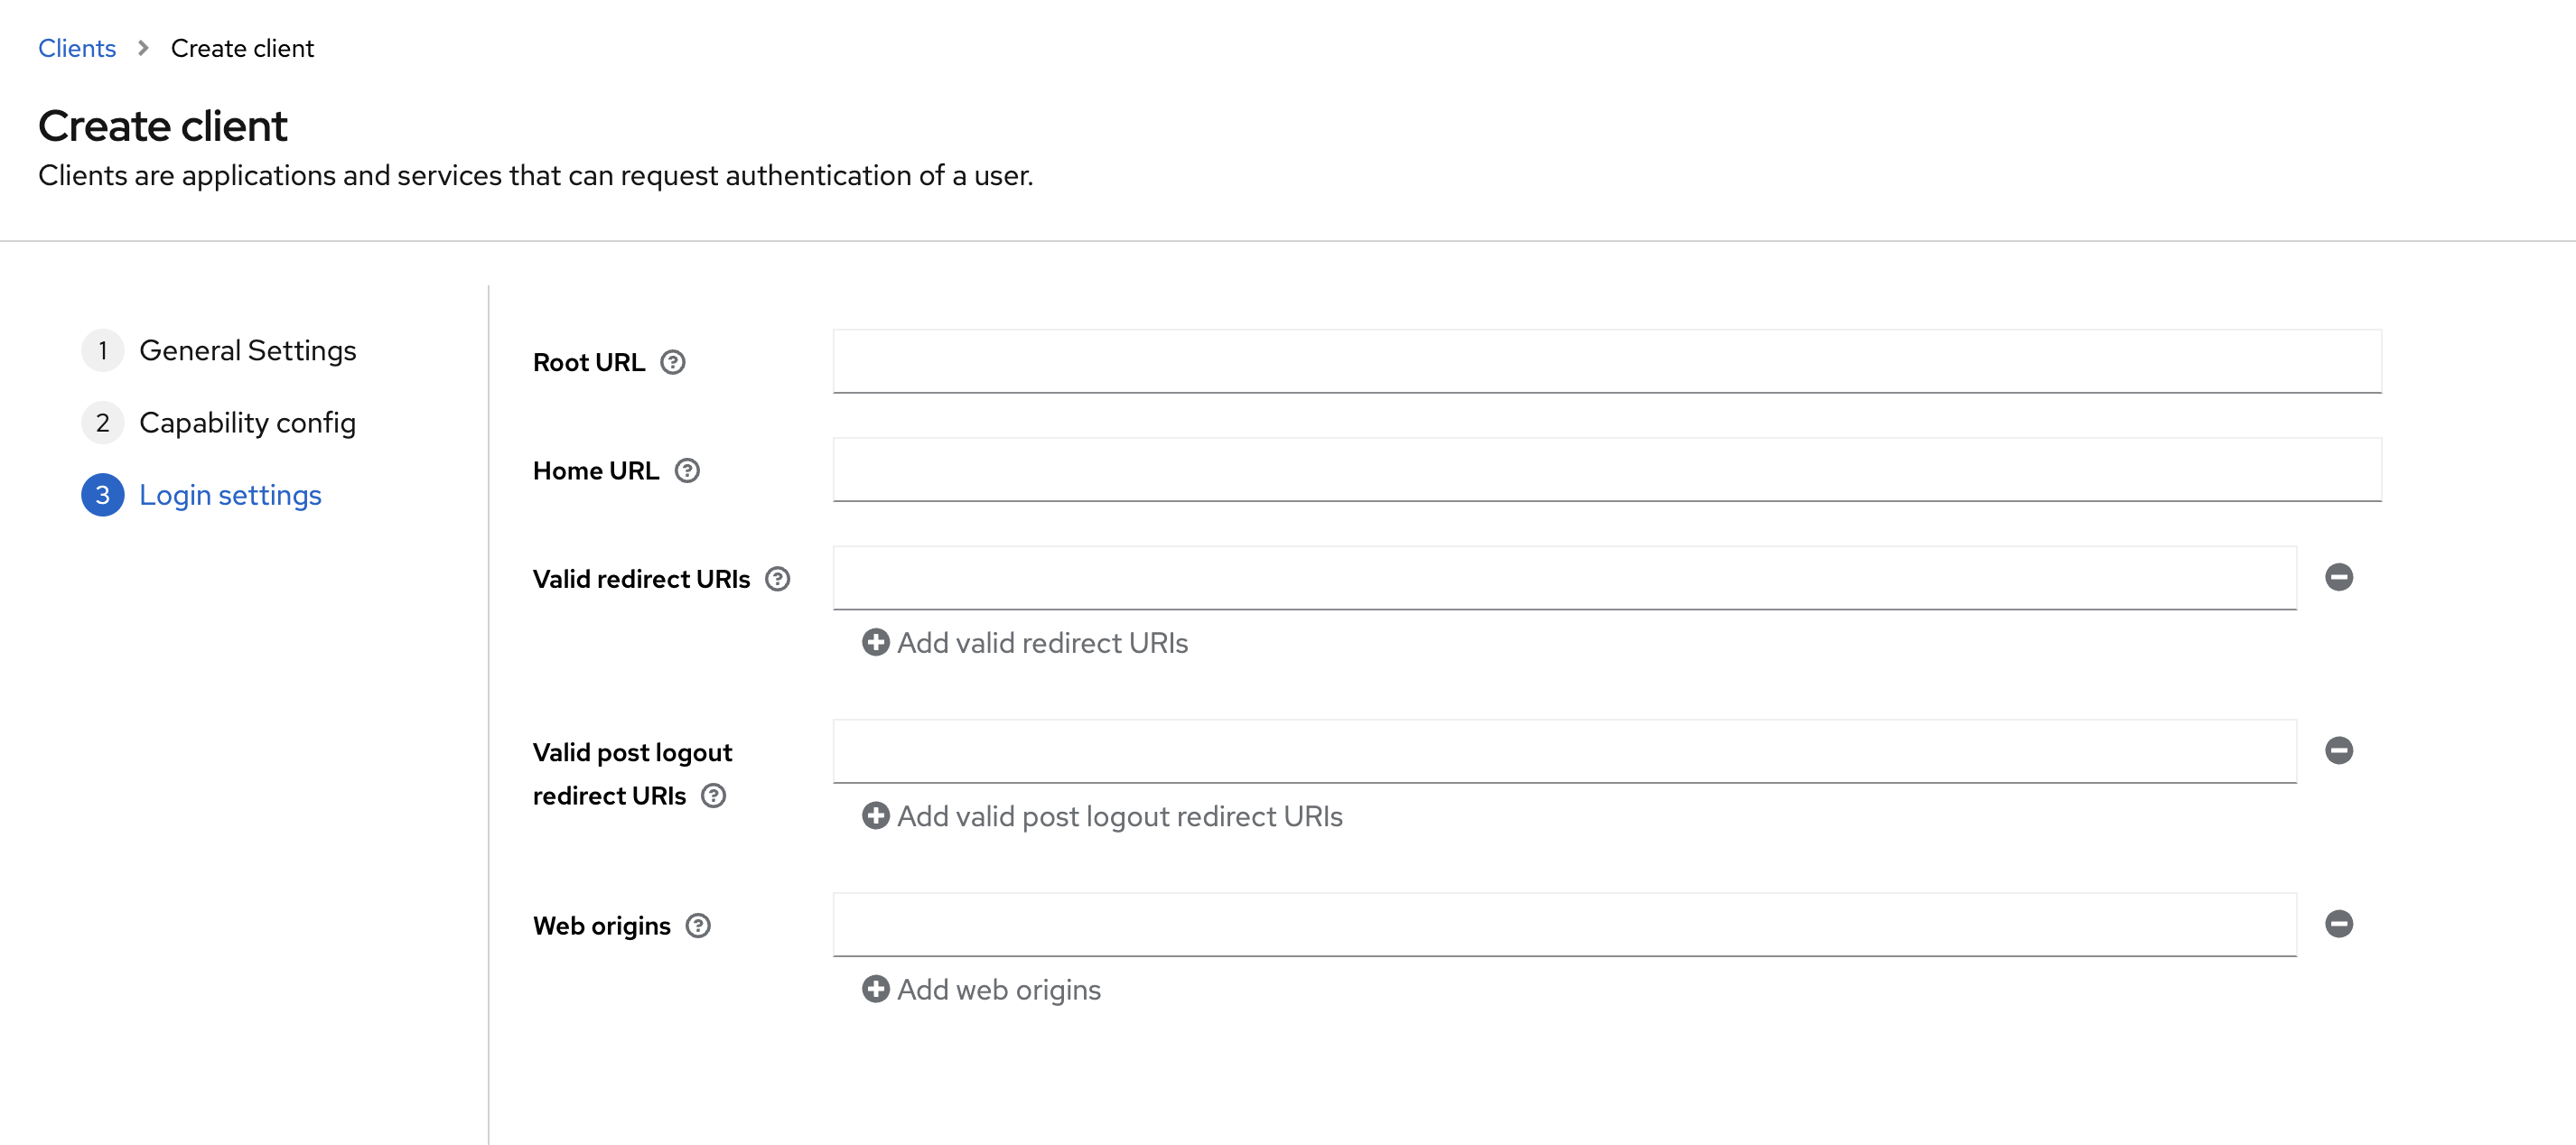
The dialog above closes and you land on the configuration page of this client:
- Valid redirect URIs: Add the correct URL pattern (e.g., wildcard
https://cmem.example.net/*works) toValid Redirect URIs(*for testing purposes can be used as well) and Save - Switch the Tabs to Client scopes and click on the first scope (i.e.:
cmem-dedicated)
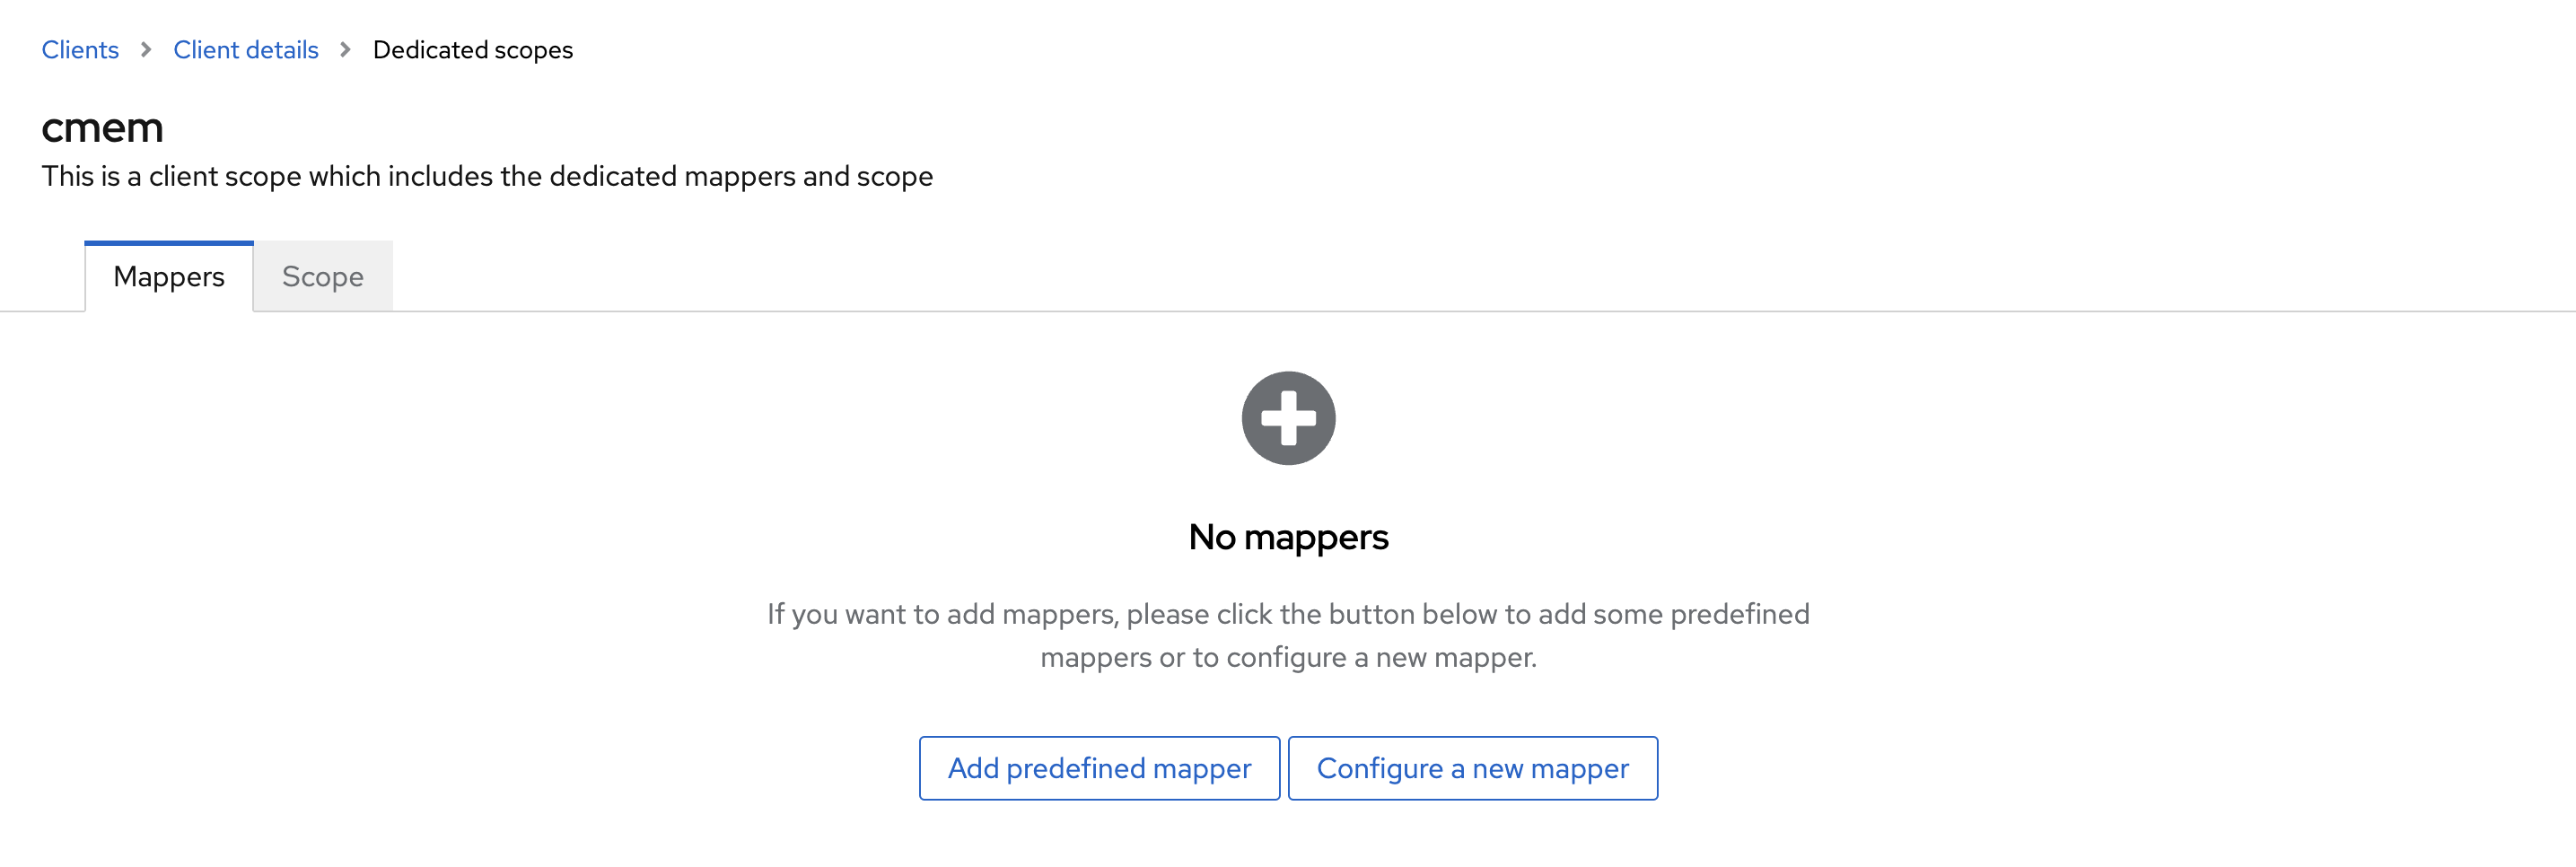
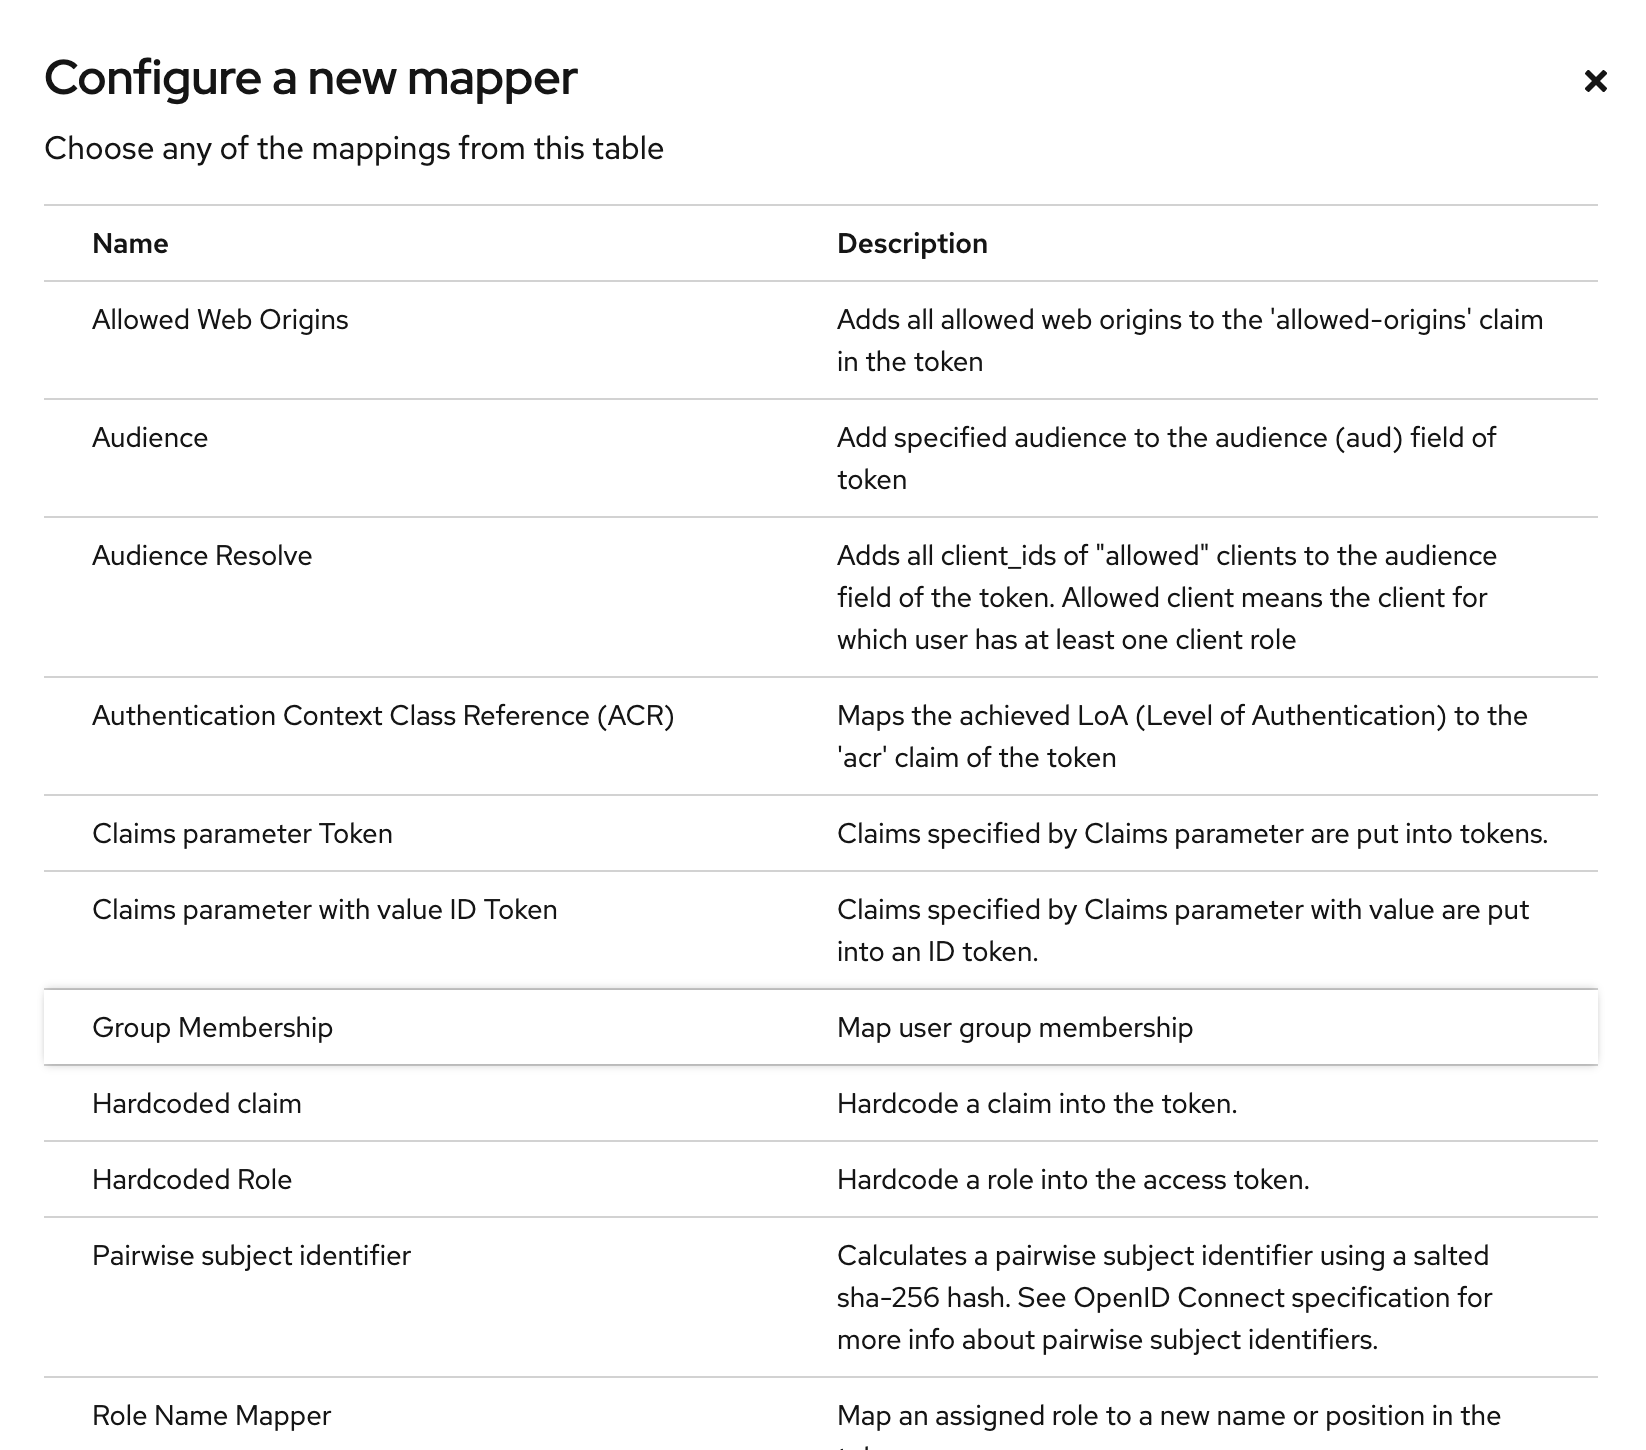
- Click Configure a new mapper
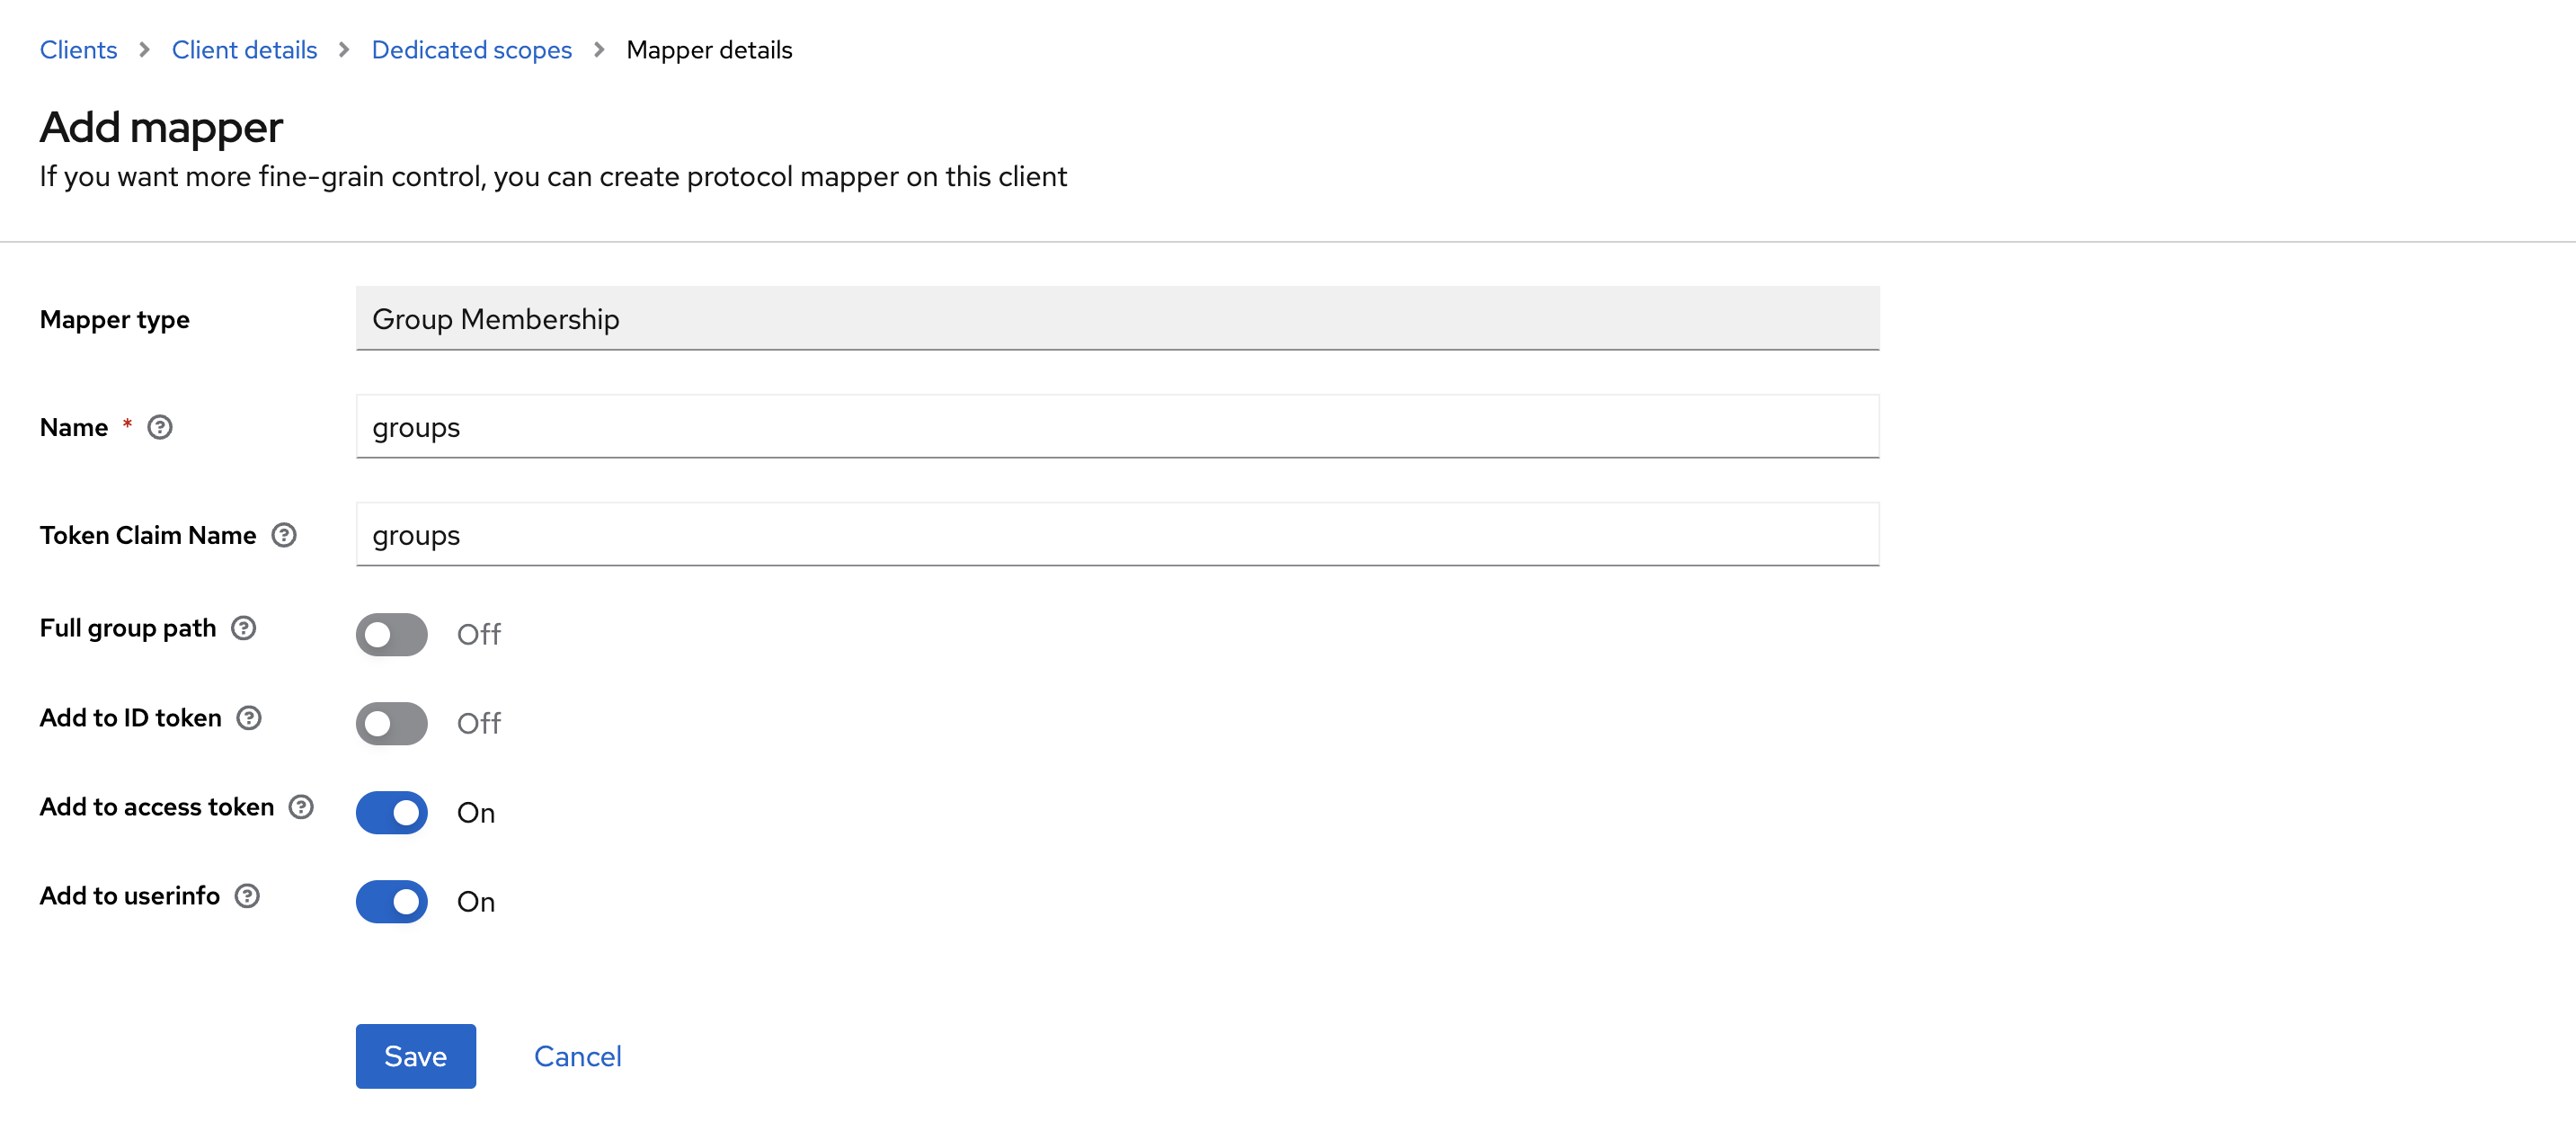
- Select Mapper Type Group Membership
- Name
groups - Token Claim Name
groups - Disable Full group path
- Disable Add to ID token
- Enable Add to access token
- Enable Add to user info
- Save
- In Corporate Memory configuration until v22.2:
- Configure this client ID under
js.config.workspaces.default.authorization.oauth2.clientIdin DataManager’s configuration file (Datamanager needs implicit flow) - Configure this client ID under
oauth.clientId = "cmem"in DataManager’s configuration file (Dataintegration needs standard flow)
- Configure this client ID under
- In Corporate Memory configuration from v23.1:
- Configure this client ID in the environments with the name
OAUTH_CLIENT_IDin/environments/config.env(defaults tocmemif not set)
- Configure this client ID in the environments with the name
Add the cmem-service-account client¤
This client is intended for internal use by DataIntegration (scheduler super-user) and data import purposes (cmemc).
This descriptions can also be used to create clients with different permissions than admins. For this, just create a different role name later, and create an access condition with this groups name in Corporate Memory as it is described in Access Conditions.
- Client type: OpenID Connect
- Client ID: i.e.
cmem-service-account, you need to remember this and use this later - Name and Description: fill as you like
- click Next
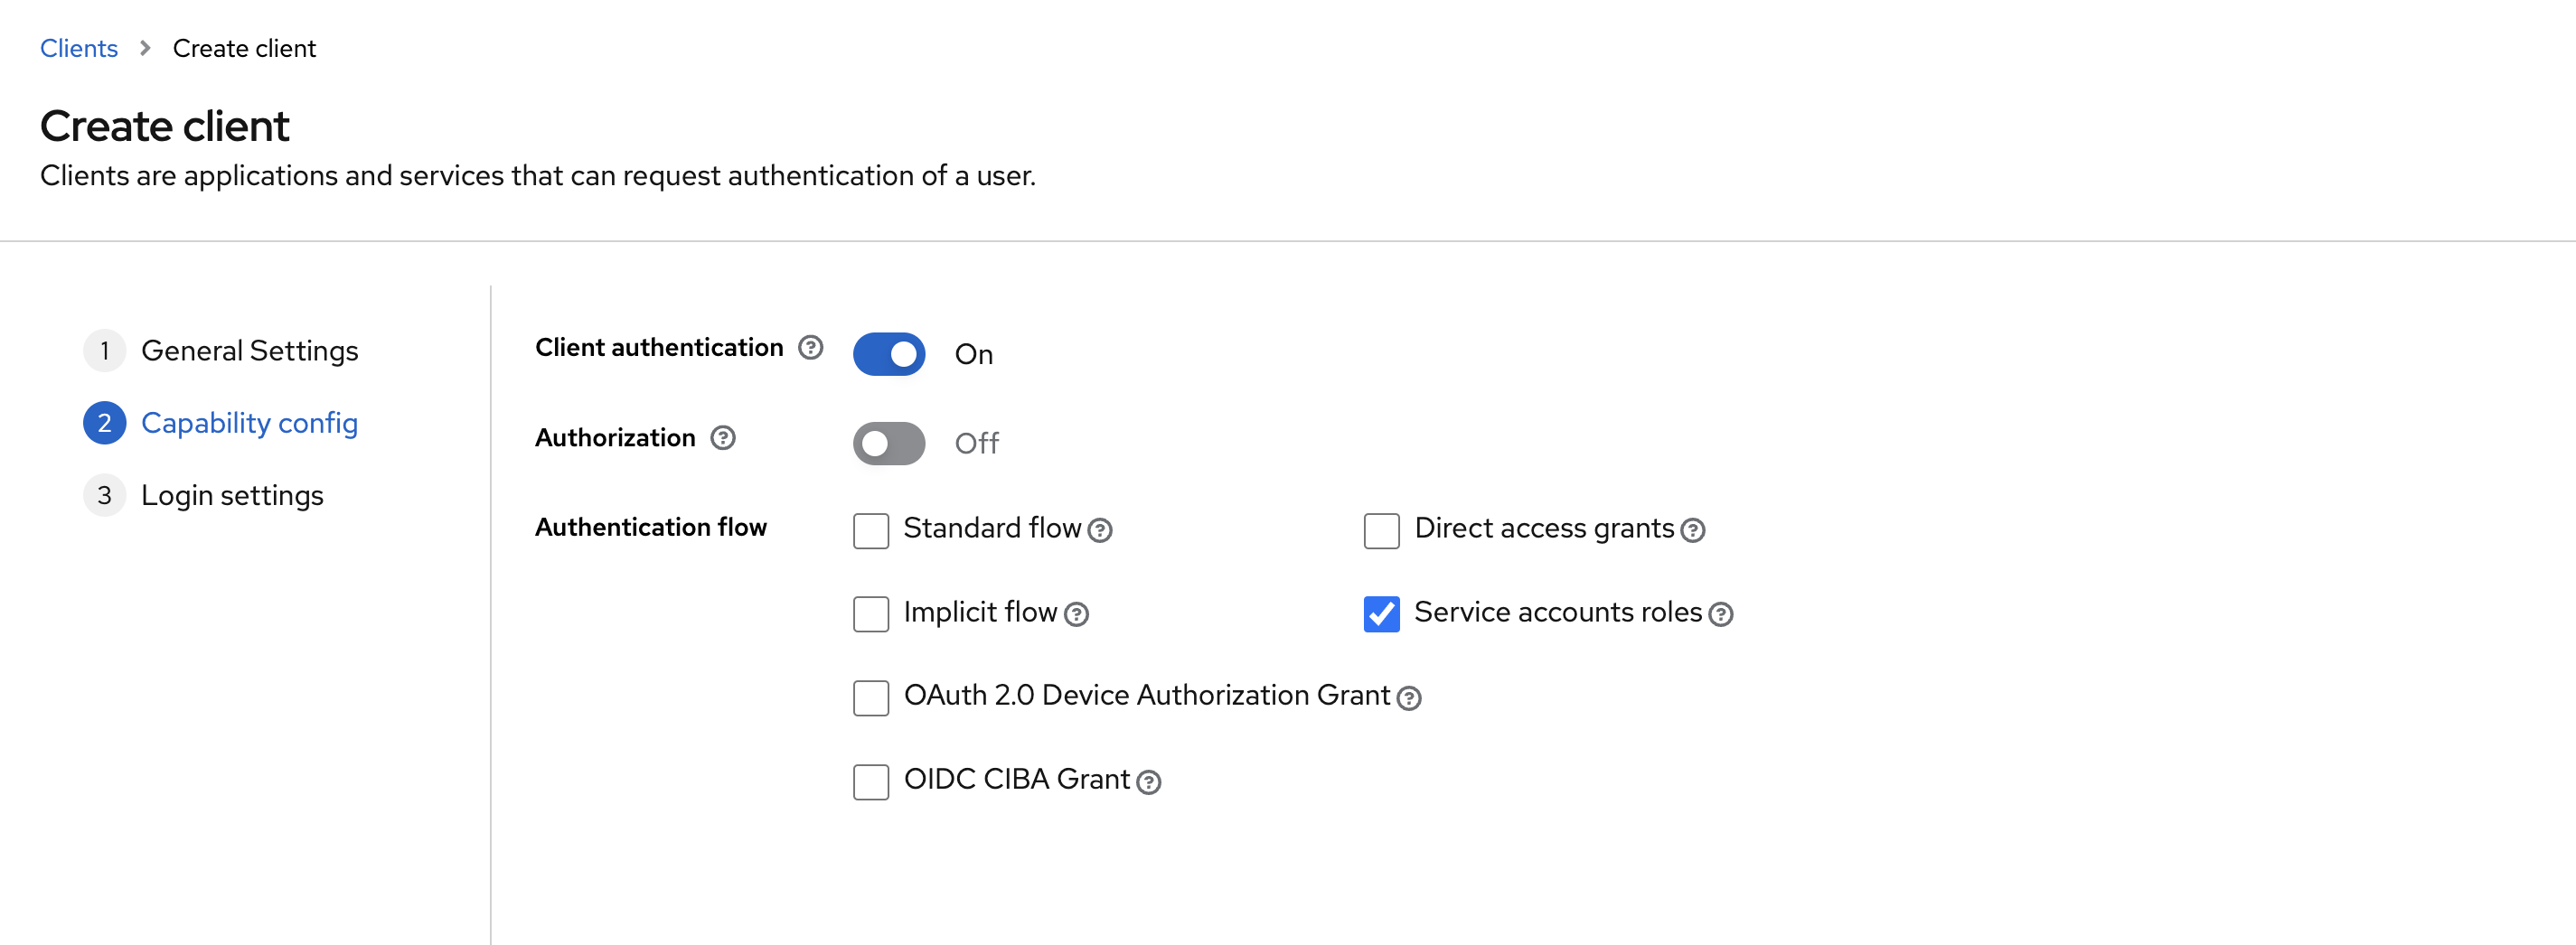
- Client authentication: On
- Authorization: Off
- Authentication flow: only enable
Service accounts roles, the rest can be disabled -
Save
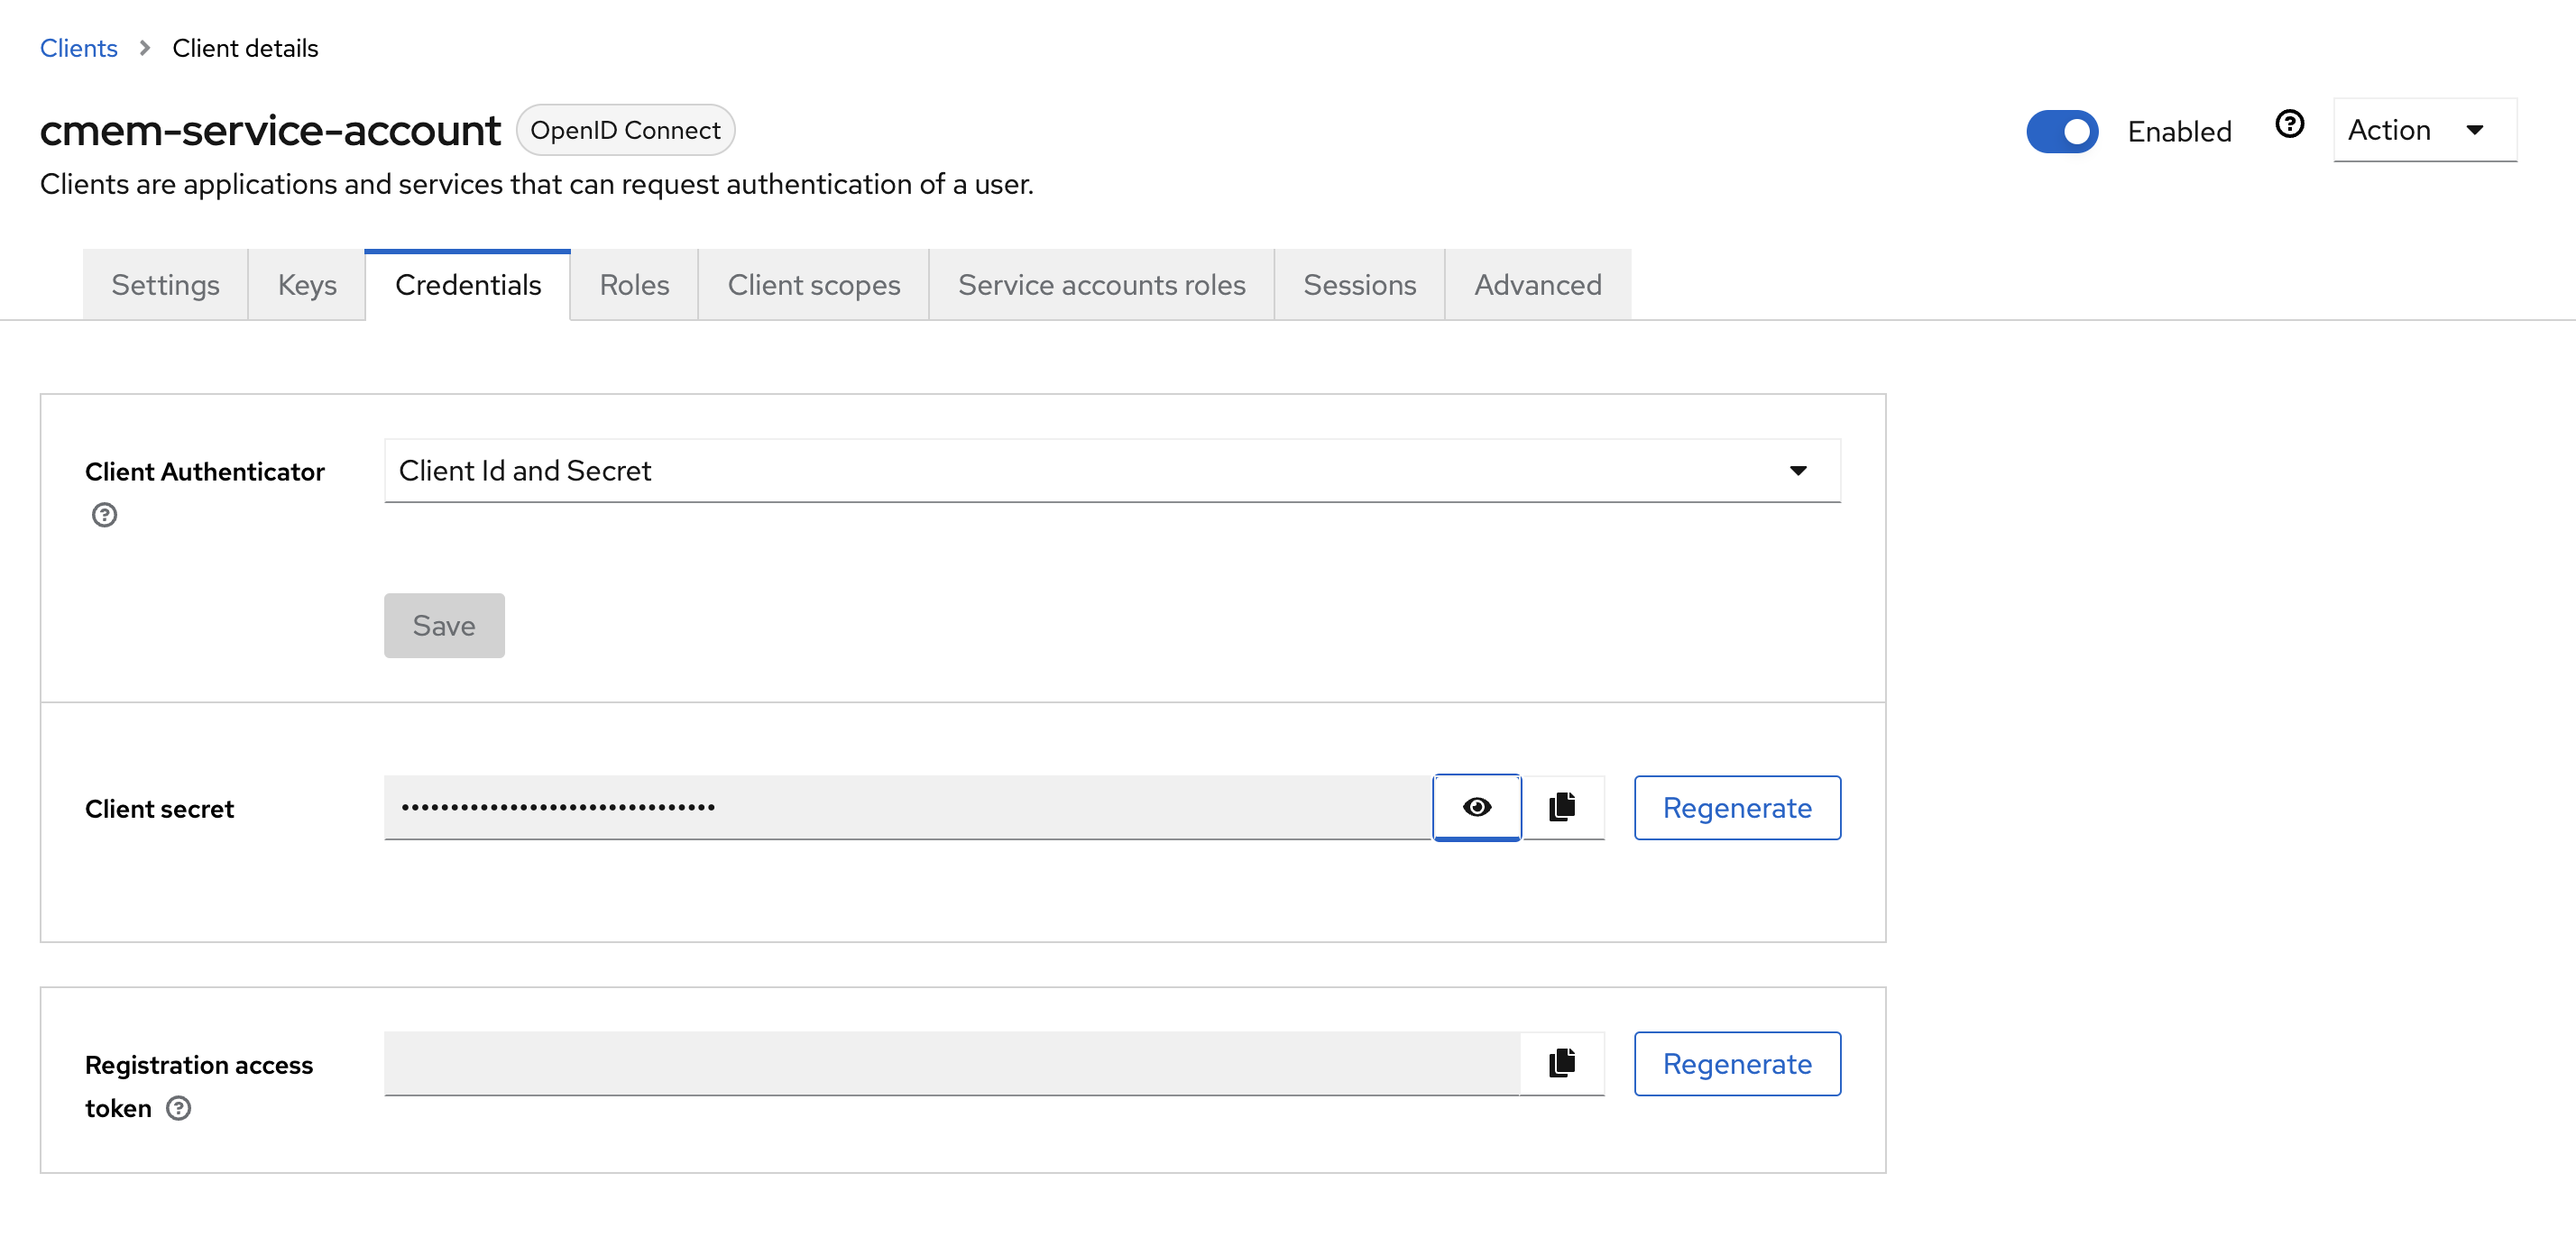
-
Go to Credentials and configure Client Id and Secret, copy the client secret for later usage
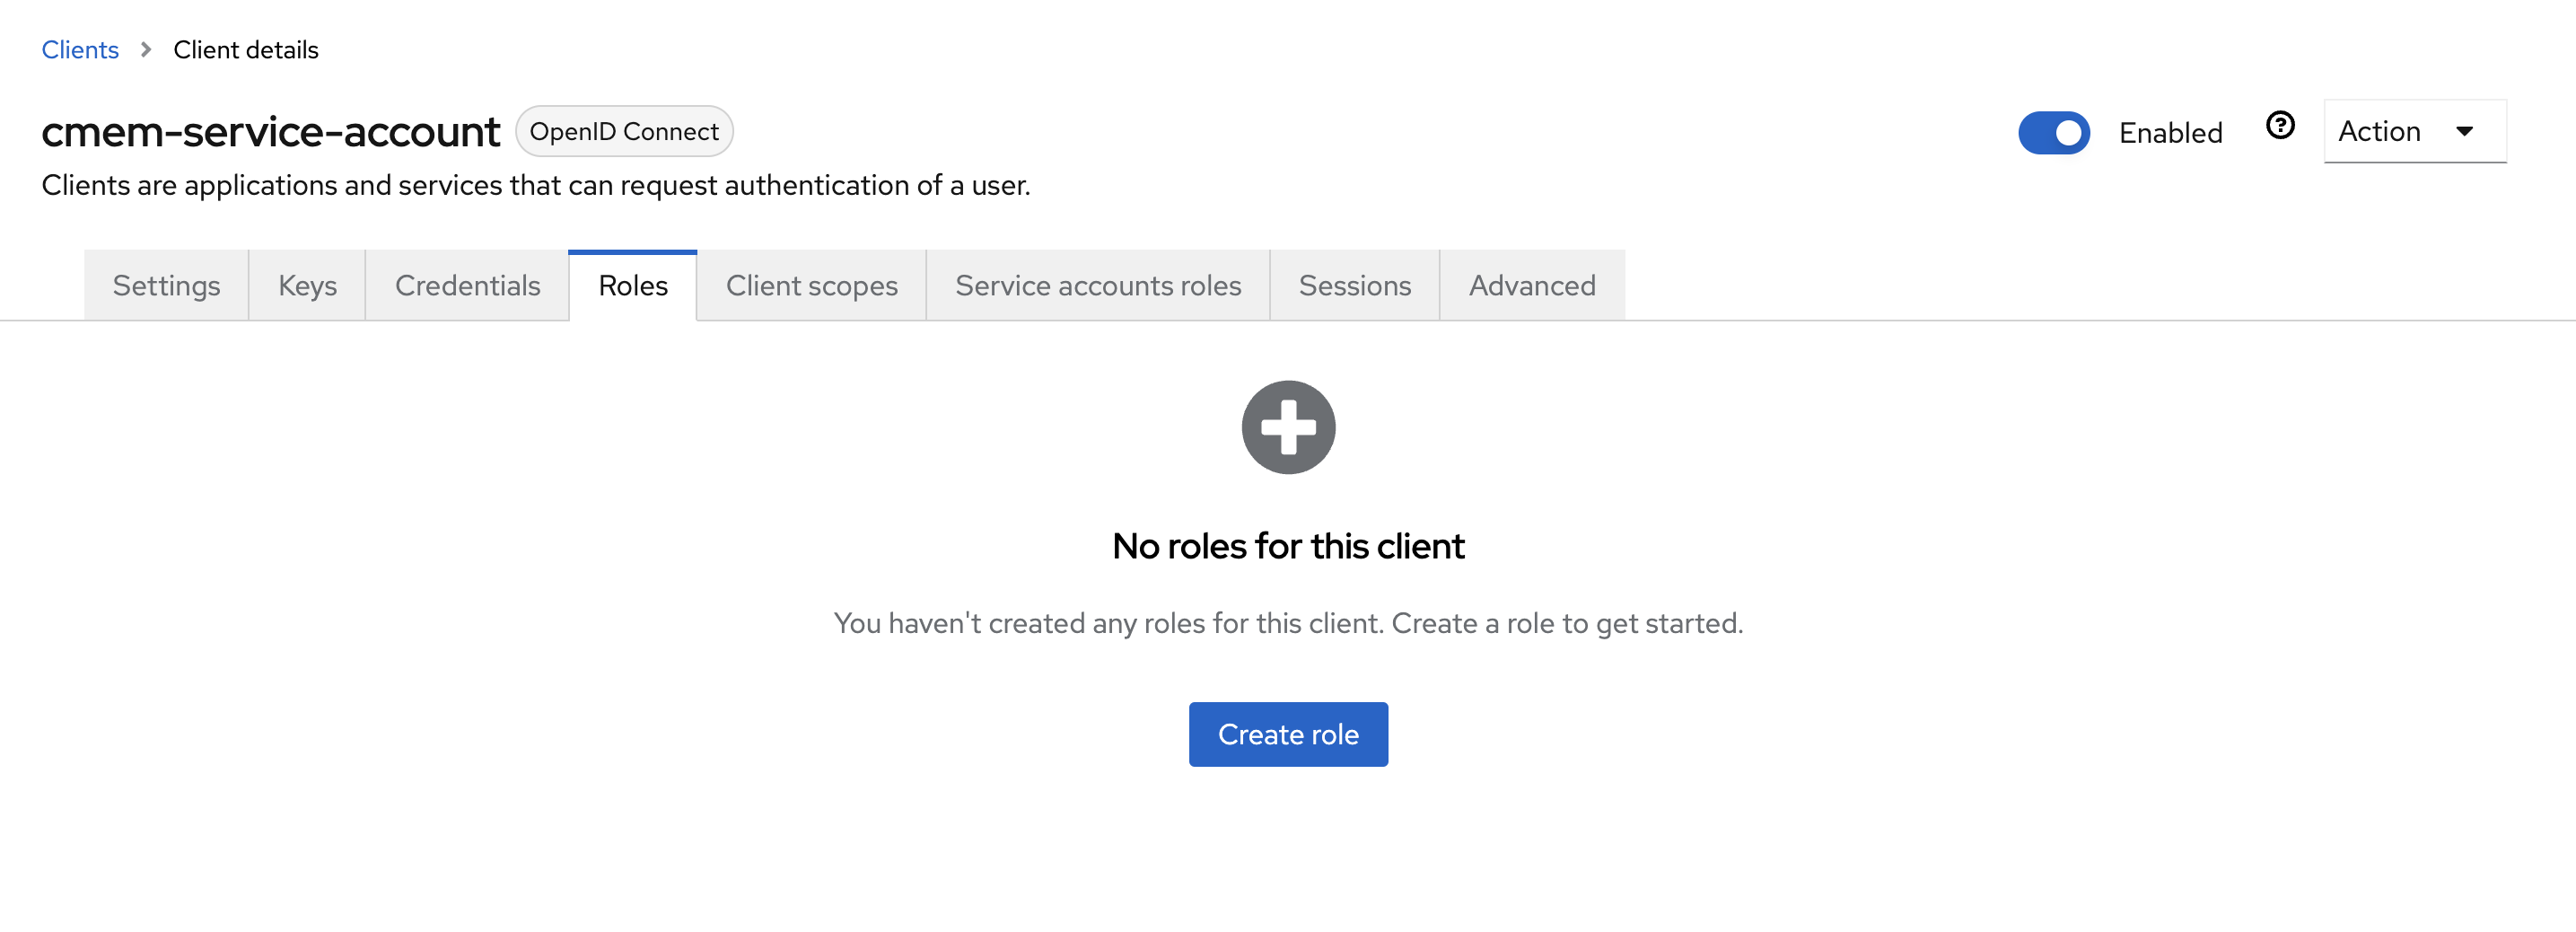
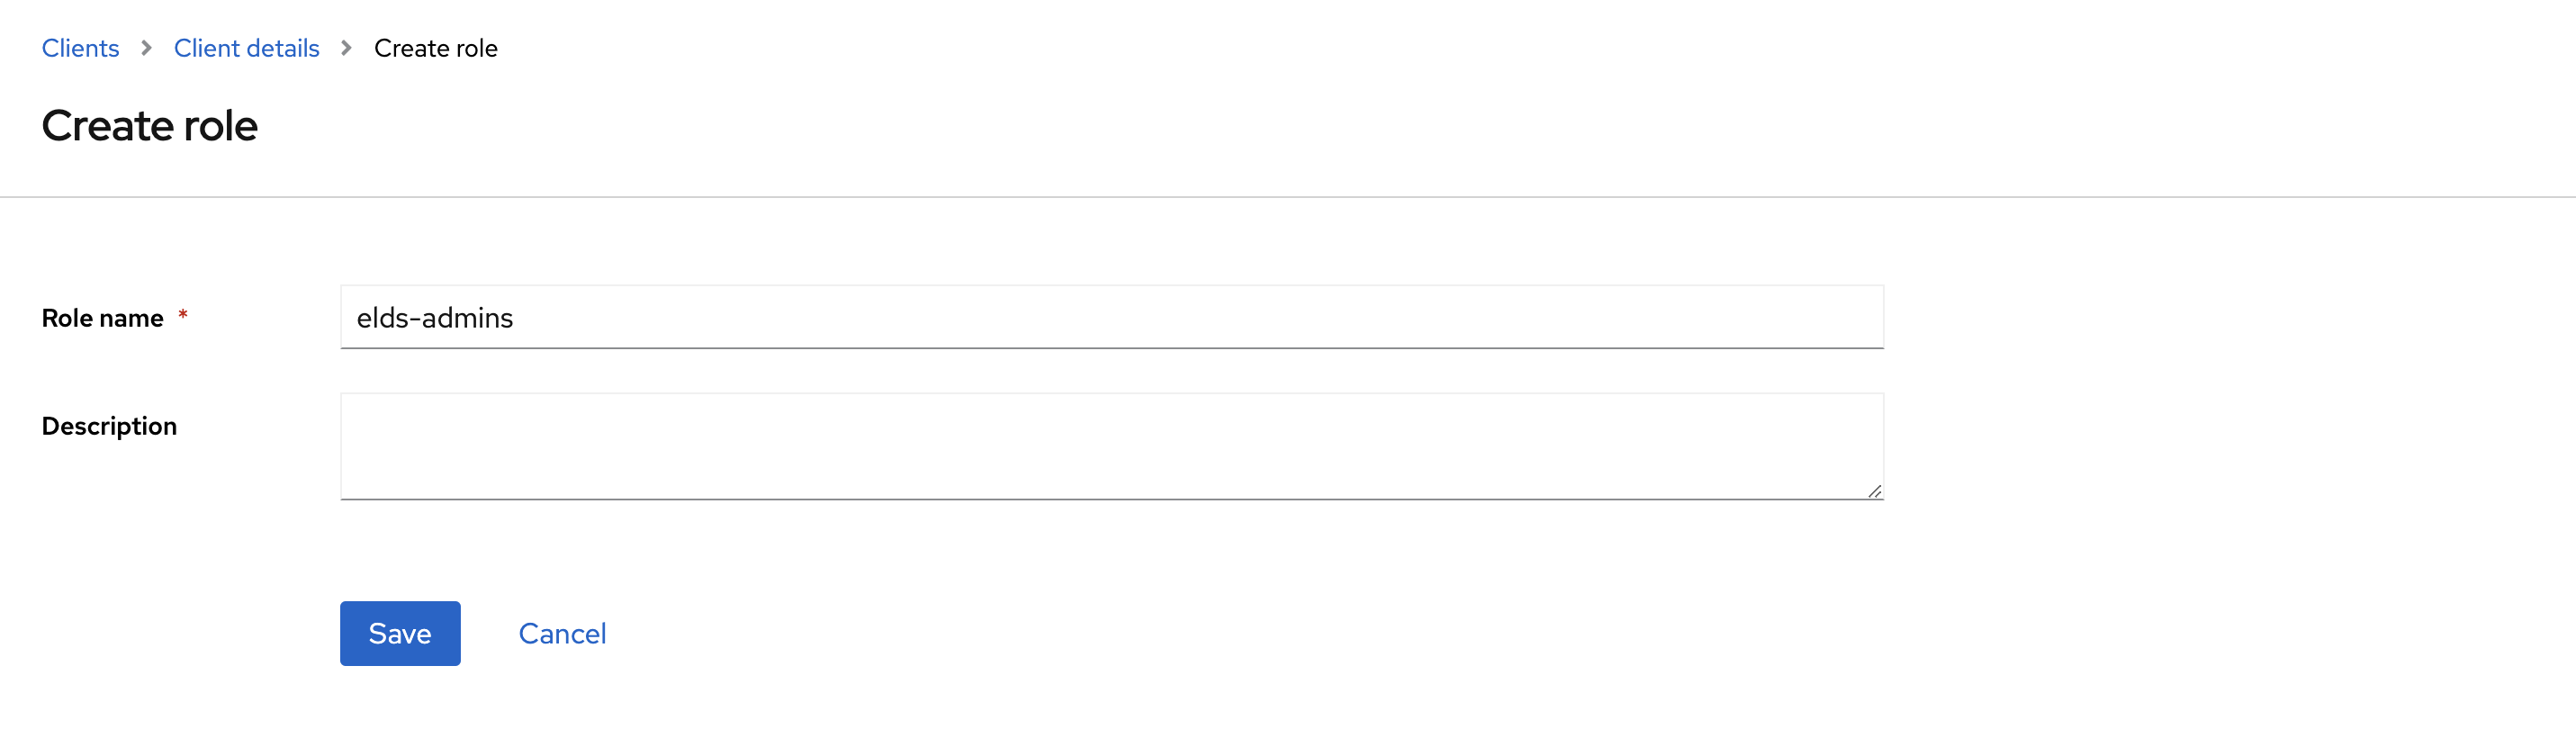
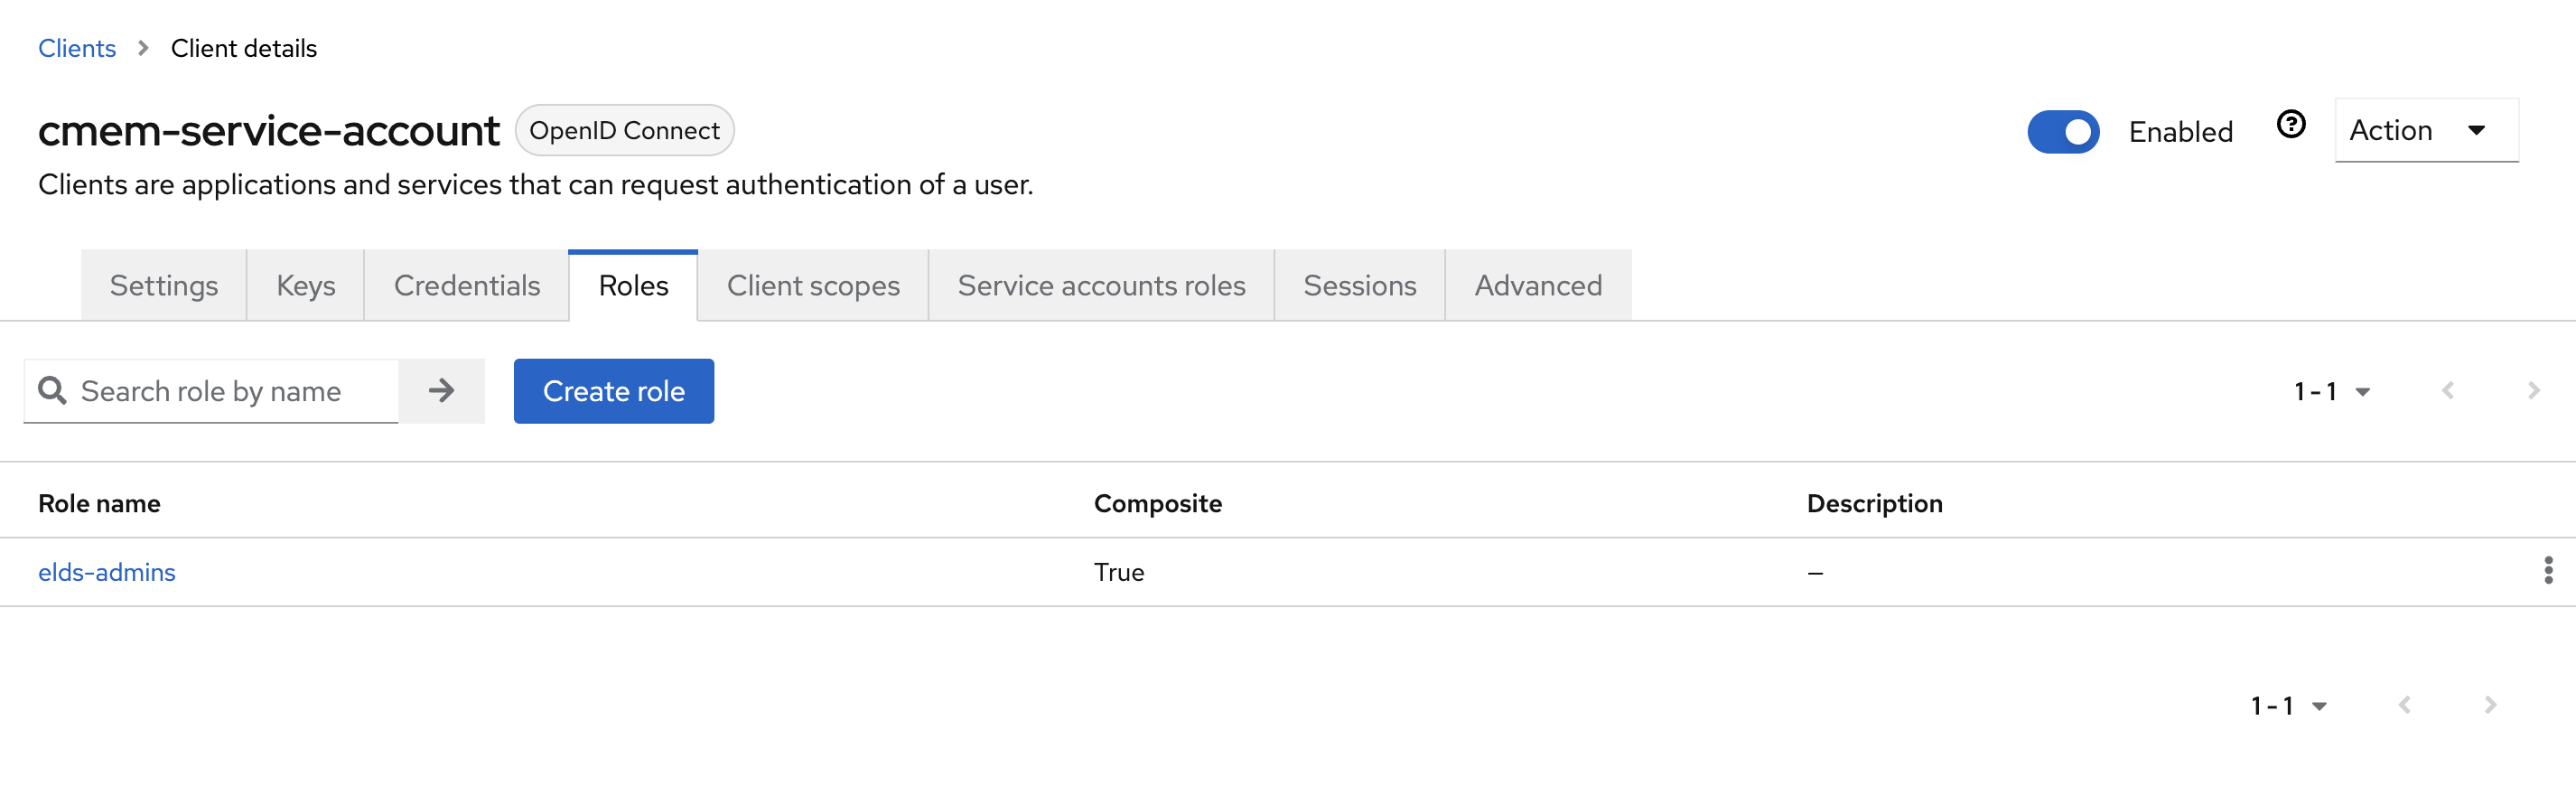
- Go to Roles and click Create role to create the
elds-adminsrole
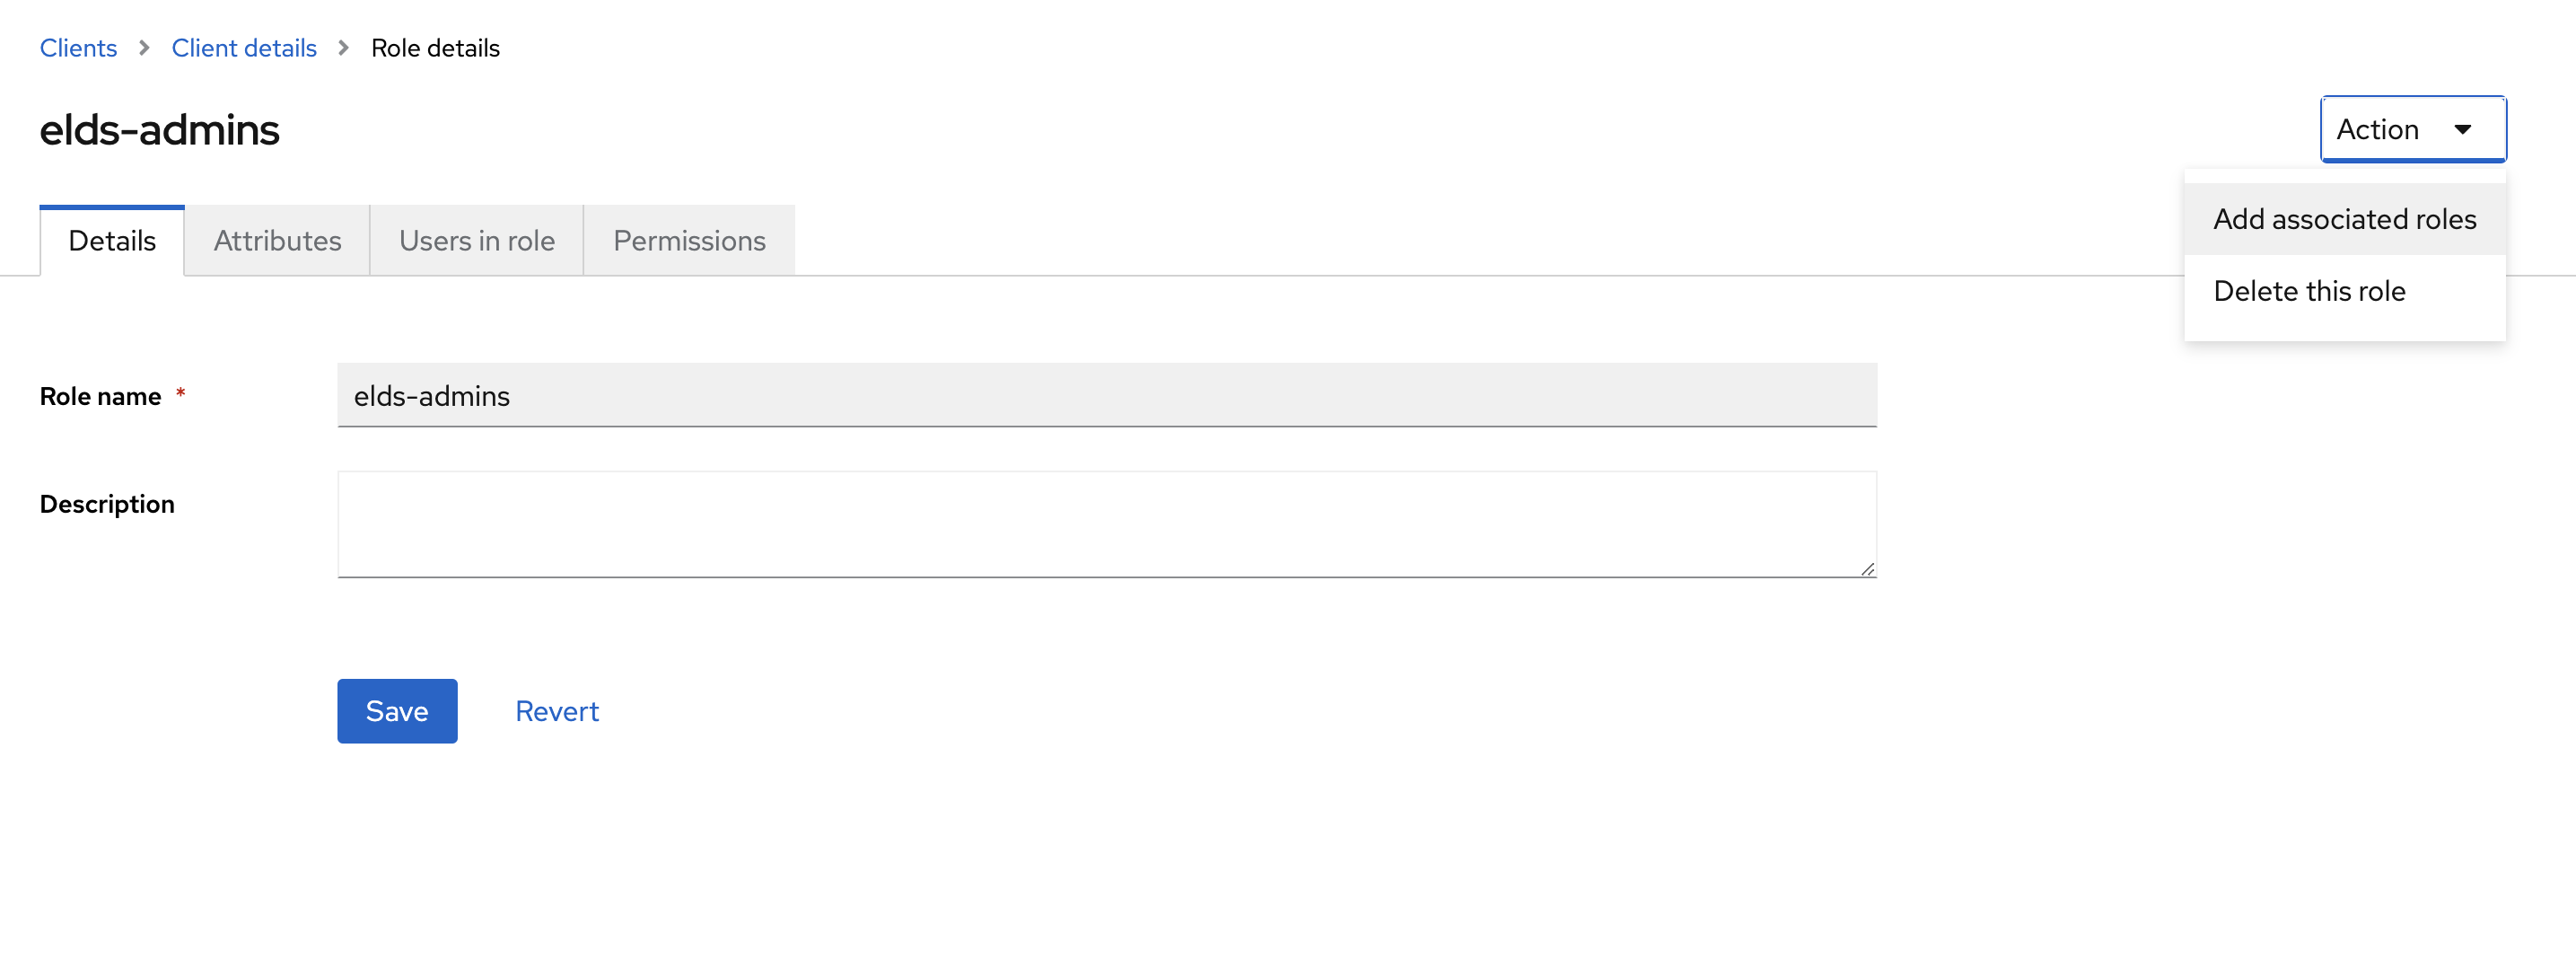
- Click Action and select Add associated roles
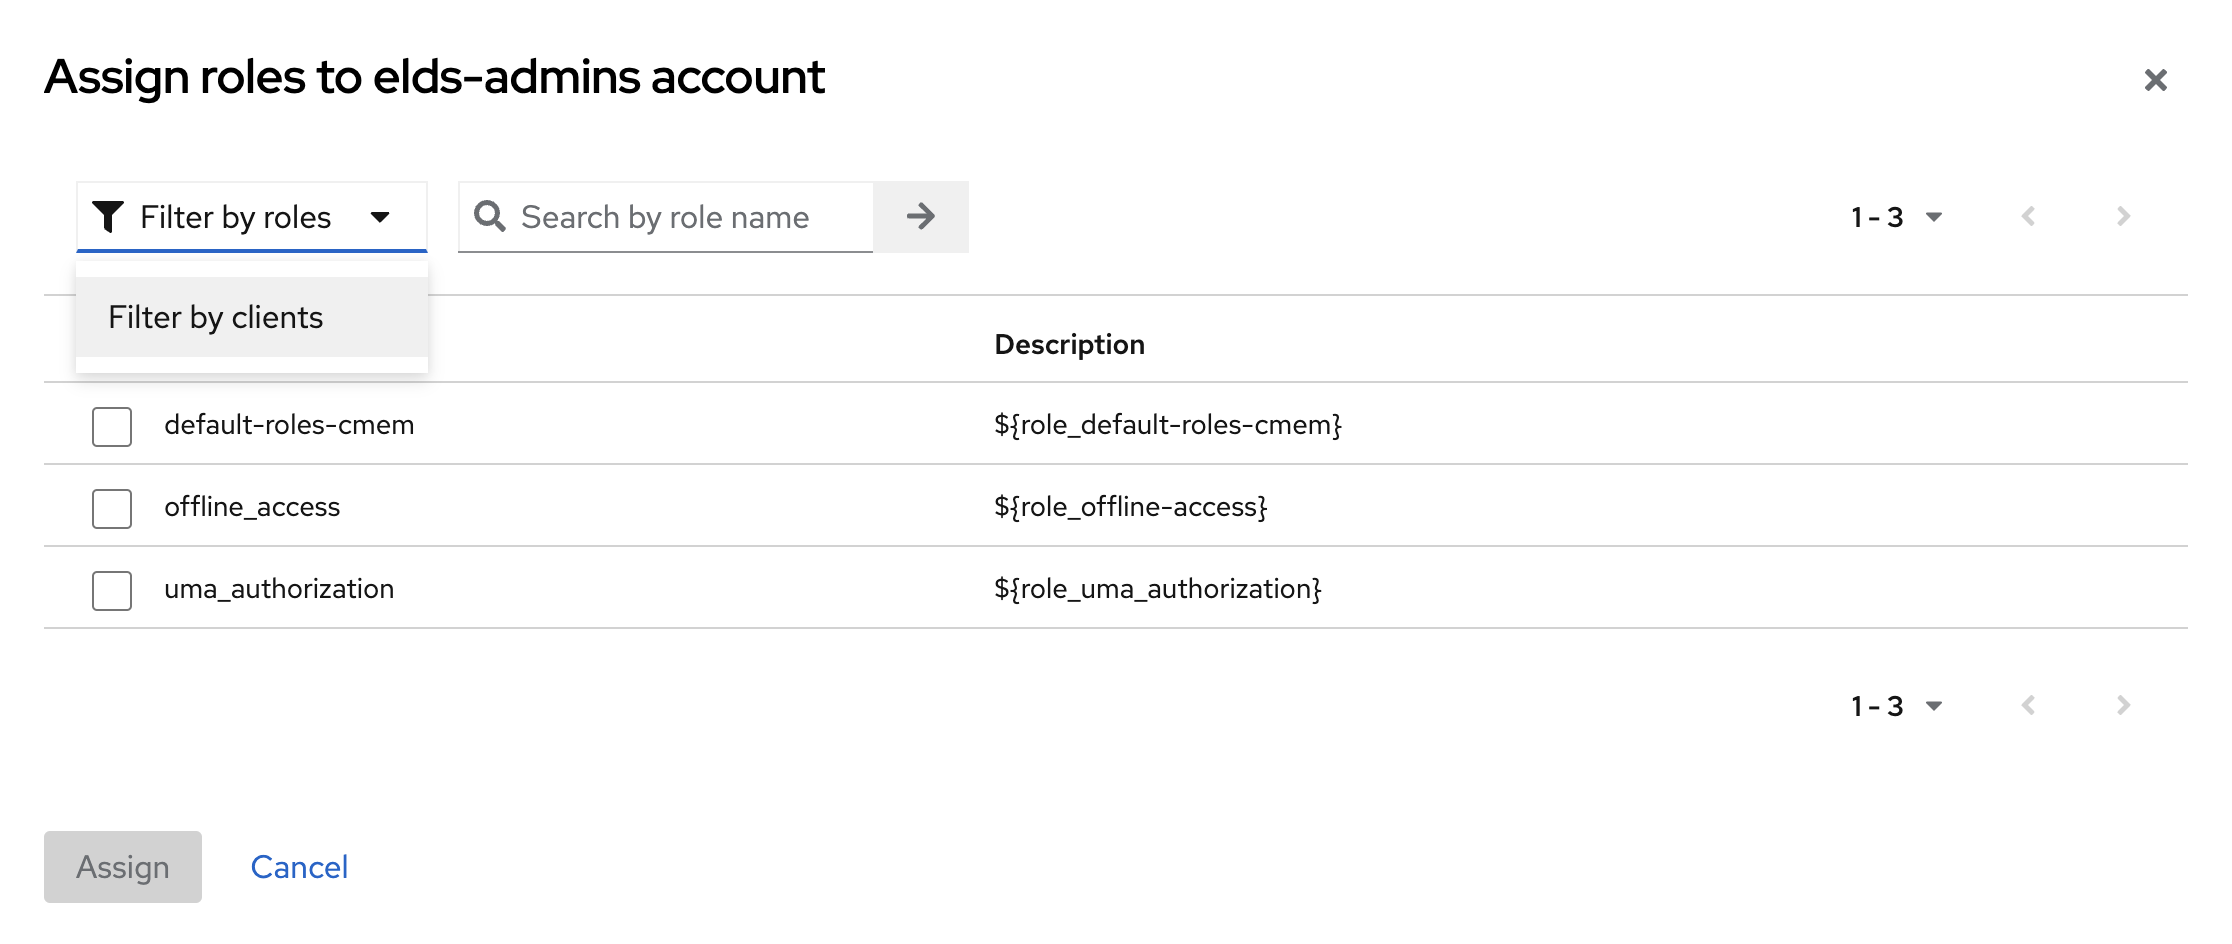
- Select Filter by client from the filter pull-down-menu
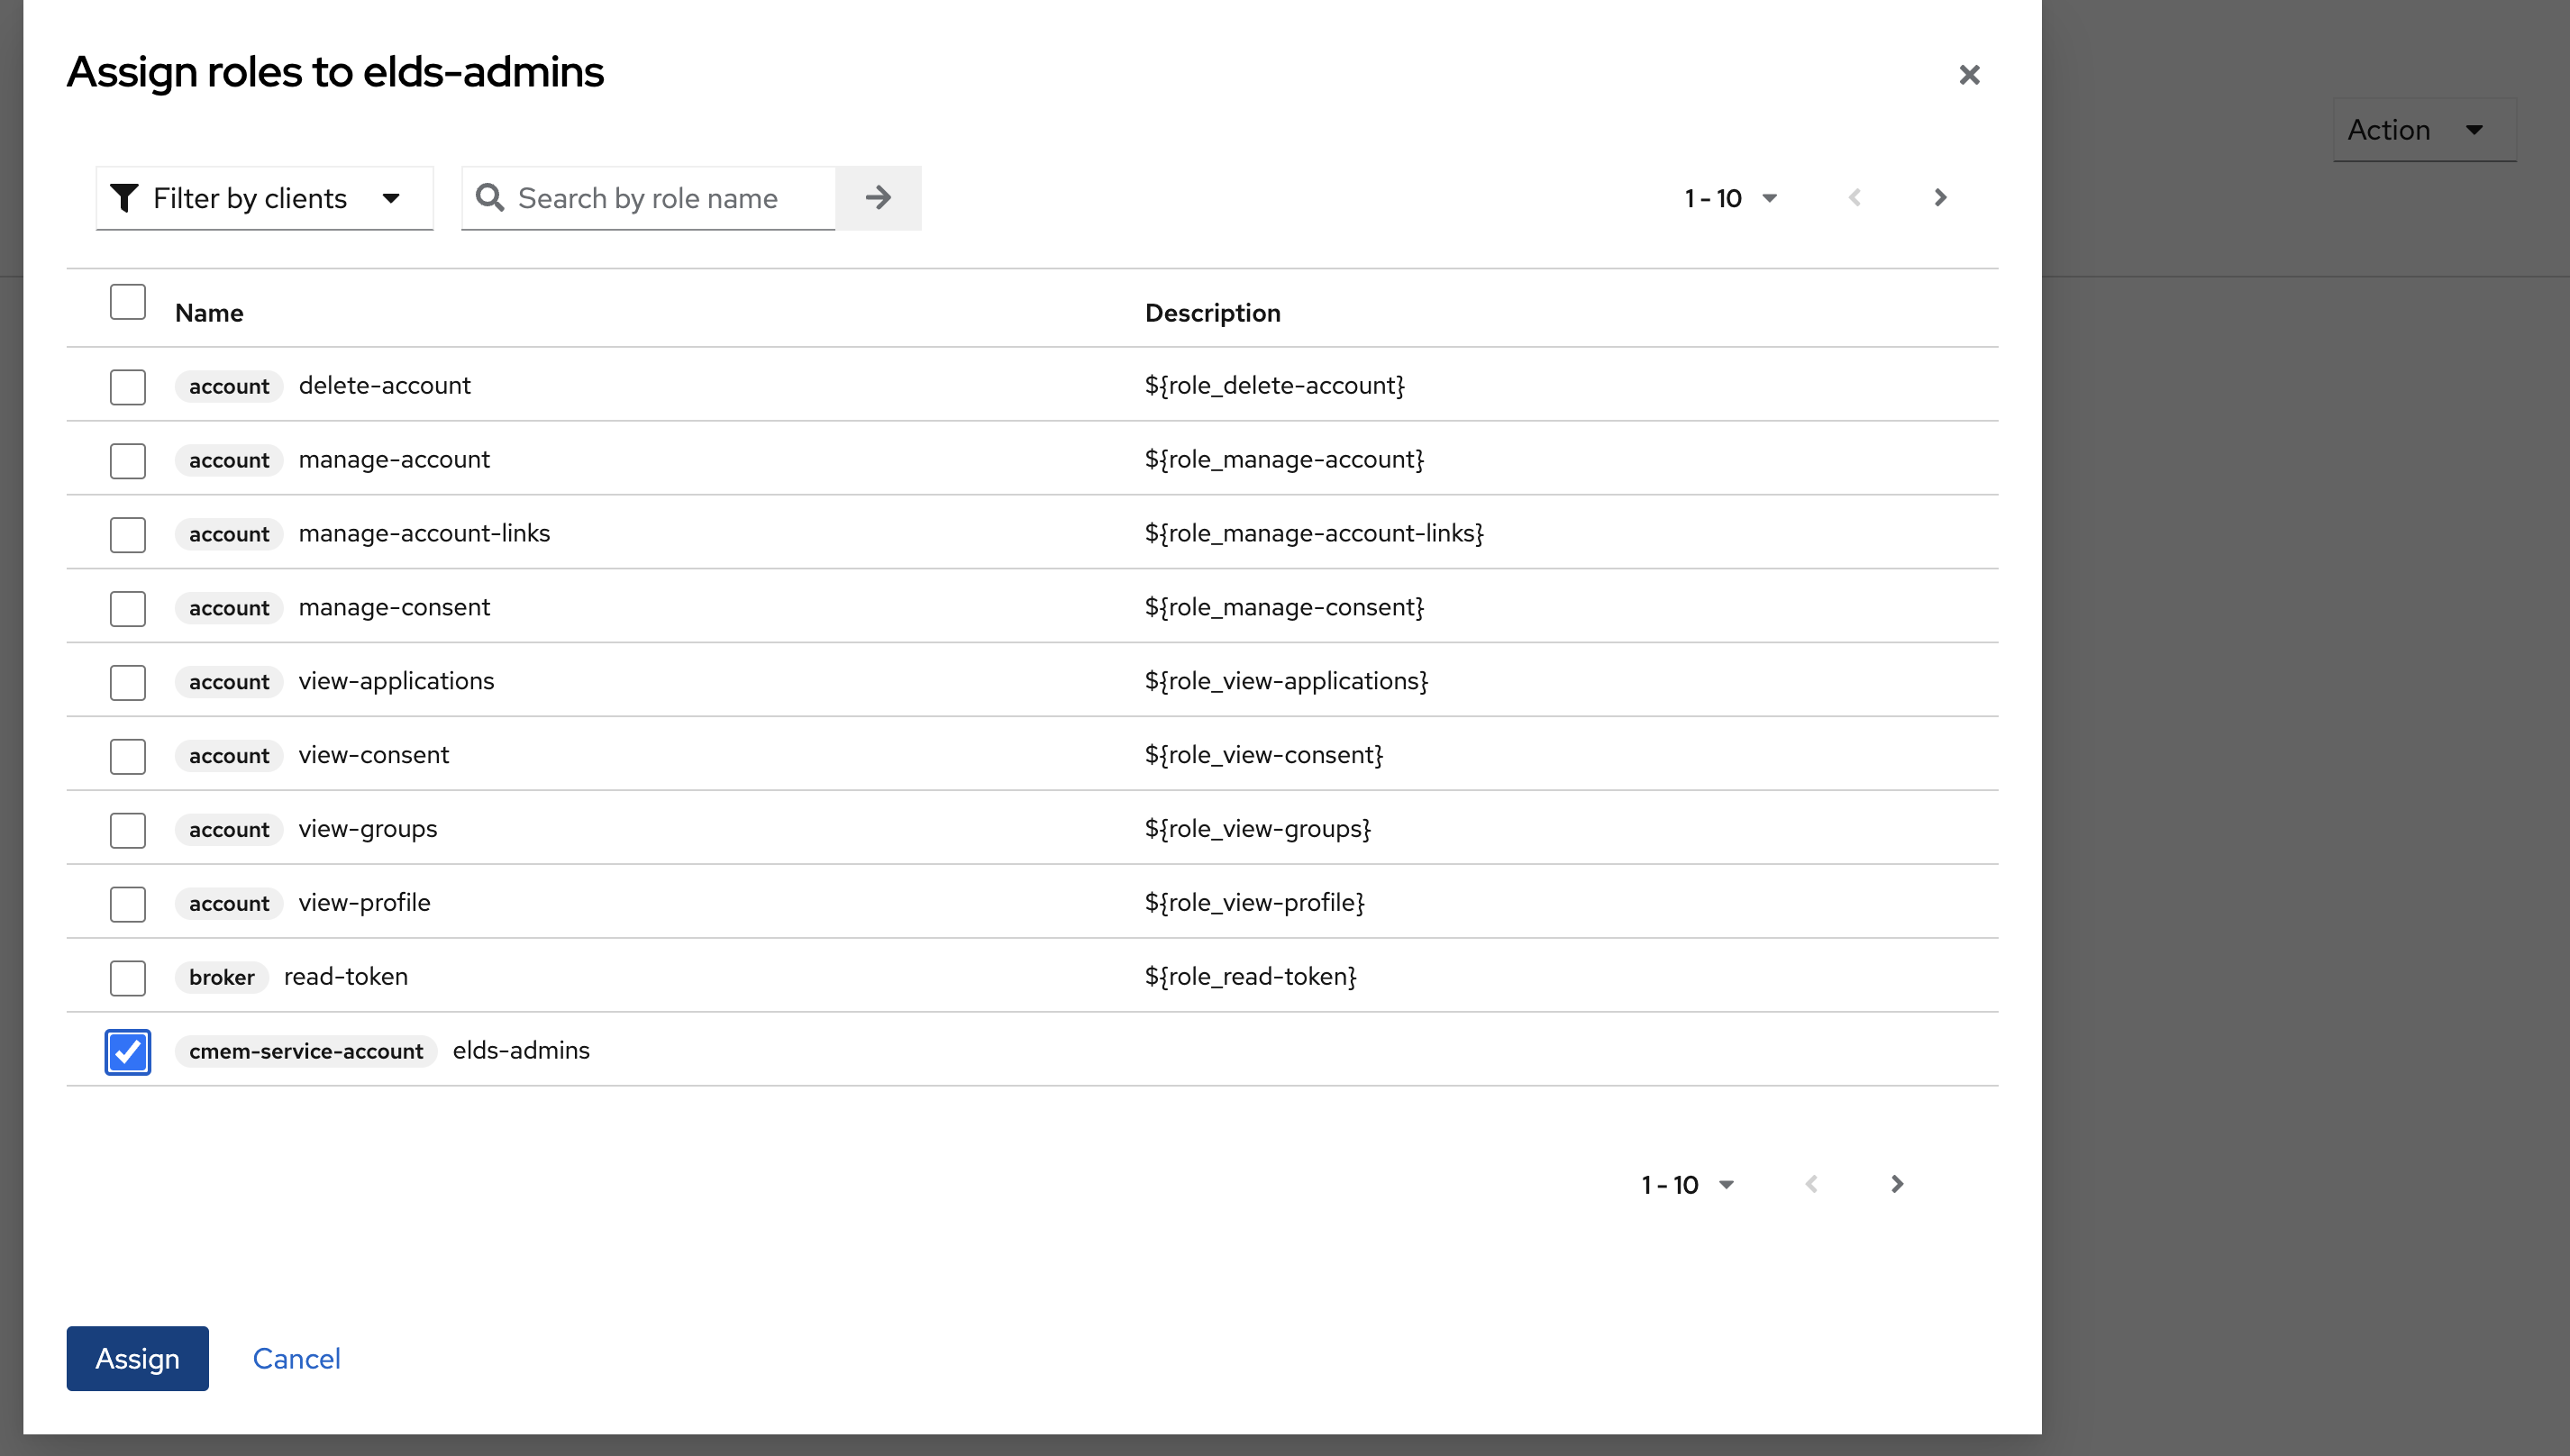
- In this dialog select the client by name which you are currently configuring (here
cmem-service-account) and then Assign
- Go back to Client details e.g., by using the top navigation
- In the Roles tab you now see your created role here
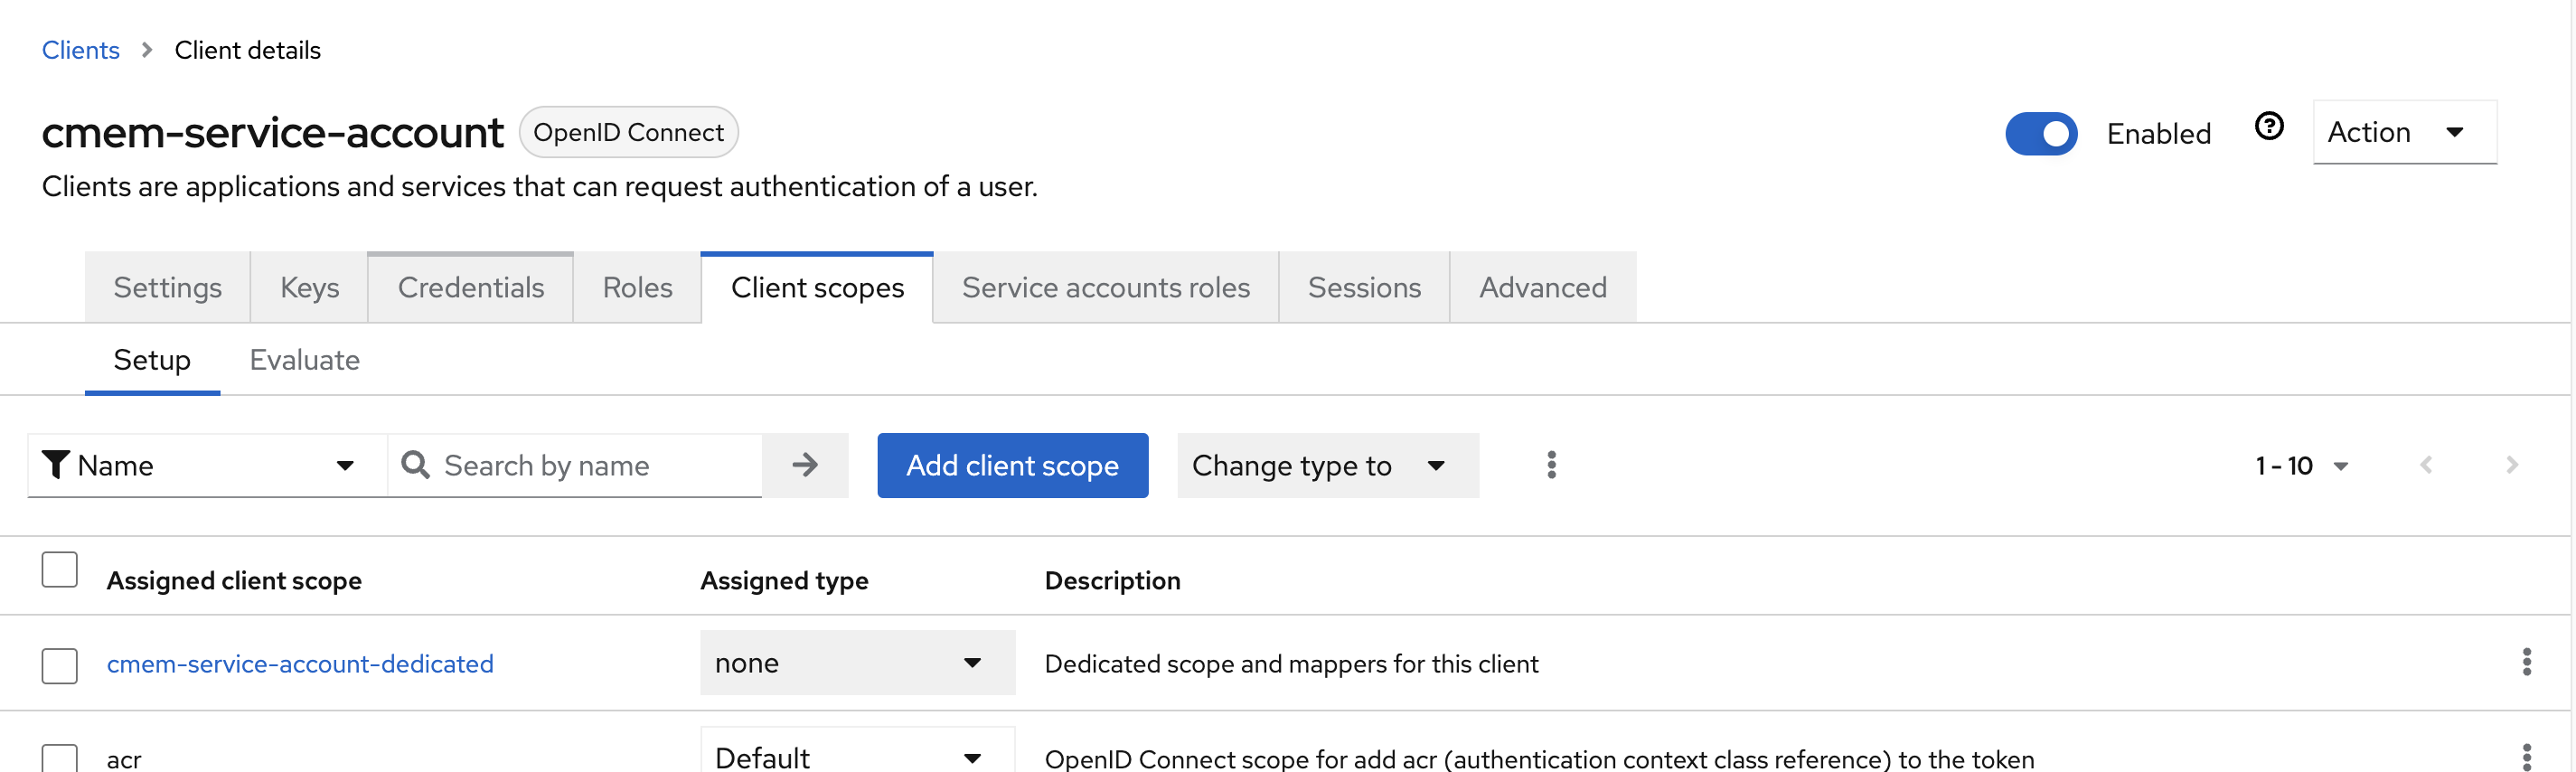
- Switch the Tabs to Client scopes and click on the first scope (i.e.:
cmem-service-account-dedicated)
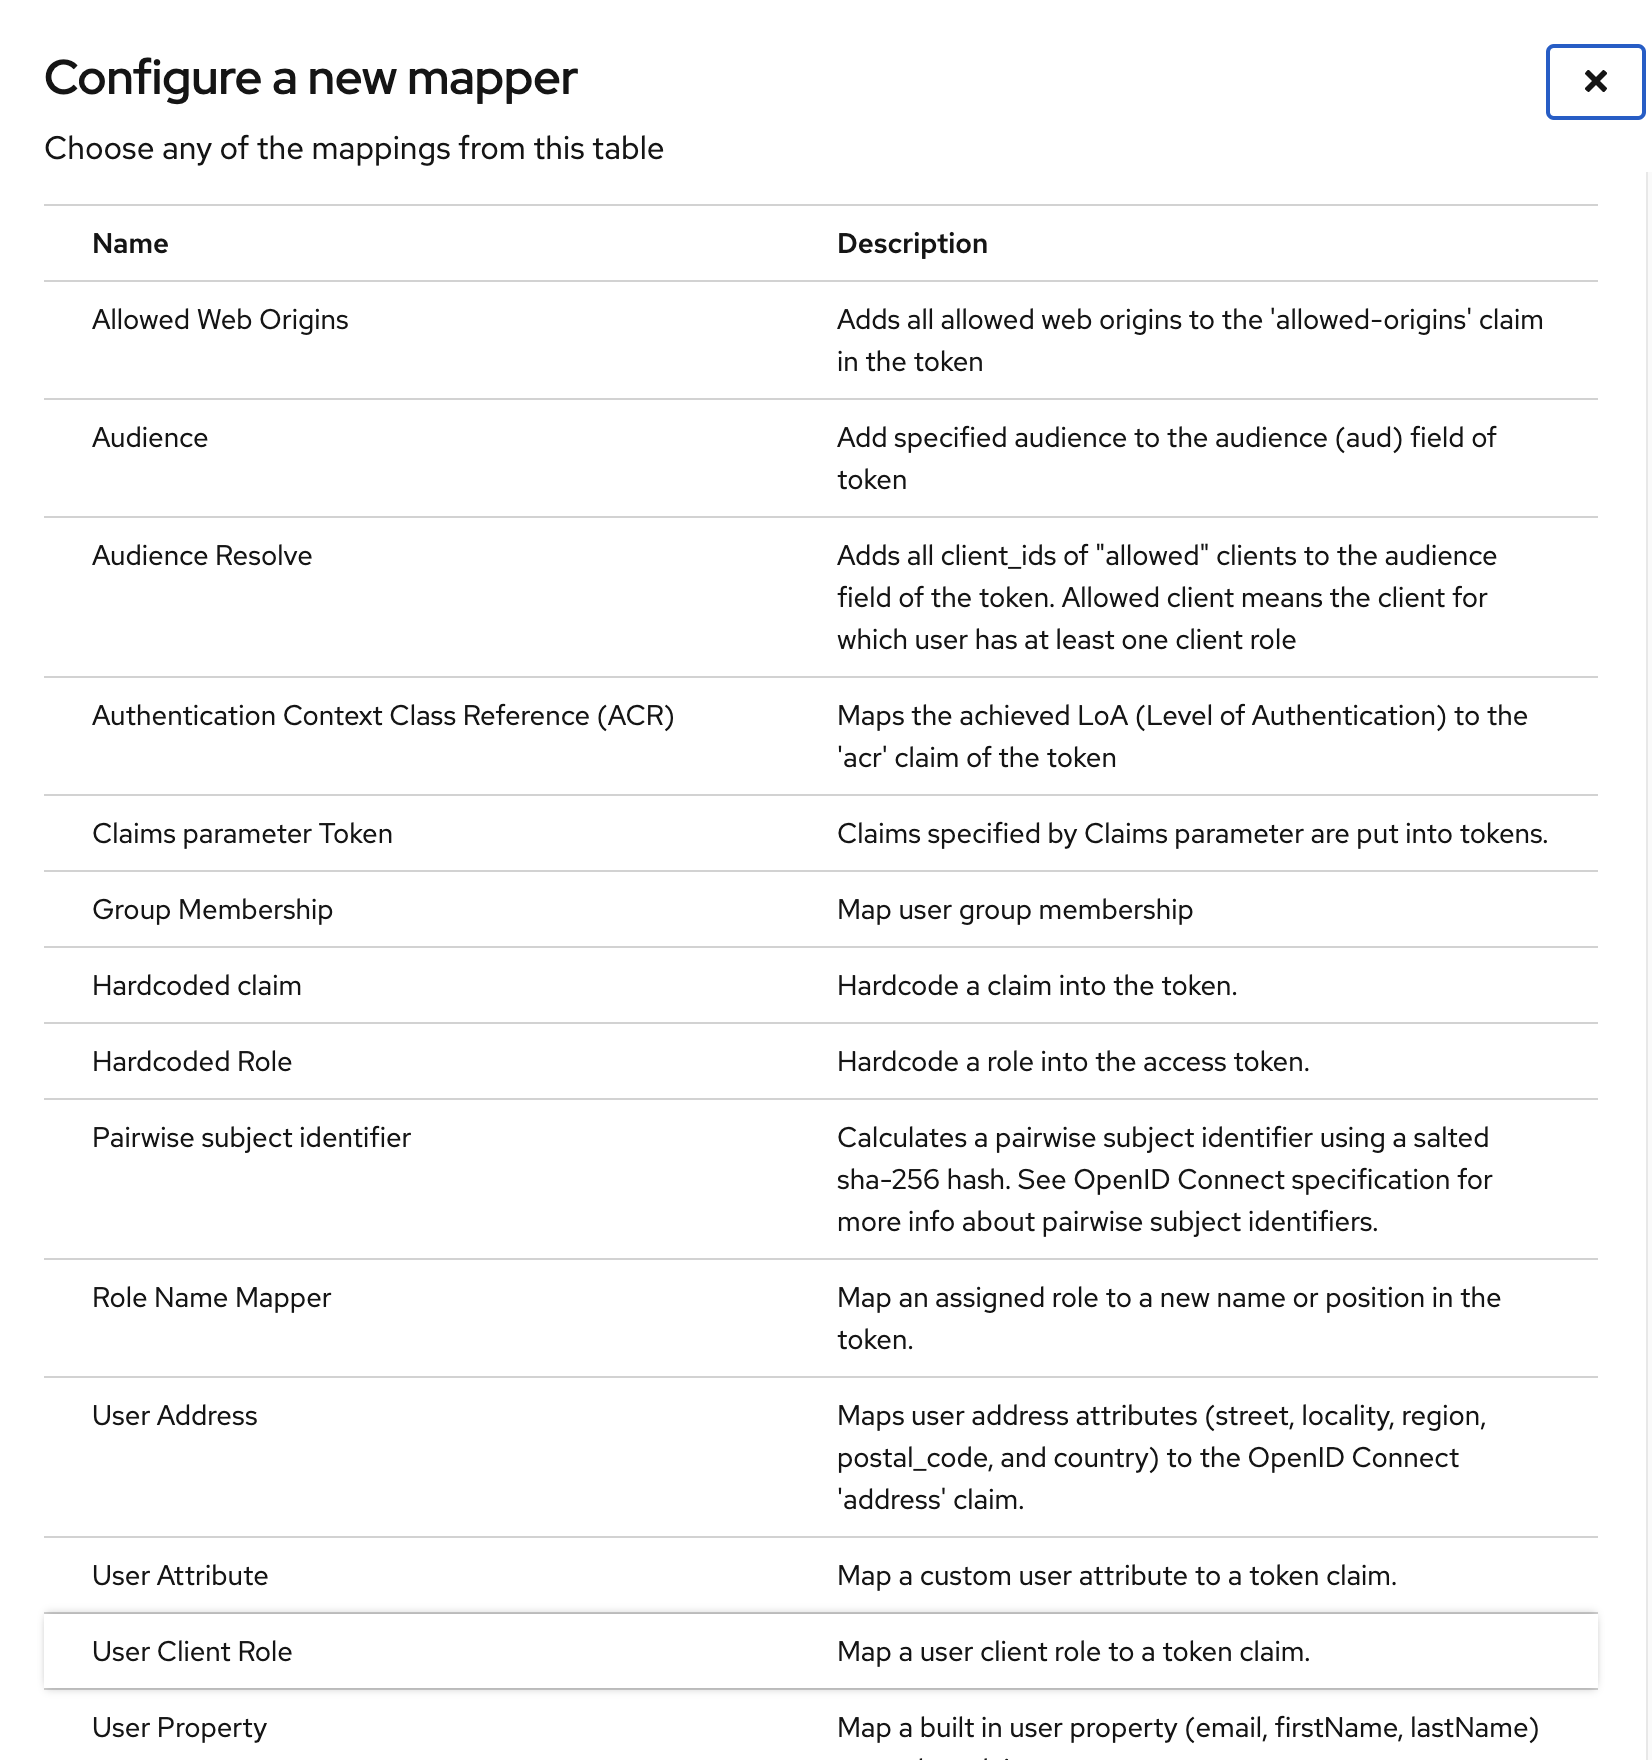
- select Add mapper -> By configuration
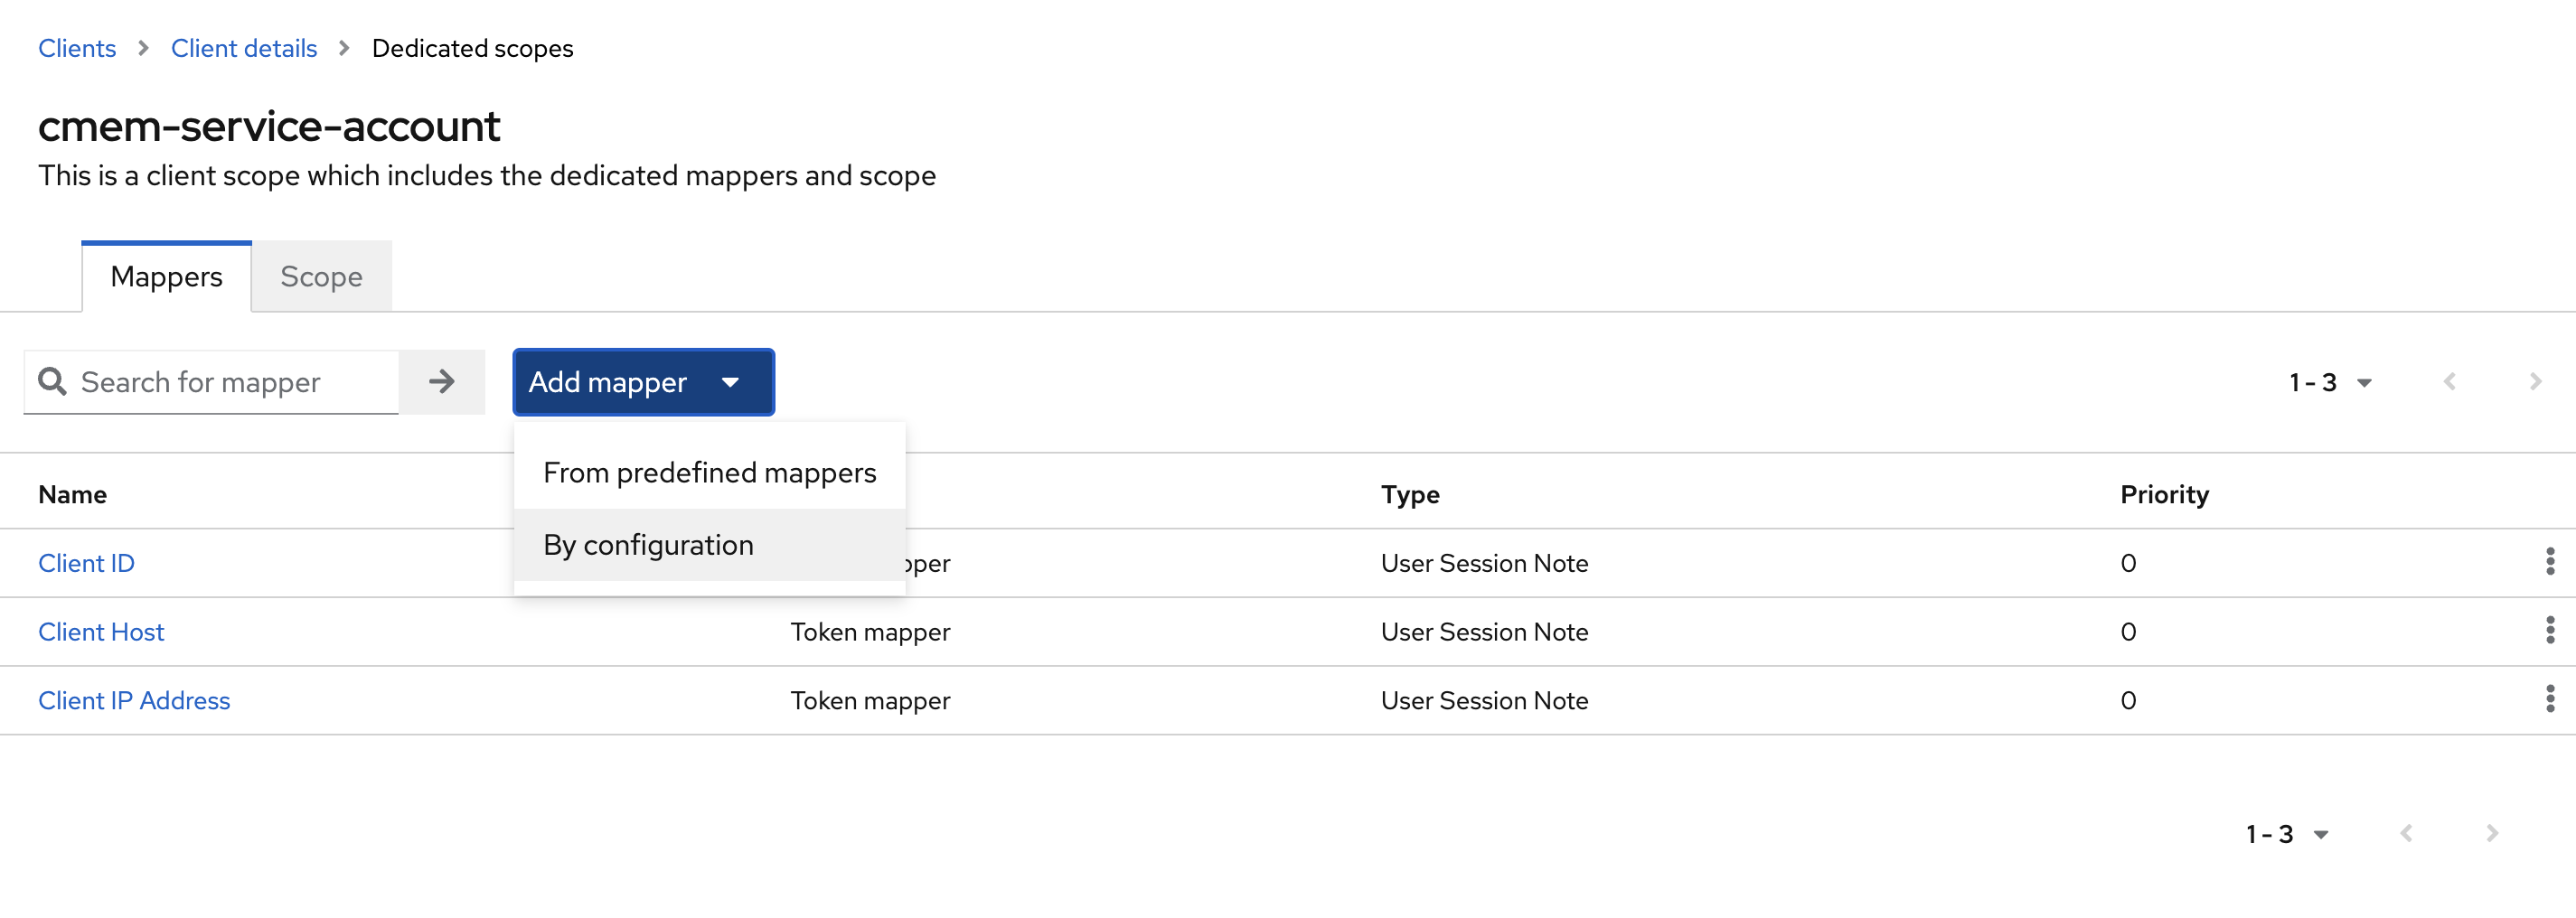
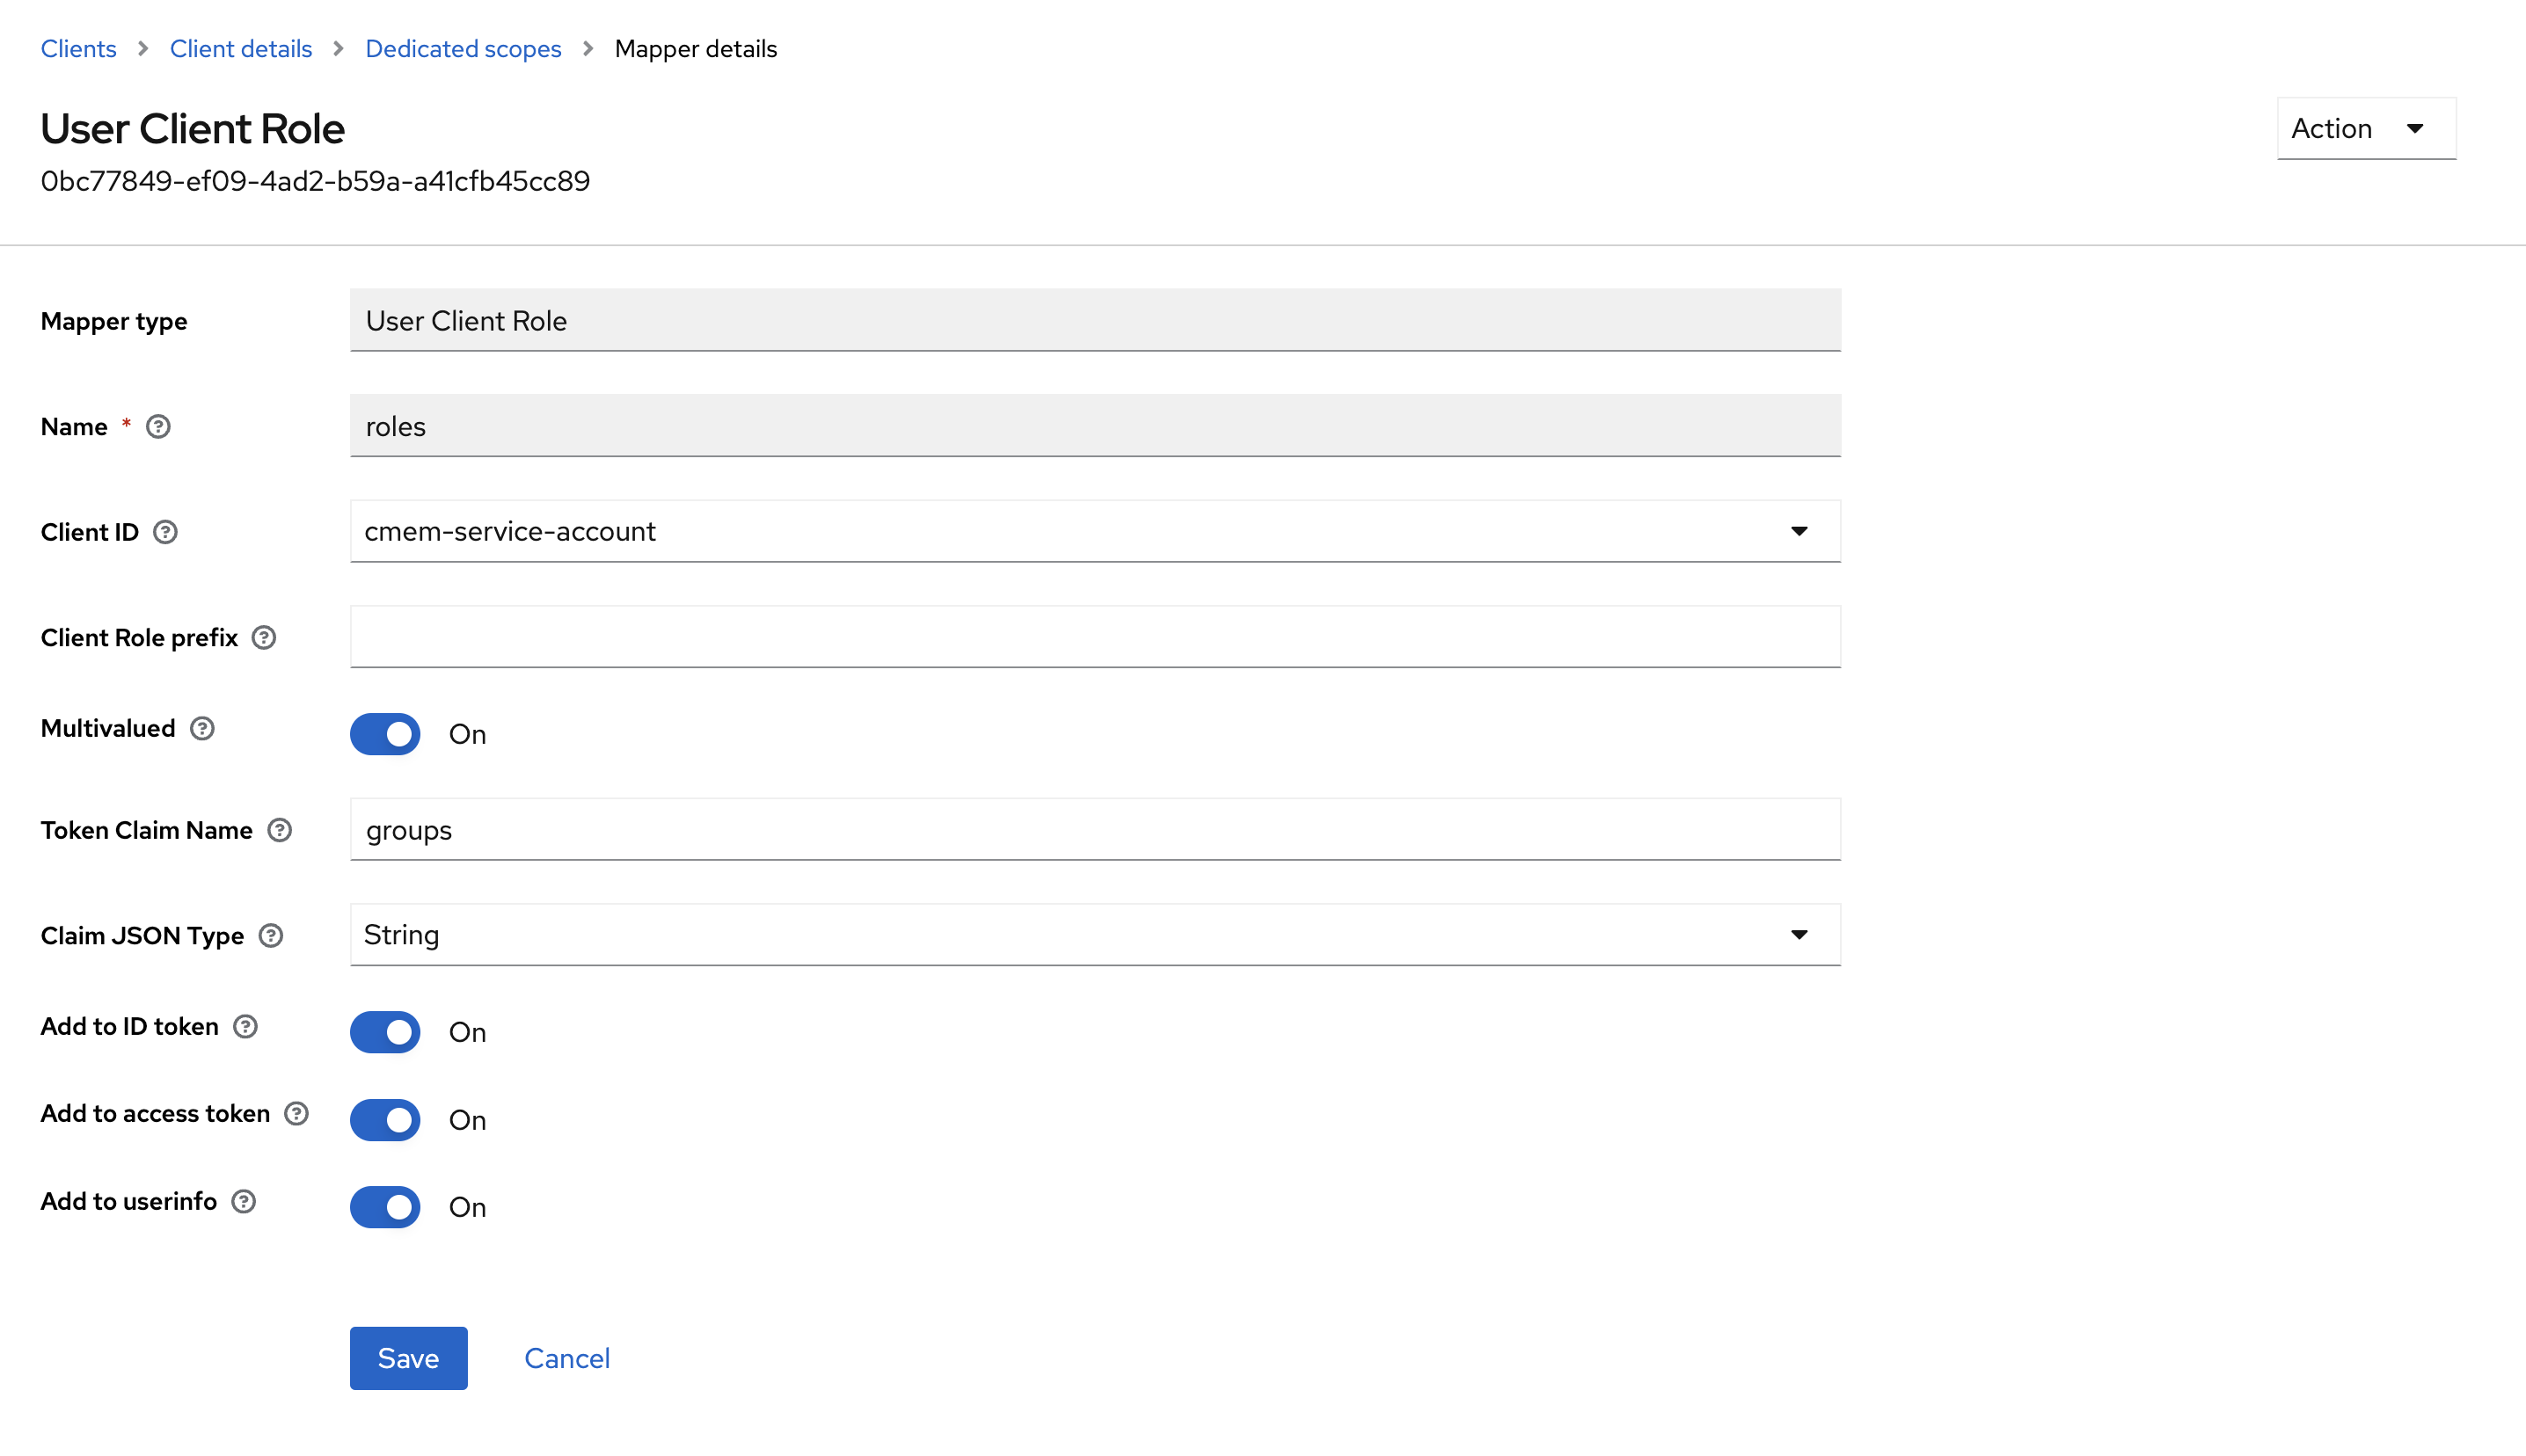
- select Mapper Type
User Client Role- Name
roles - Client ID select the client you are currently configuring from the pull-down-menu (here
cmem-service-account) - Enable Multivalued
- Token Claim Name
groups - Enable Add to ID token
- Enable Add to access token
- Enable Add to user info
- Name
- Save
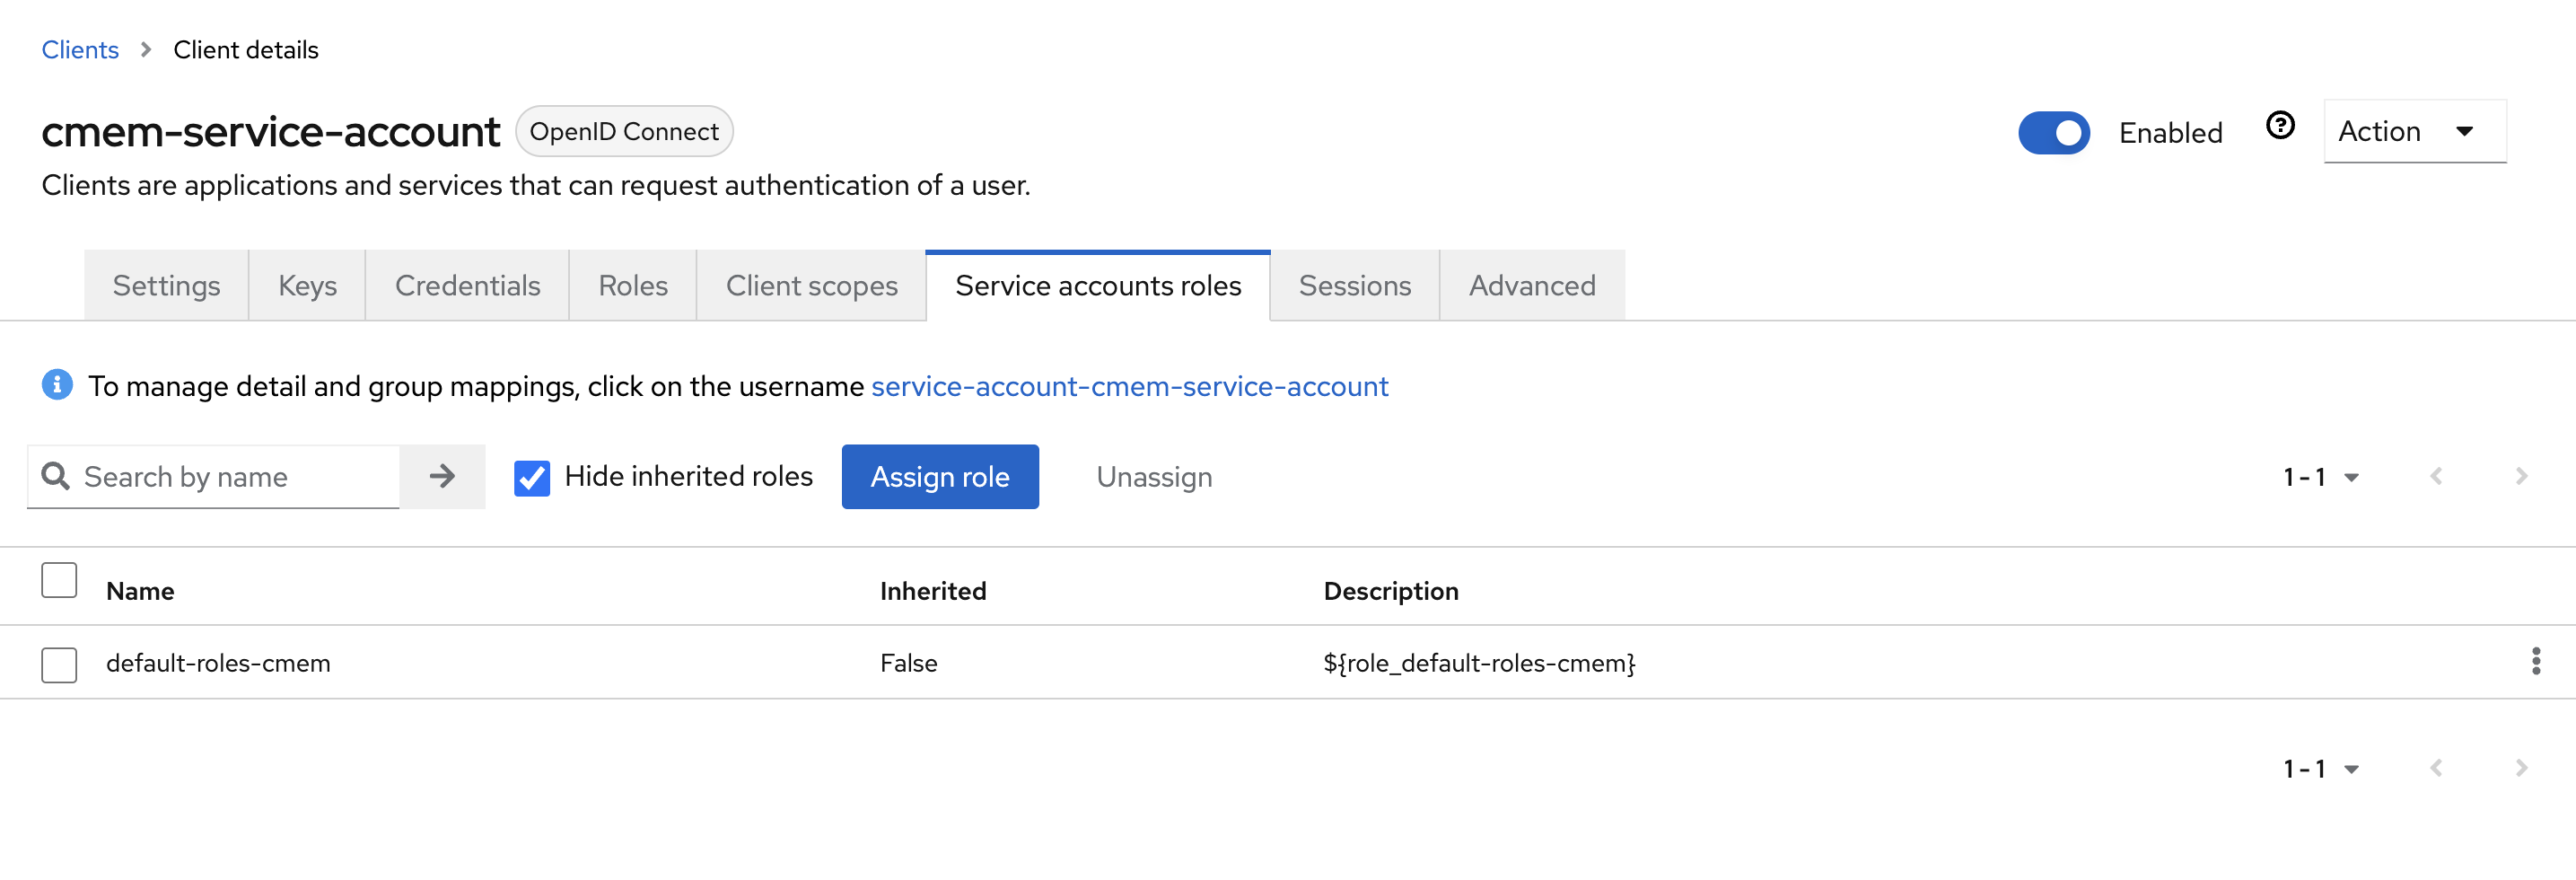
- After Save go back to Client details
- Go to tab Service account roles tab
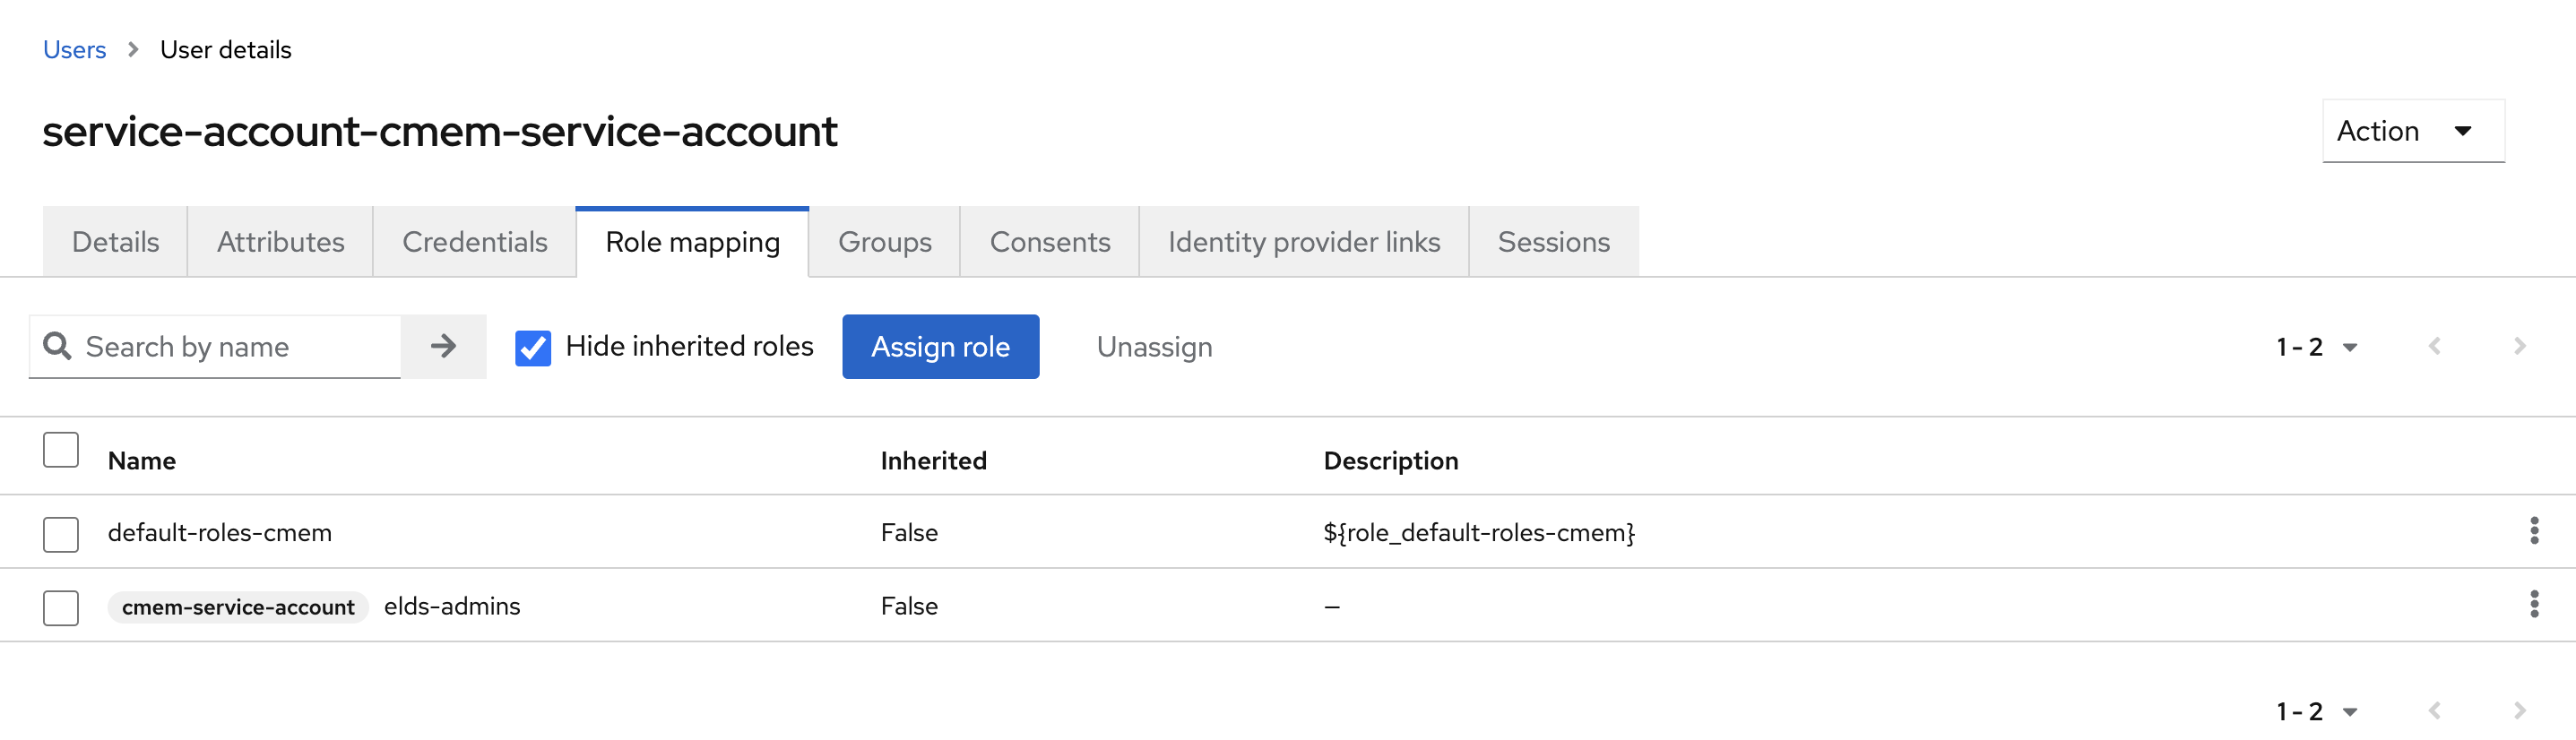
- Select the link in the center To manage detail and group mappings, click on the username service-account-YOUR_CLIENT_ID
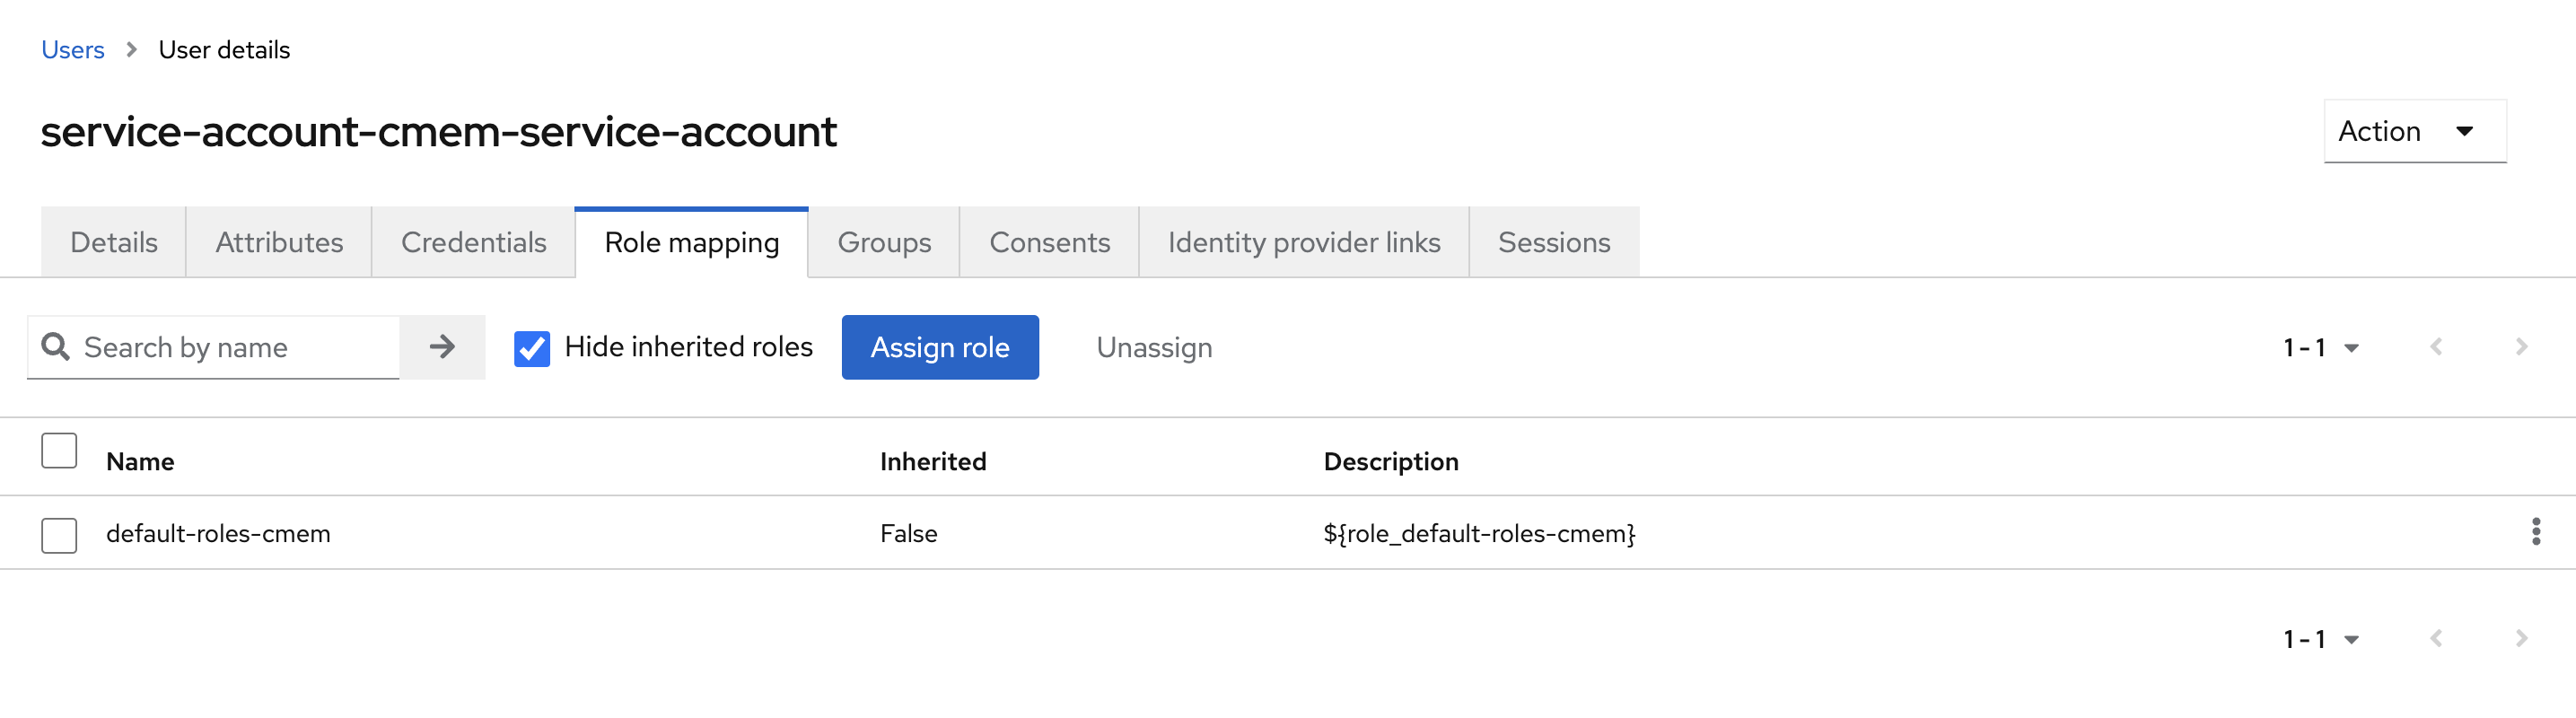
- Go to tab Role mapping and select Assign role
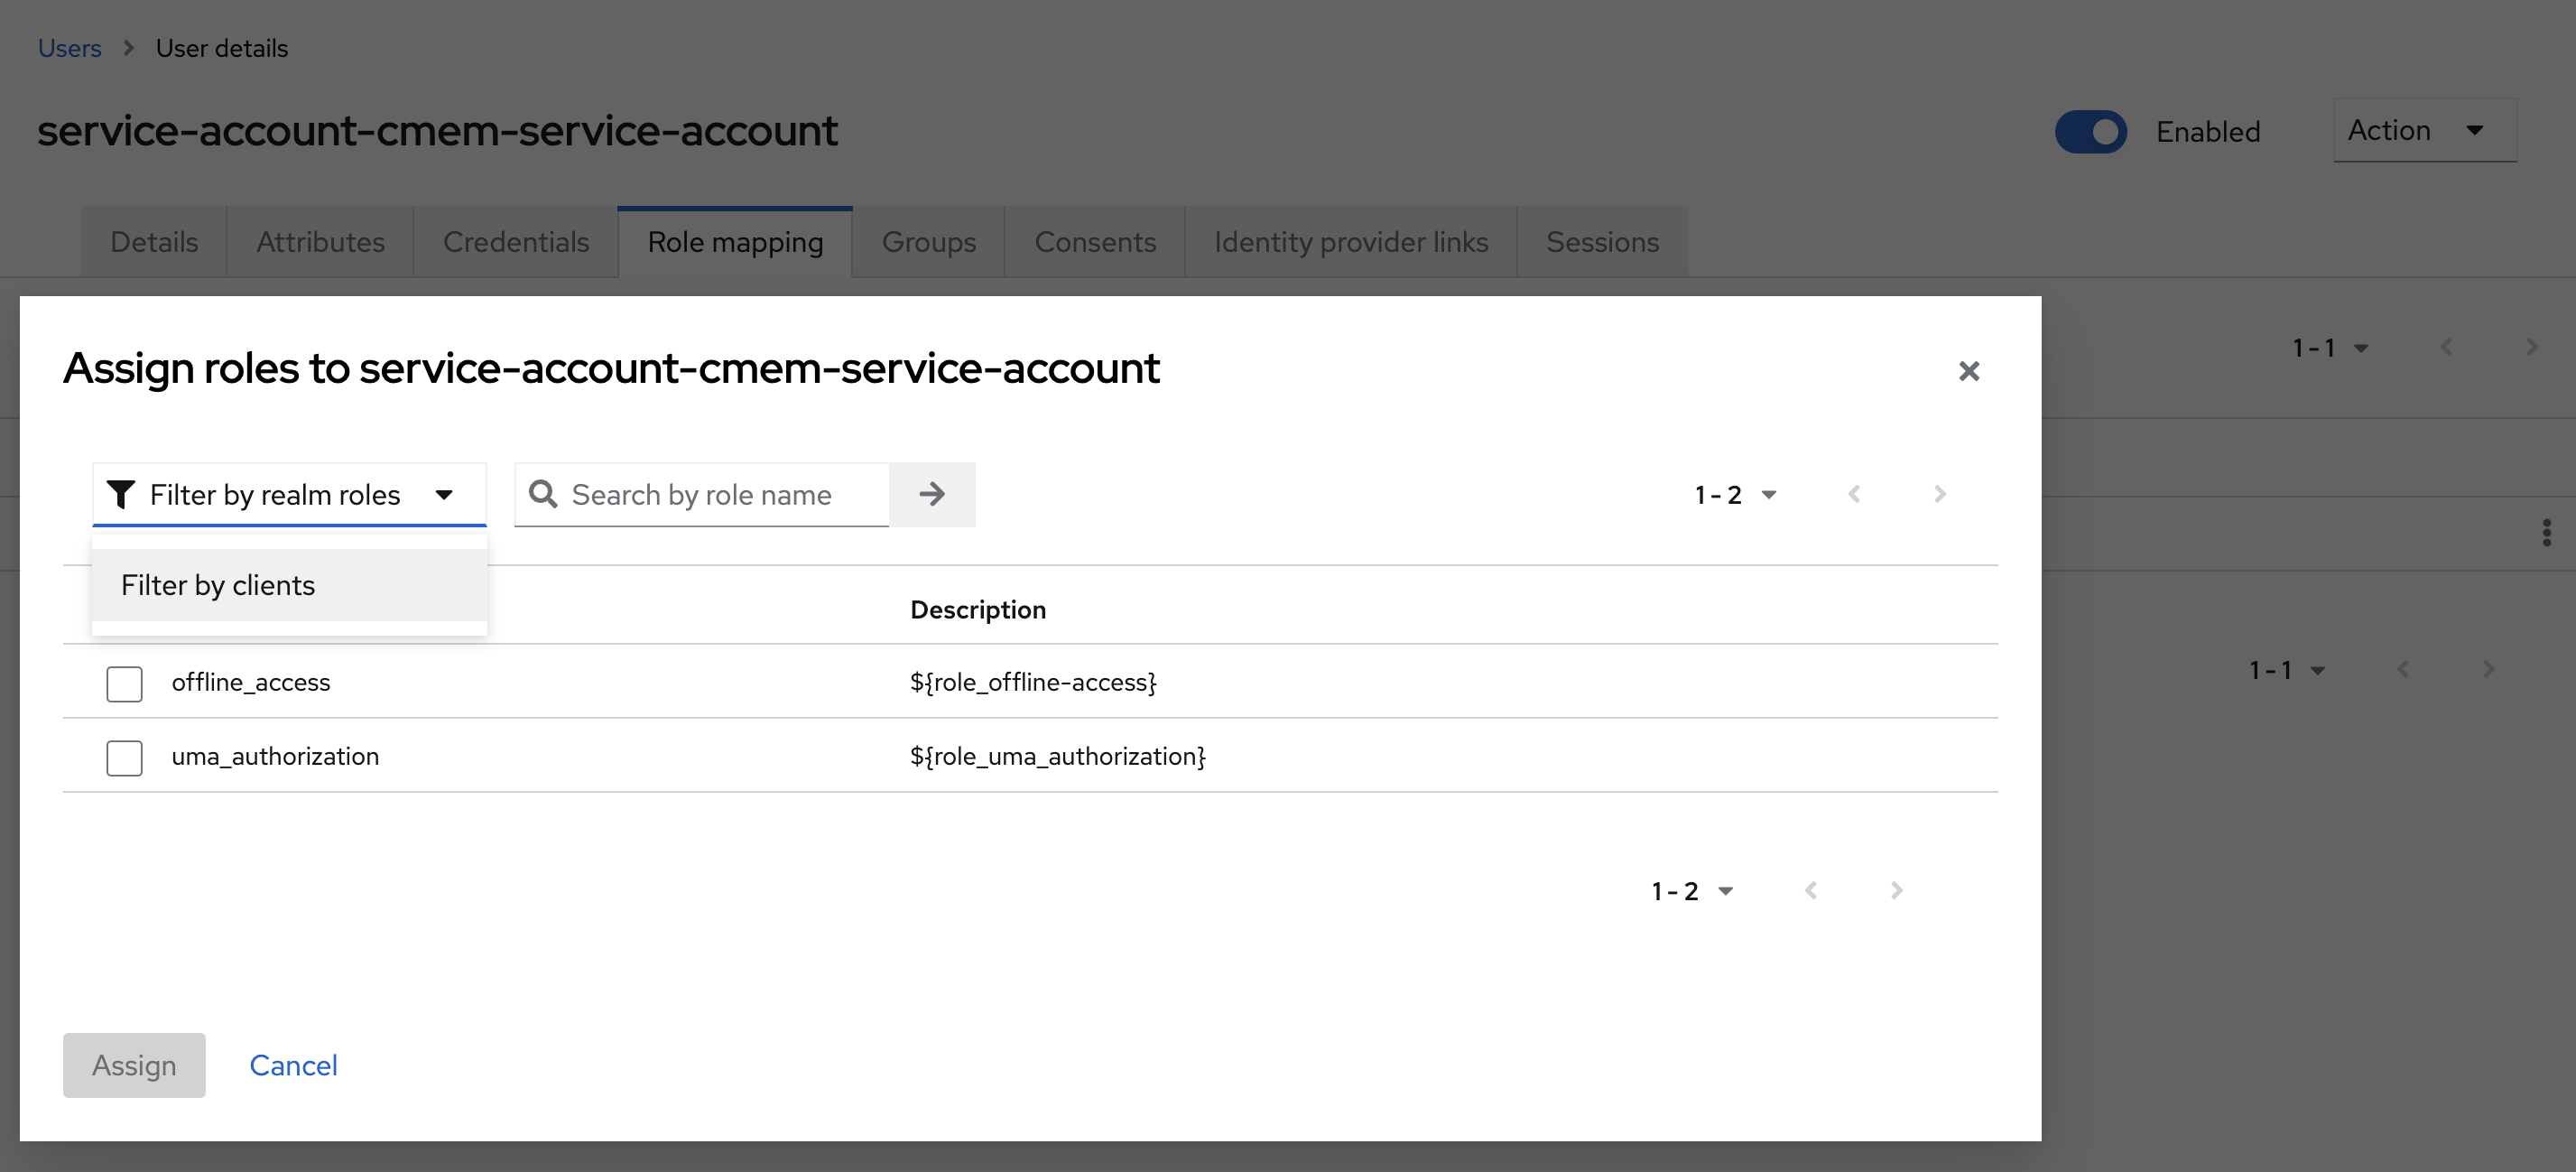
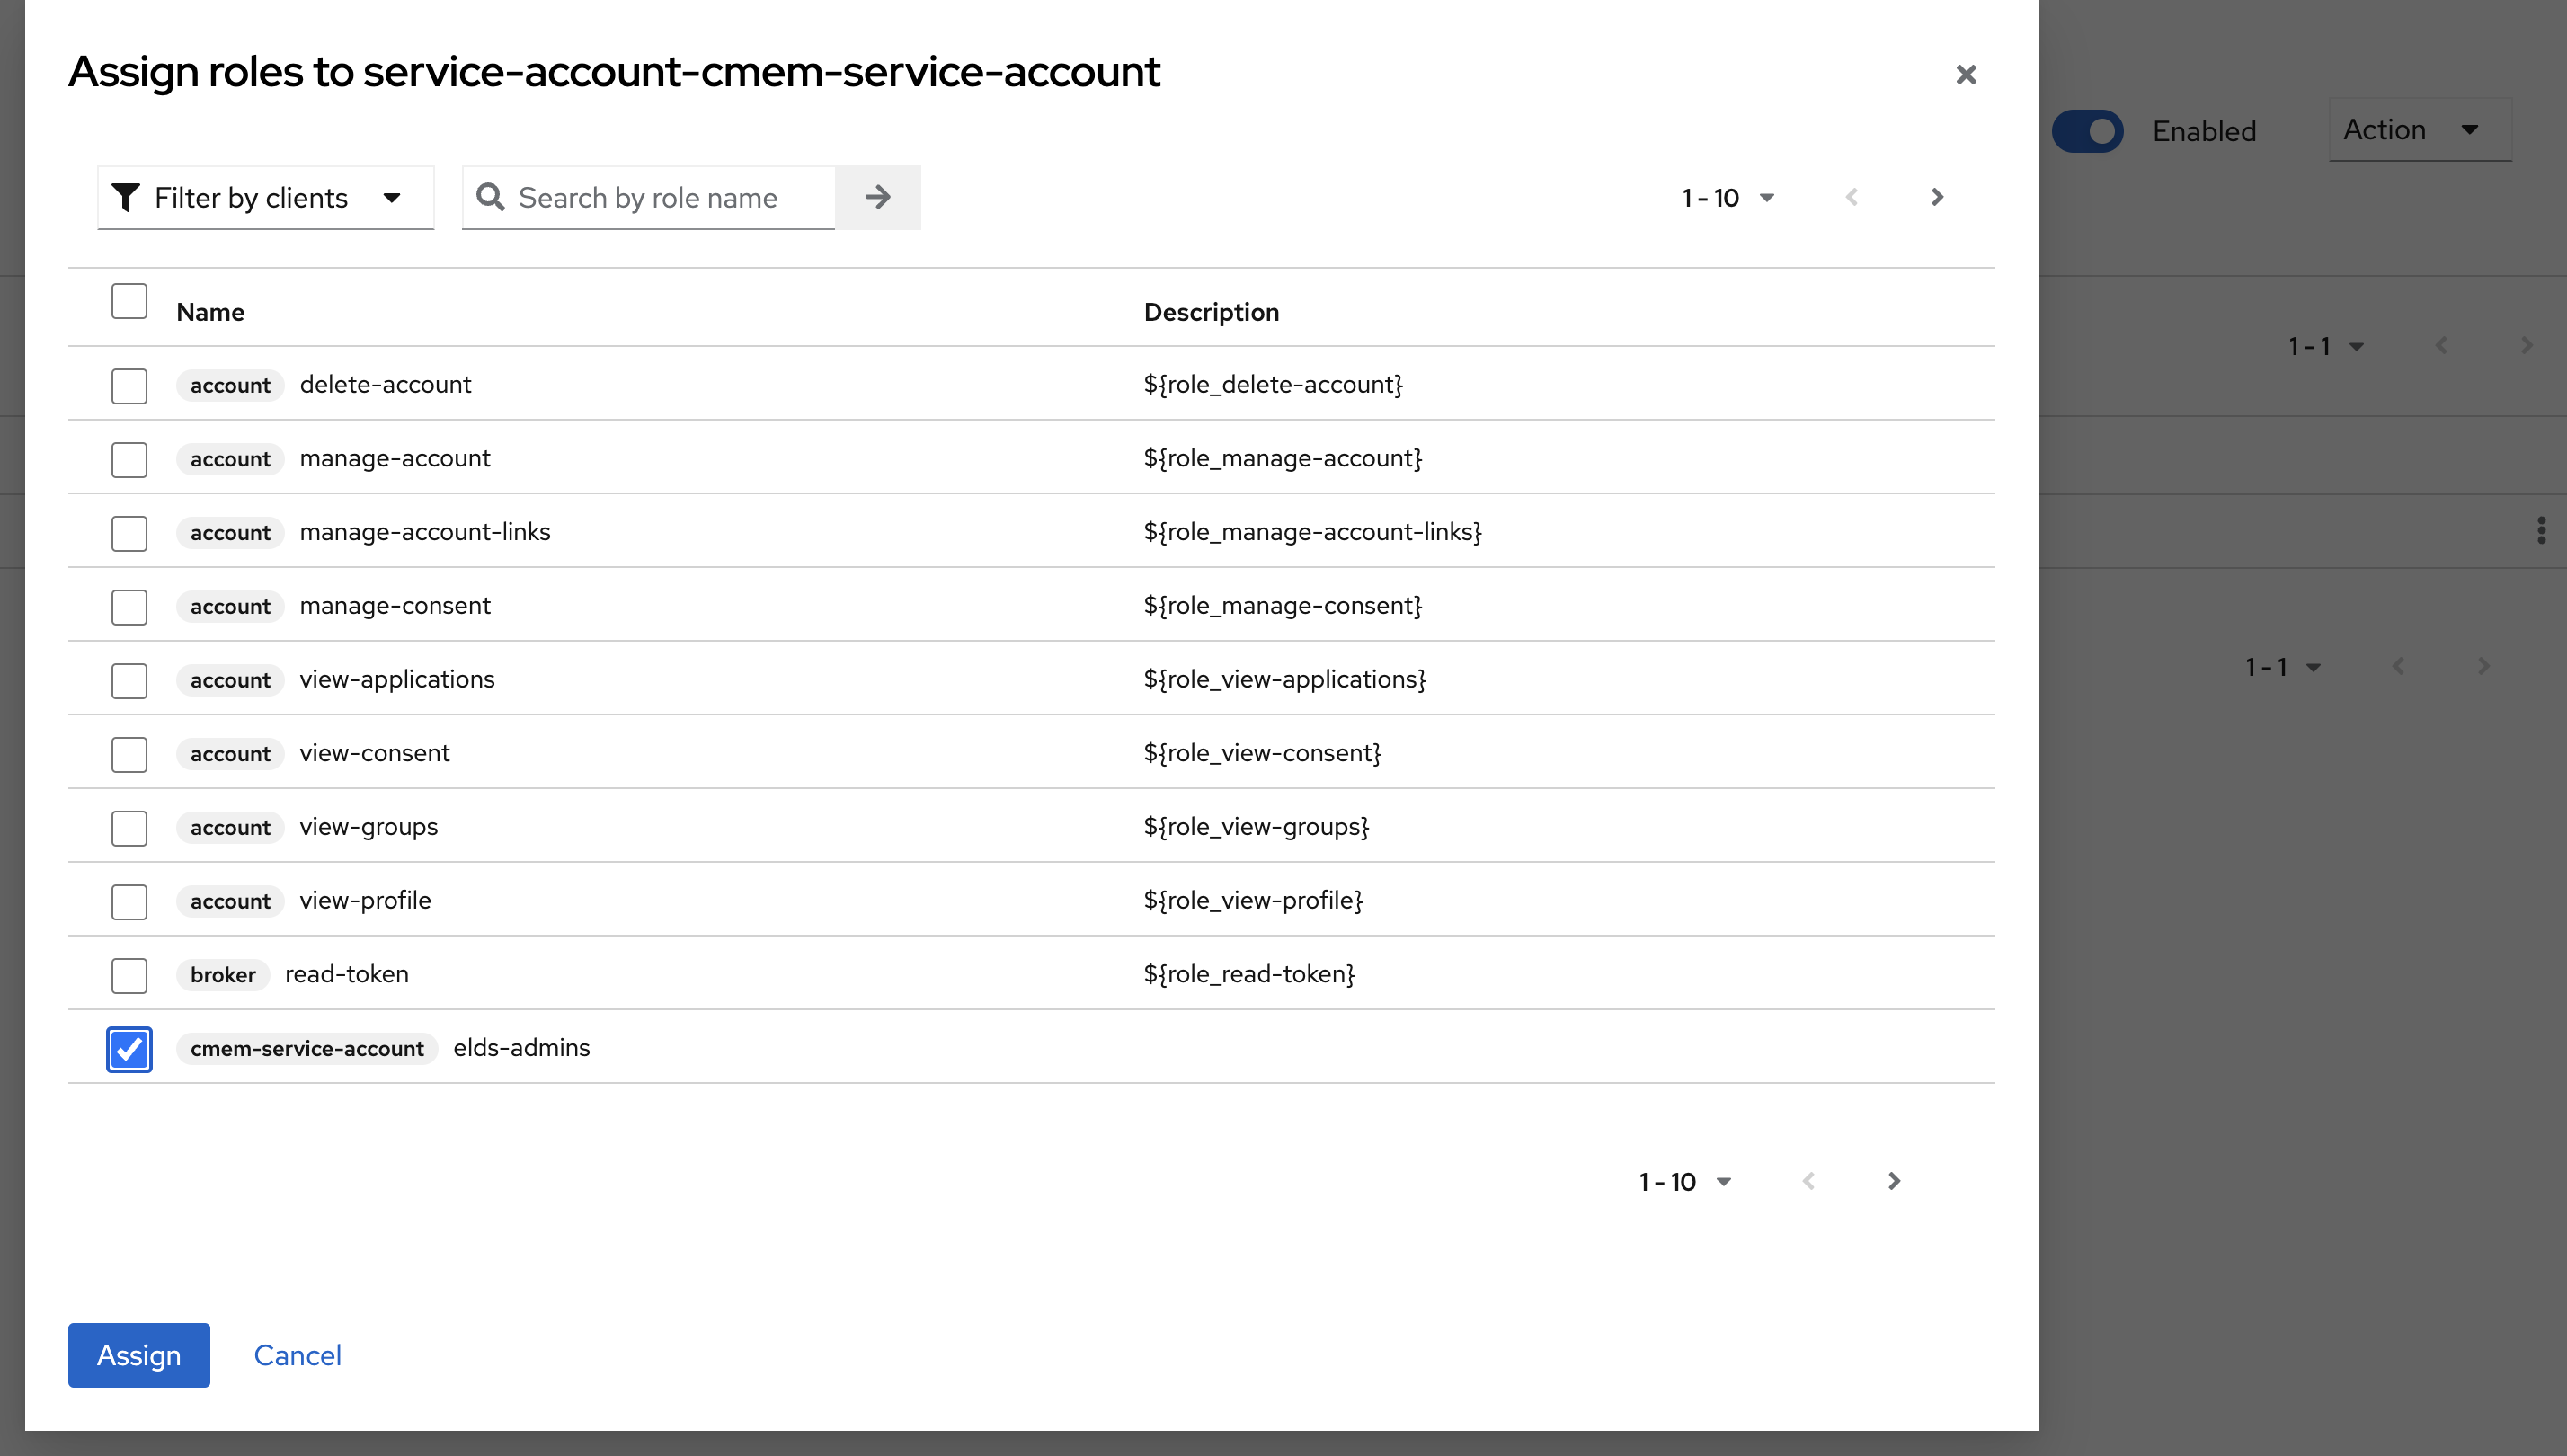
- Change the filter to Filter by clients and select the new Client ID, i.e
cmem-service-account - Click Assign
Corporate Memory configuration after setting up clients¤
- If DataIntegration schedulers are required, configure this client id and secret under the properties
workbench.superuser.clientandworkbench.superuser.clientSecretin DataIntegration’s configuration file or - in docker-compose-orchestration you can edit this in the environment as:
- in helm this value is defined by:
- For cmemc you can configure this with
OAUTH_CLIENT_IDandOAUTH_CLIENT_SECRET.
Groups configuration¤
- Go to Groups and add the following groups:
- These groups are used only to assign them to user accounts (clients have roles-to-group mappers).
elds-admins- Any groups provided by your user management system (e.g. LDAP) that must be recognized/mapped by Keycloak
- In Corporate Memory docker orchestration,
local-users,local-admins
Users configuration¤
- This applies to the Docker Orchestration, for other setups consult the Keycloak manual.
- Go to
Users - Add the following users and assign their groups respectively (for each user go to credentials, add password and disable
Temporary) user:user- groups:
local-users
- groups:
admin:admin- groups:
local-admin
- groups: