Evaluate Jinja Template and Send an Email Message¤
Introduction¤
In this tutorial we dynamically produce text with a Jinja template and send it in an email after the execution of a workflow. The email message contains information retrieved from a graph. The graph dataset is attached to the email as an N-triples file.
Tip
The complete tutorial is available as a project file. You can import the projects:
- by using the web interface (Create → Project → Import project file) or
-
by using the command line interface
Warning
In the imported project, enter valid email credentials in the send eMail task to successfully execute the included workflow (see §10.3).
The following material is used in this tutorial:
-
RDF graph containing company information regarding employees, products and services: company.ttl
<http://ld.company.org/prod-instances/hw-A181-1118563> a prod:Hardware ;
rdfs:label "A181-1118563 - Compensator Switch" ;
prod:compatibleProduct <http://ld.company.org/prod-instances/hw-M558-2275045> ;
prod:depth_mm 14 ;
prod:hasCategory <http://ld.company.org/prod-instances/prod-cat-Switch> ;
prod:hasProductManager <http://ld.company.org/prod-instances/empl-Adolfina.Hoch%40company.org> ;
prod:height_mm 32 ;
prod:id "A181-1118563" ;
prod:name "Compensator Switch" ;
prod:price <http://ld.company.org/prod-instances/price-hw-A181-1118563-EUR> ;
prod:weight_g 5 ;
prod:width_mm 22 .
...
The tutorial consists of the following steps, which are described in detail below.
1 Upload the Company Graph¤
Info
The vocabulary contains the classes and properties needed to map the source data into entities in the Knowledge Graph.
-
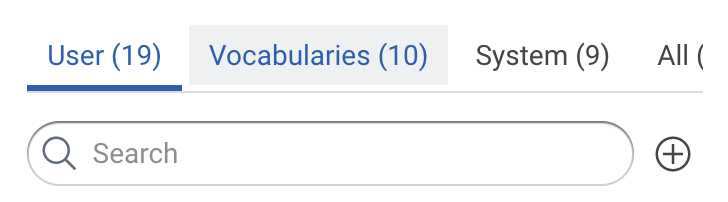
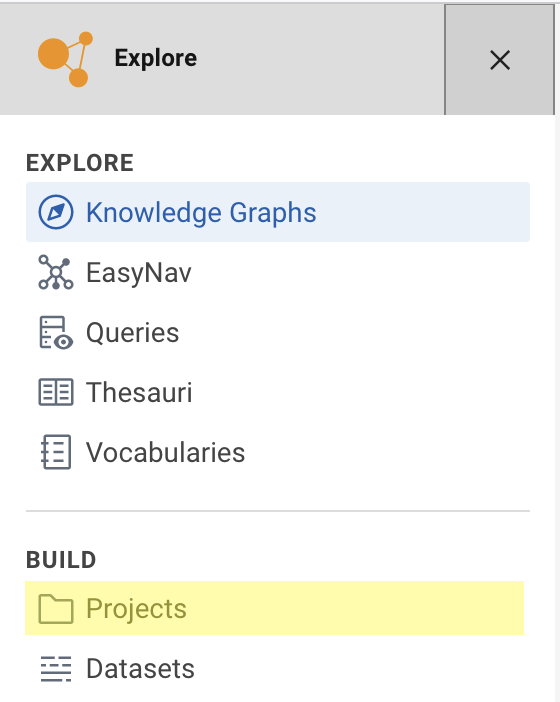
In Corporate Memory, click Knowledge Graphs in the navigation under Explore on the left side of the page.

-
Click on the + symbol next to the search field on the top left side of the page.
-
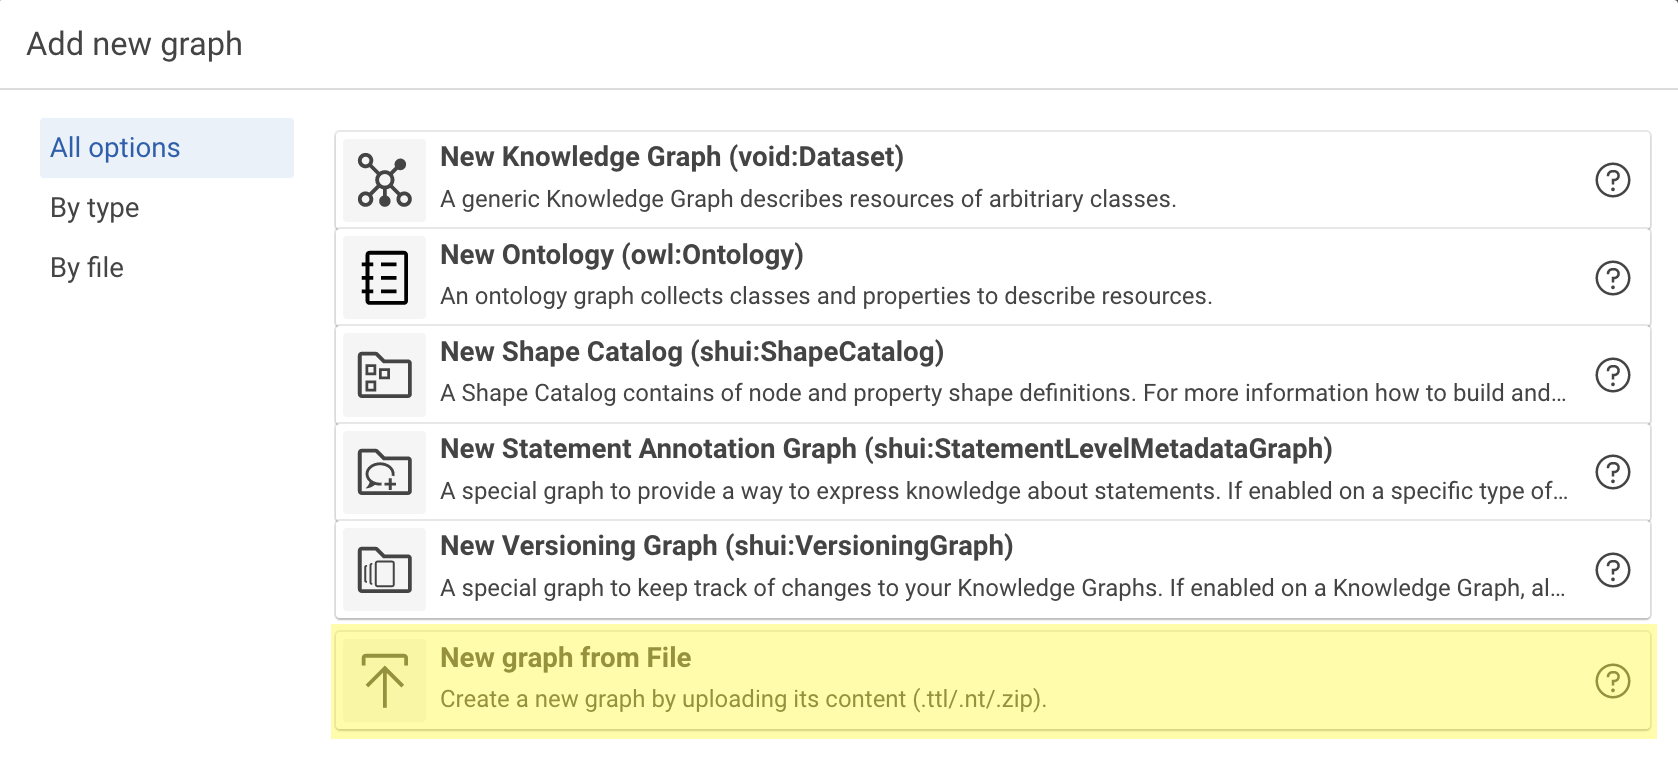
In the dialog box, click New graph from File.
-
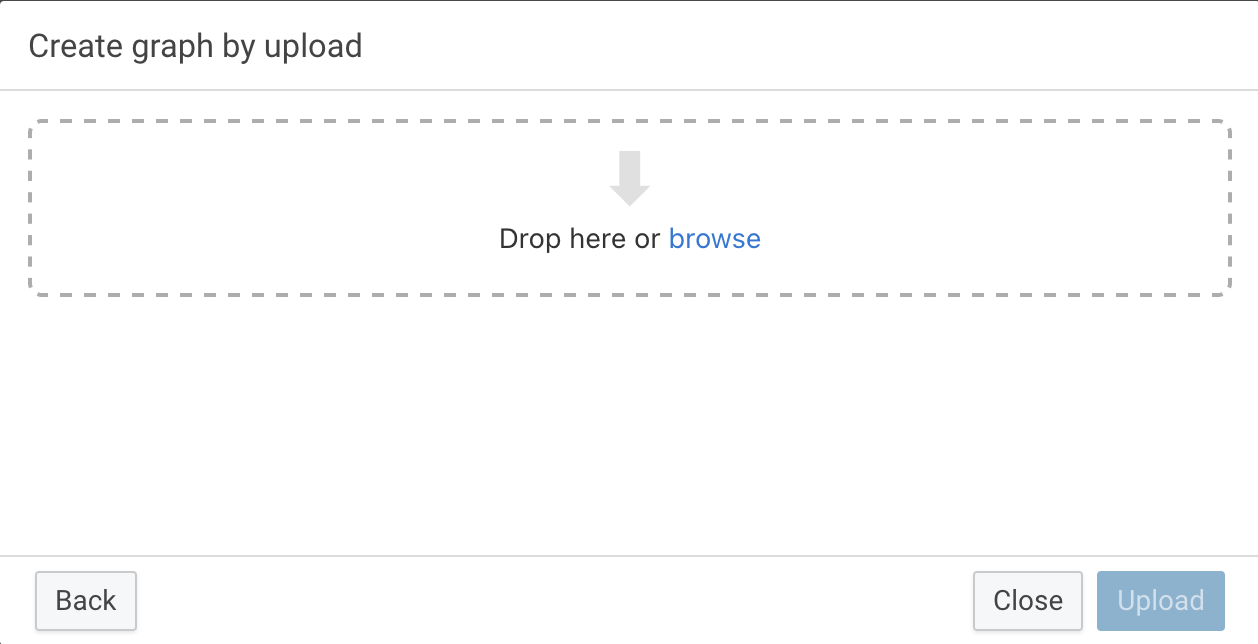
Drop the file company.ttl onto the dialog box, or click on browse to navigate to the file.
-
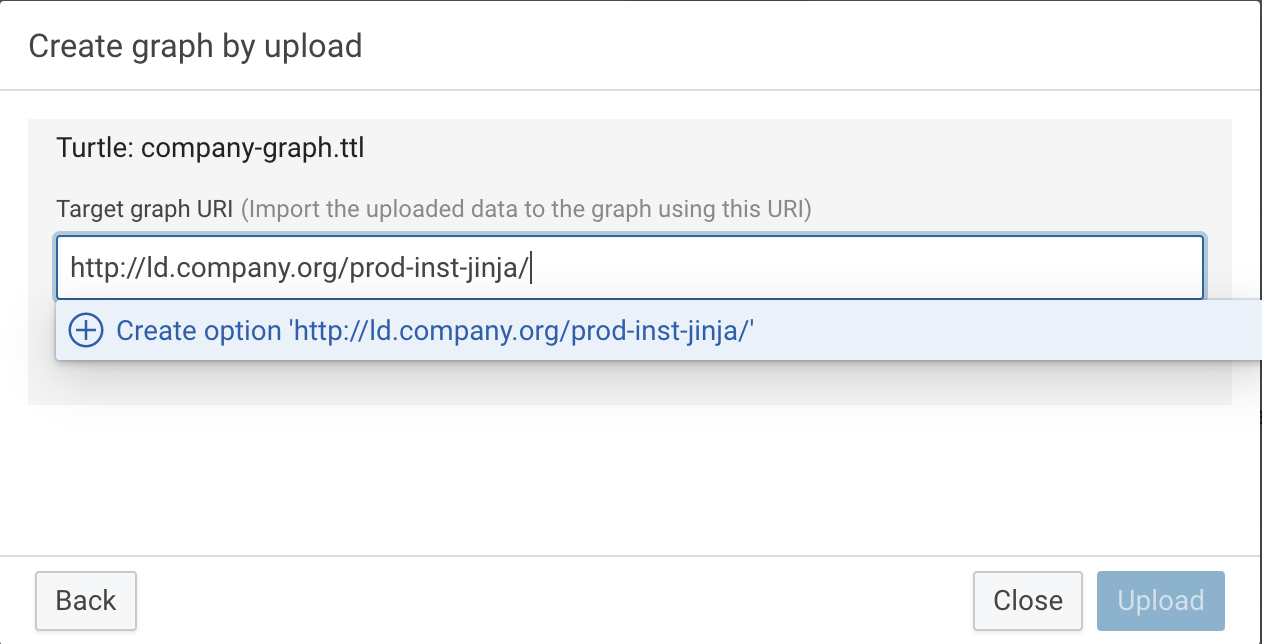
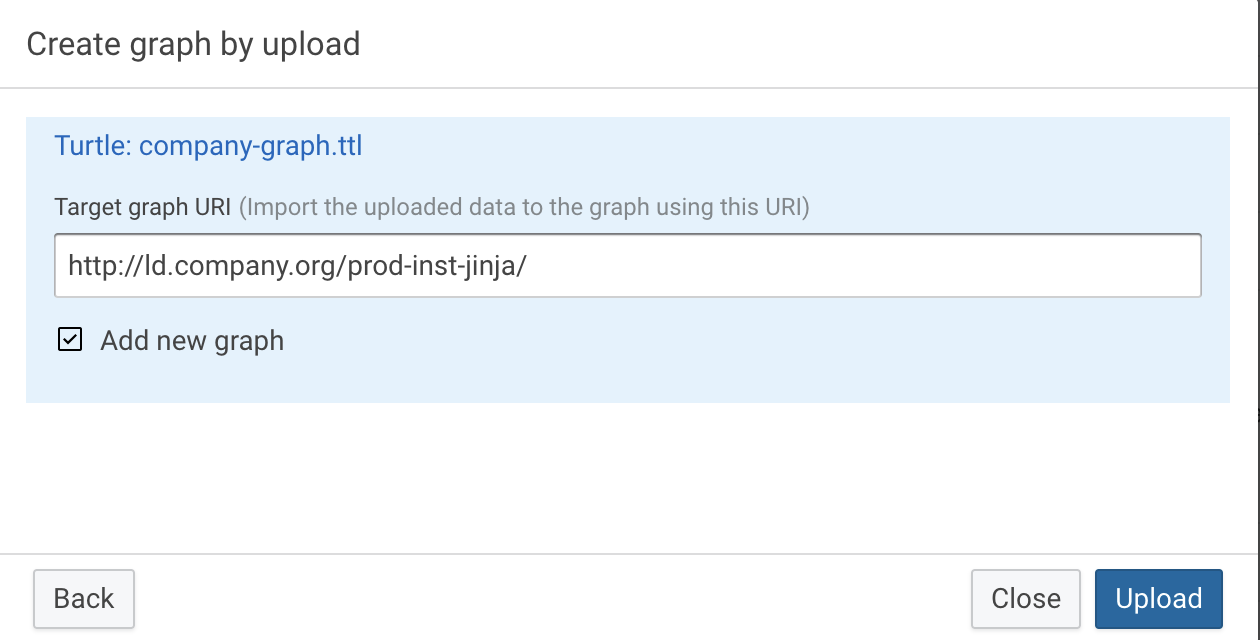
In the Target graph URI field, enter http://ld.company.org/prod-inst-jinja/ and click Create option ‘http://ld.company.org/prod-inst-jinja/‘
-
Tick the Add new graph checkbox and click Upload.
2 Create a Project¤
-
Click Projects in the navigation under Build on the left side of the page.
-
Click Create at the top of the page.
-
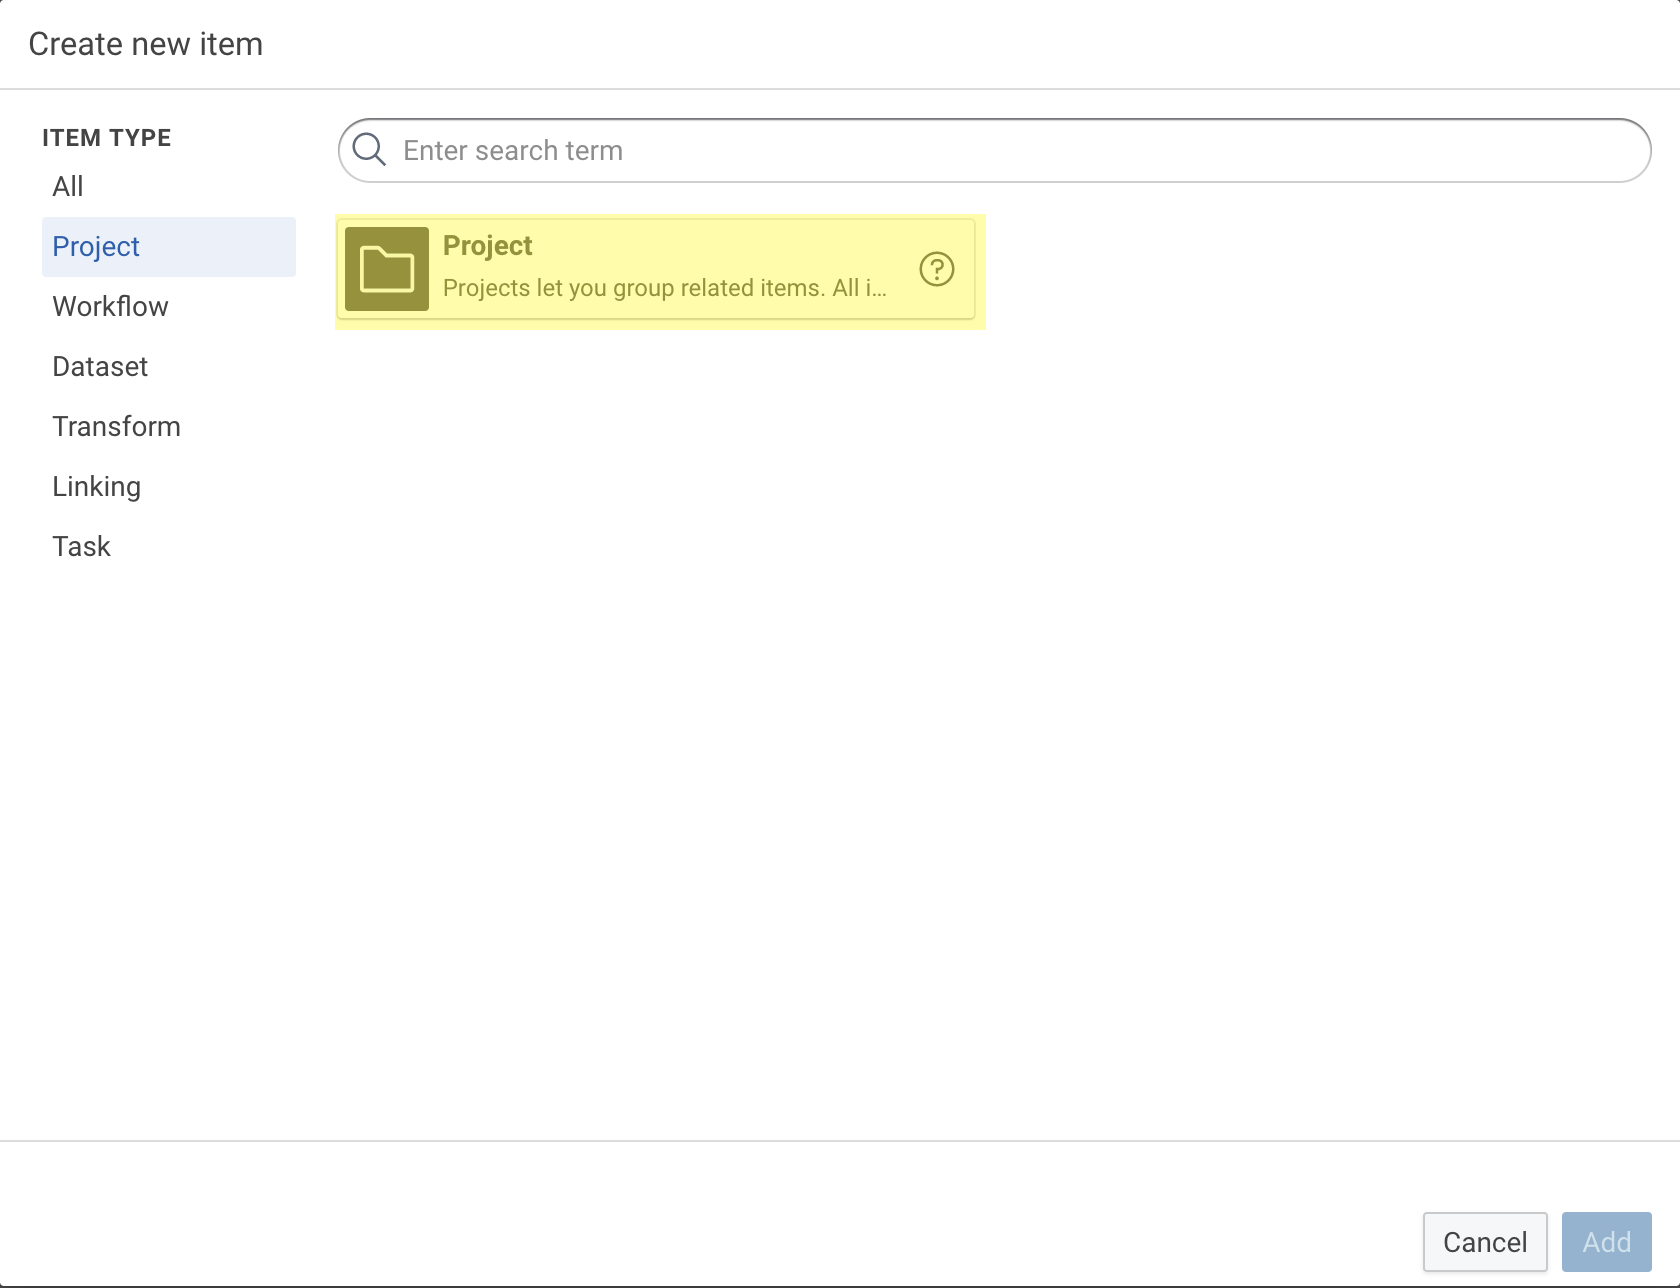
Select Project and click Add.
-
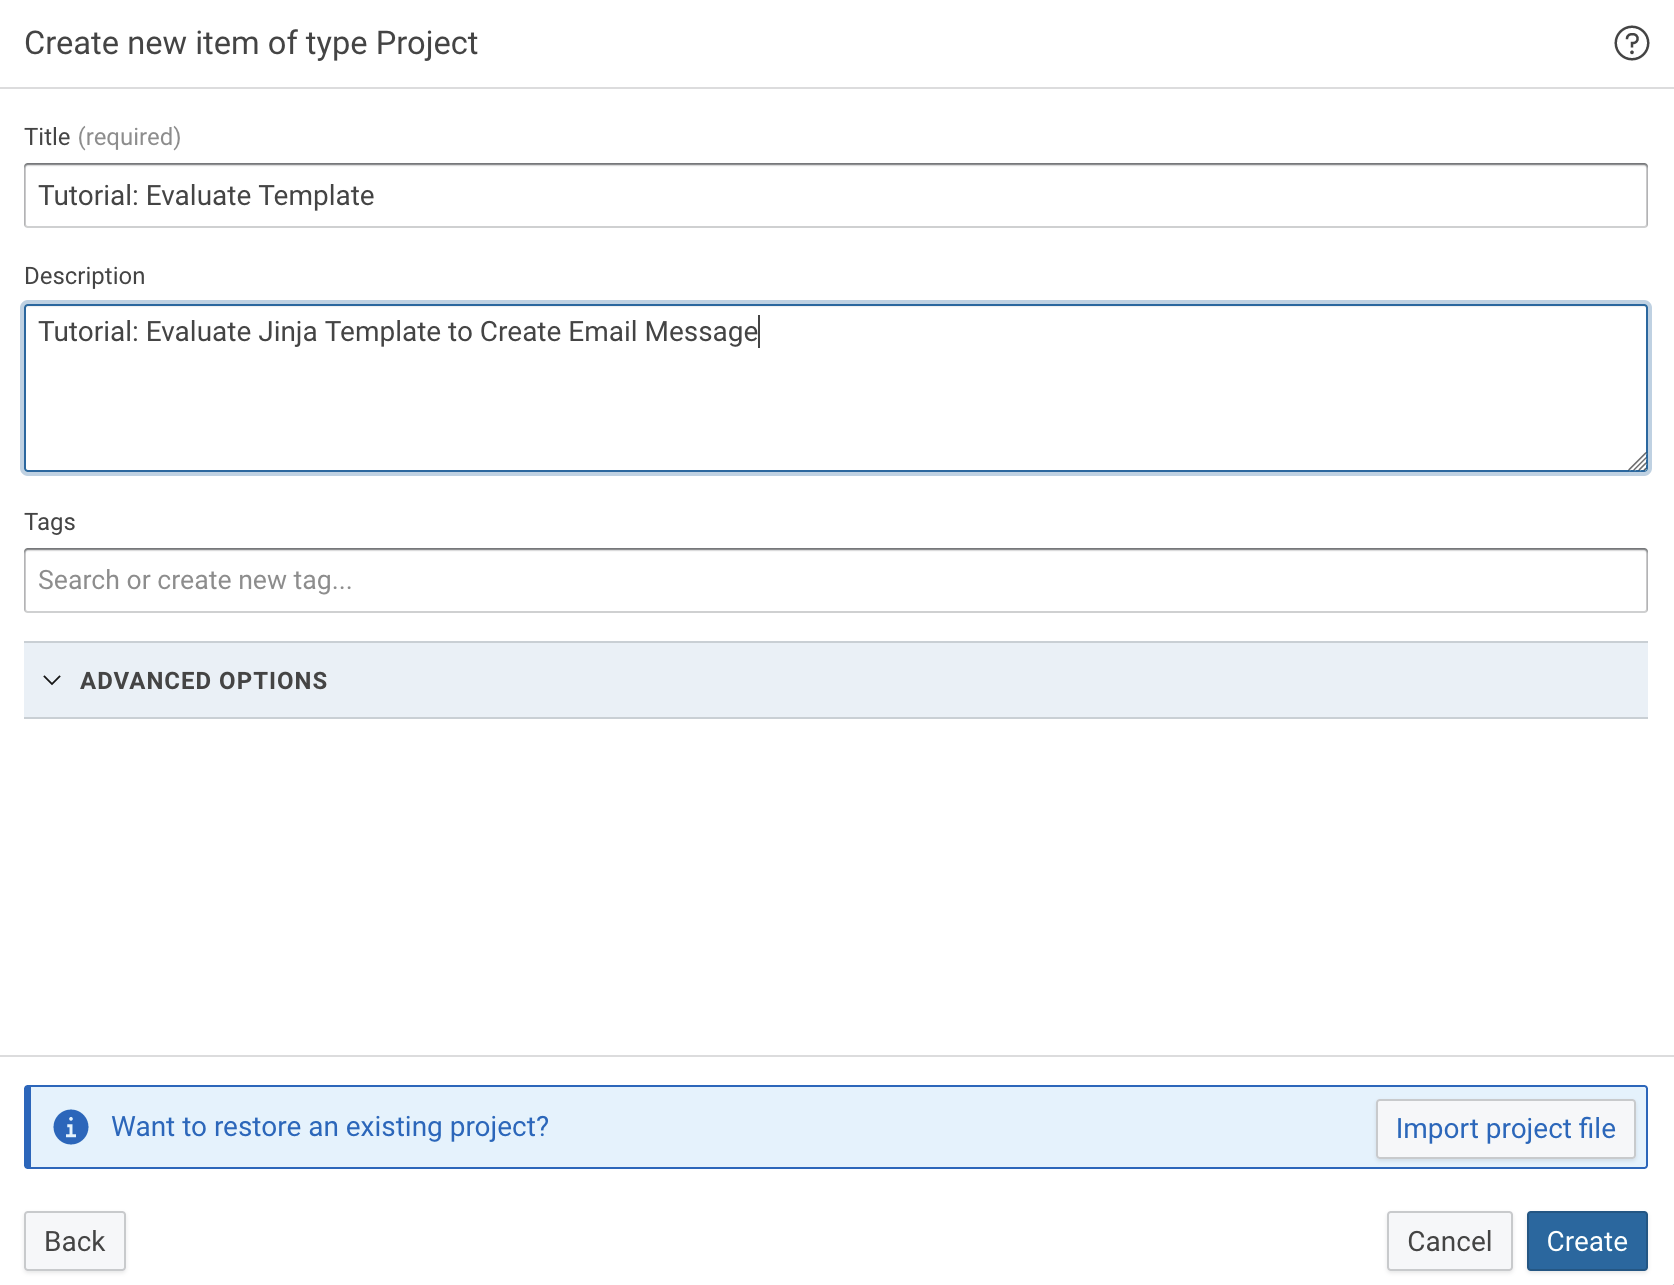
Fill in the required details (Title) and click Create.
3 Create a Knowledge Graph Dataset¤
Info
The Knowledge graph dataset holds the Company graph we uploaded earlier.
-
Click Create at the top of the page.

-
Select Knowledge Graph and click Add.
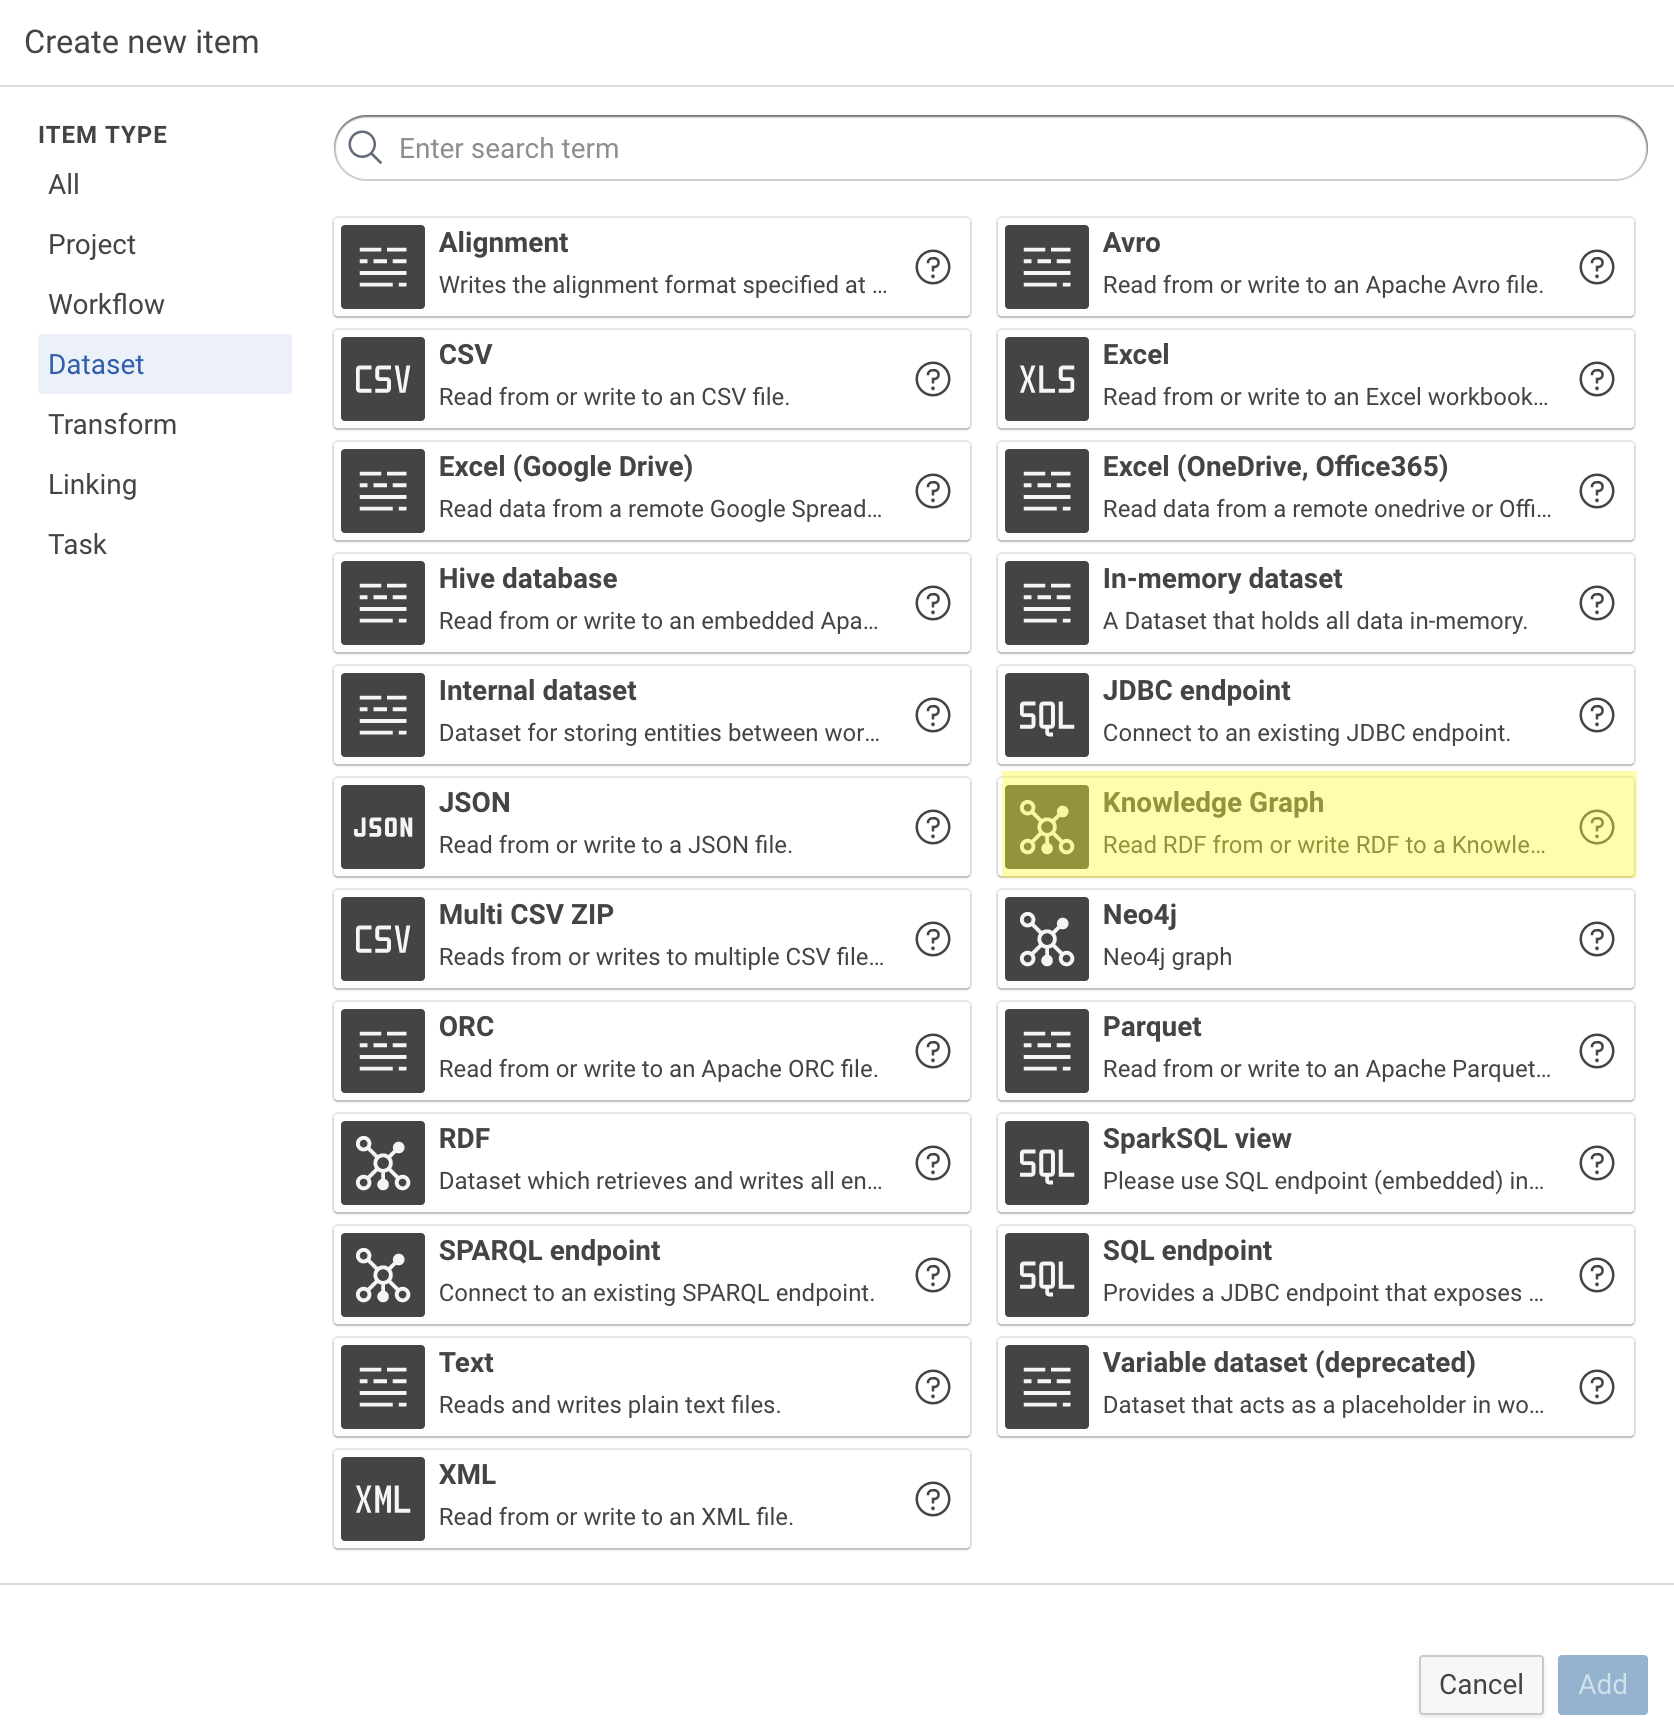
-
Fill in the required details, such as Label and, for Graph, the IRI of the company graph http://ld.company.org/prod-inst-jinja/. When finished, click Create.

4 Create a SPARQL Select Query Task Item¤
Info
The SPARQL select query is used to retrieve the data from the company graph that we want to include in our email. It counts the instances of employees, managers, departments, products, and products that have other compatible products in the database.
-
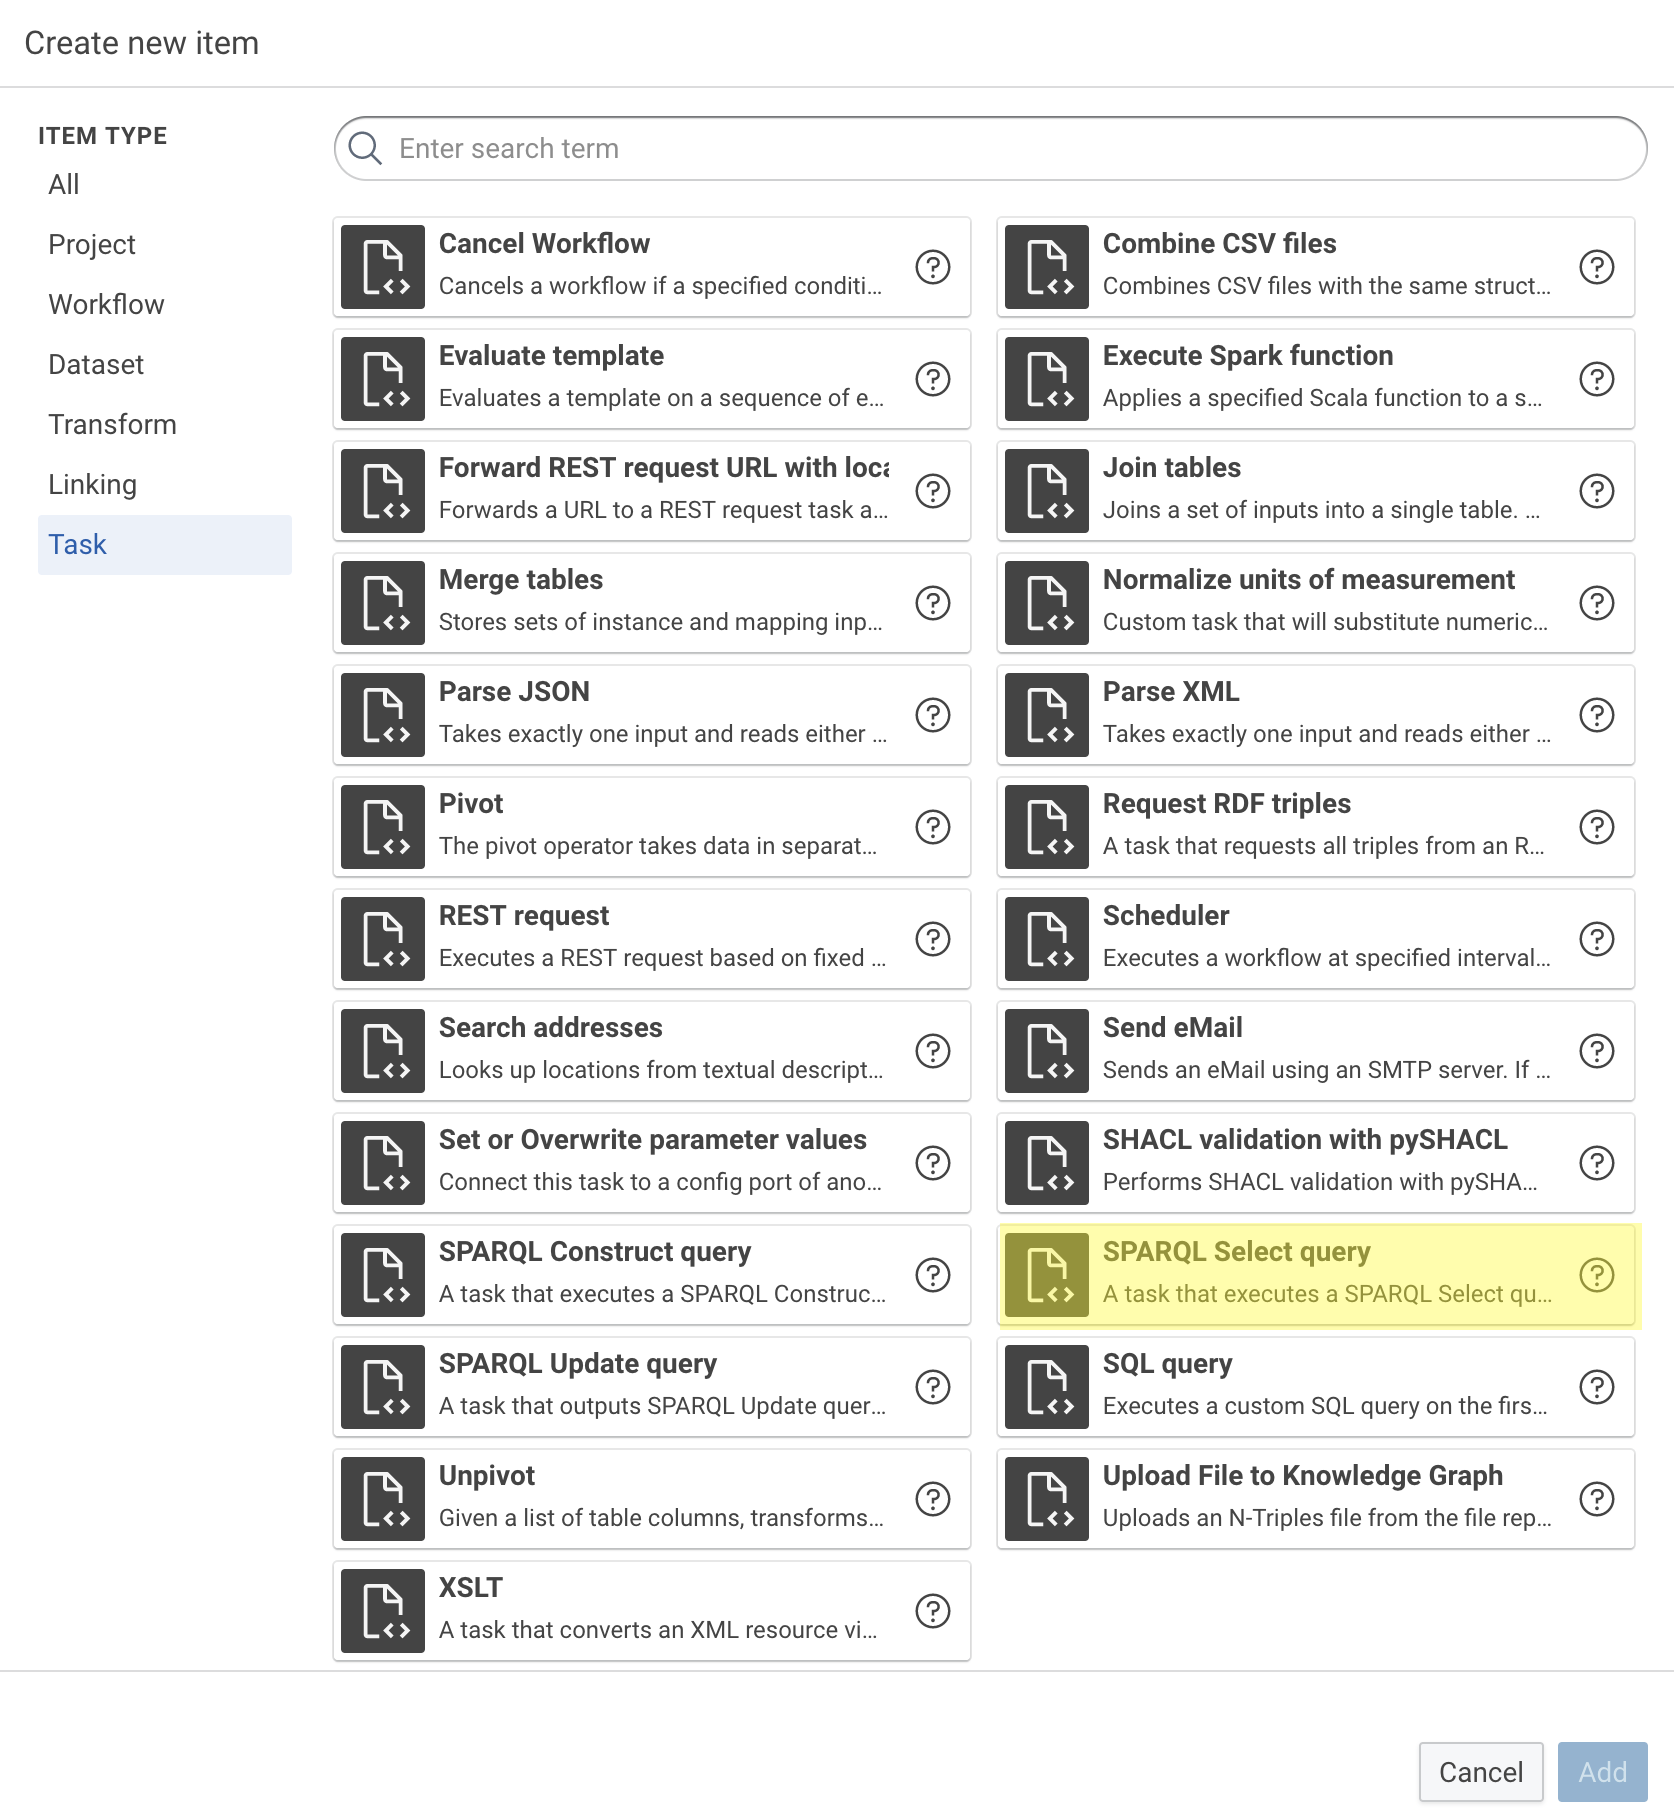
Click Create at the top of the page.
-
Select SPARQL Select query and click Add.
-
Fill in the required details such as Title and Description, then copy the above query and paste in the Select query field. When finished, click Create.
PREFIX pv: <http://ld.company.org/prod-vocab/>

SELECT ?employees
    ?managers
    ?departments
    ?products
    ?product_compatibility
    ?currentDateTime
FROM <http://ld.company.org/prod-inst-jinja/>
WHERE {
    { SELECT ( COUNT( DISTINCT ?employee ) AS ?employees ) {
        ?employee a pv:Employee }
    }
    { SELECT ( COUNT( DISTINCT ?manager ) AS ?managers ) {
        ?manager a pv:Manager }
    }
    { SELECT ( COUNT( DISTINCT ?department ) AS ?departments ) {
        ?department a pv:Department }
    }
    { SELECT ( COUNT( DISTINCT ?product_) AS ?products ) {
        ?product_ a pv:Hardware }
    }
    { SELECT ( COUNT( DISTINCT ?comp_product_ ) AS ?product_compatibility ) {
        ?comp_product_  pv:compatibleProduct ?prod }
    }
    BIND( now() AS ?currentDateTime )
}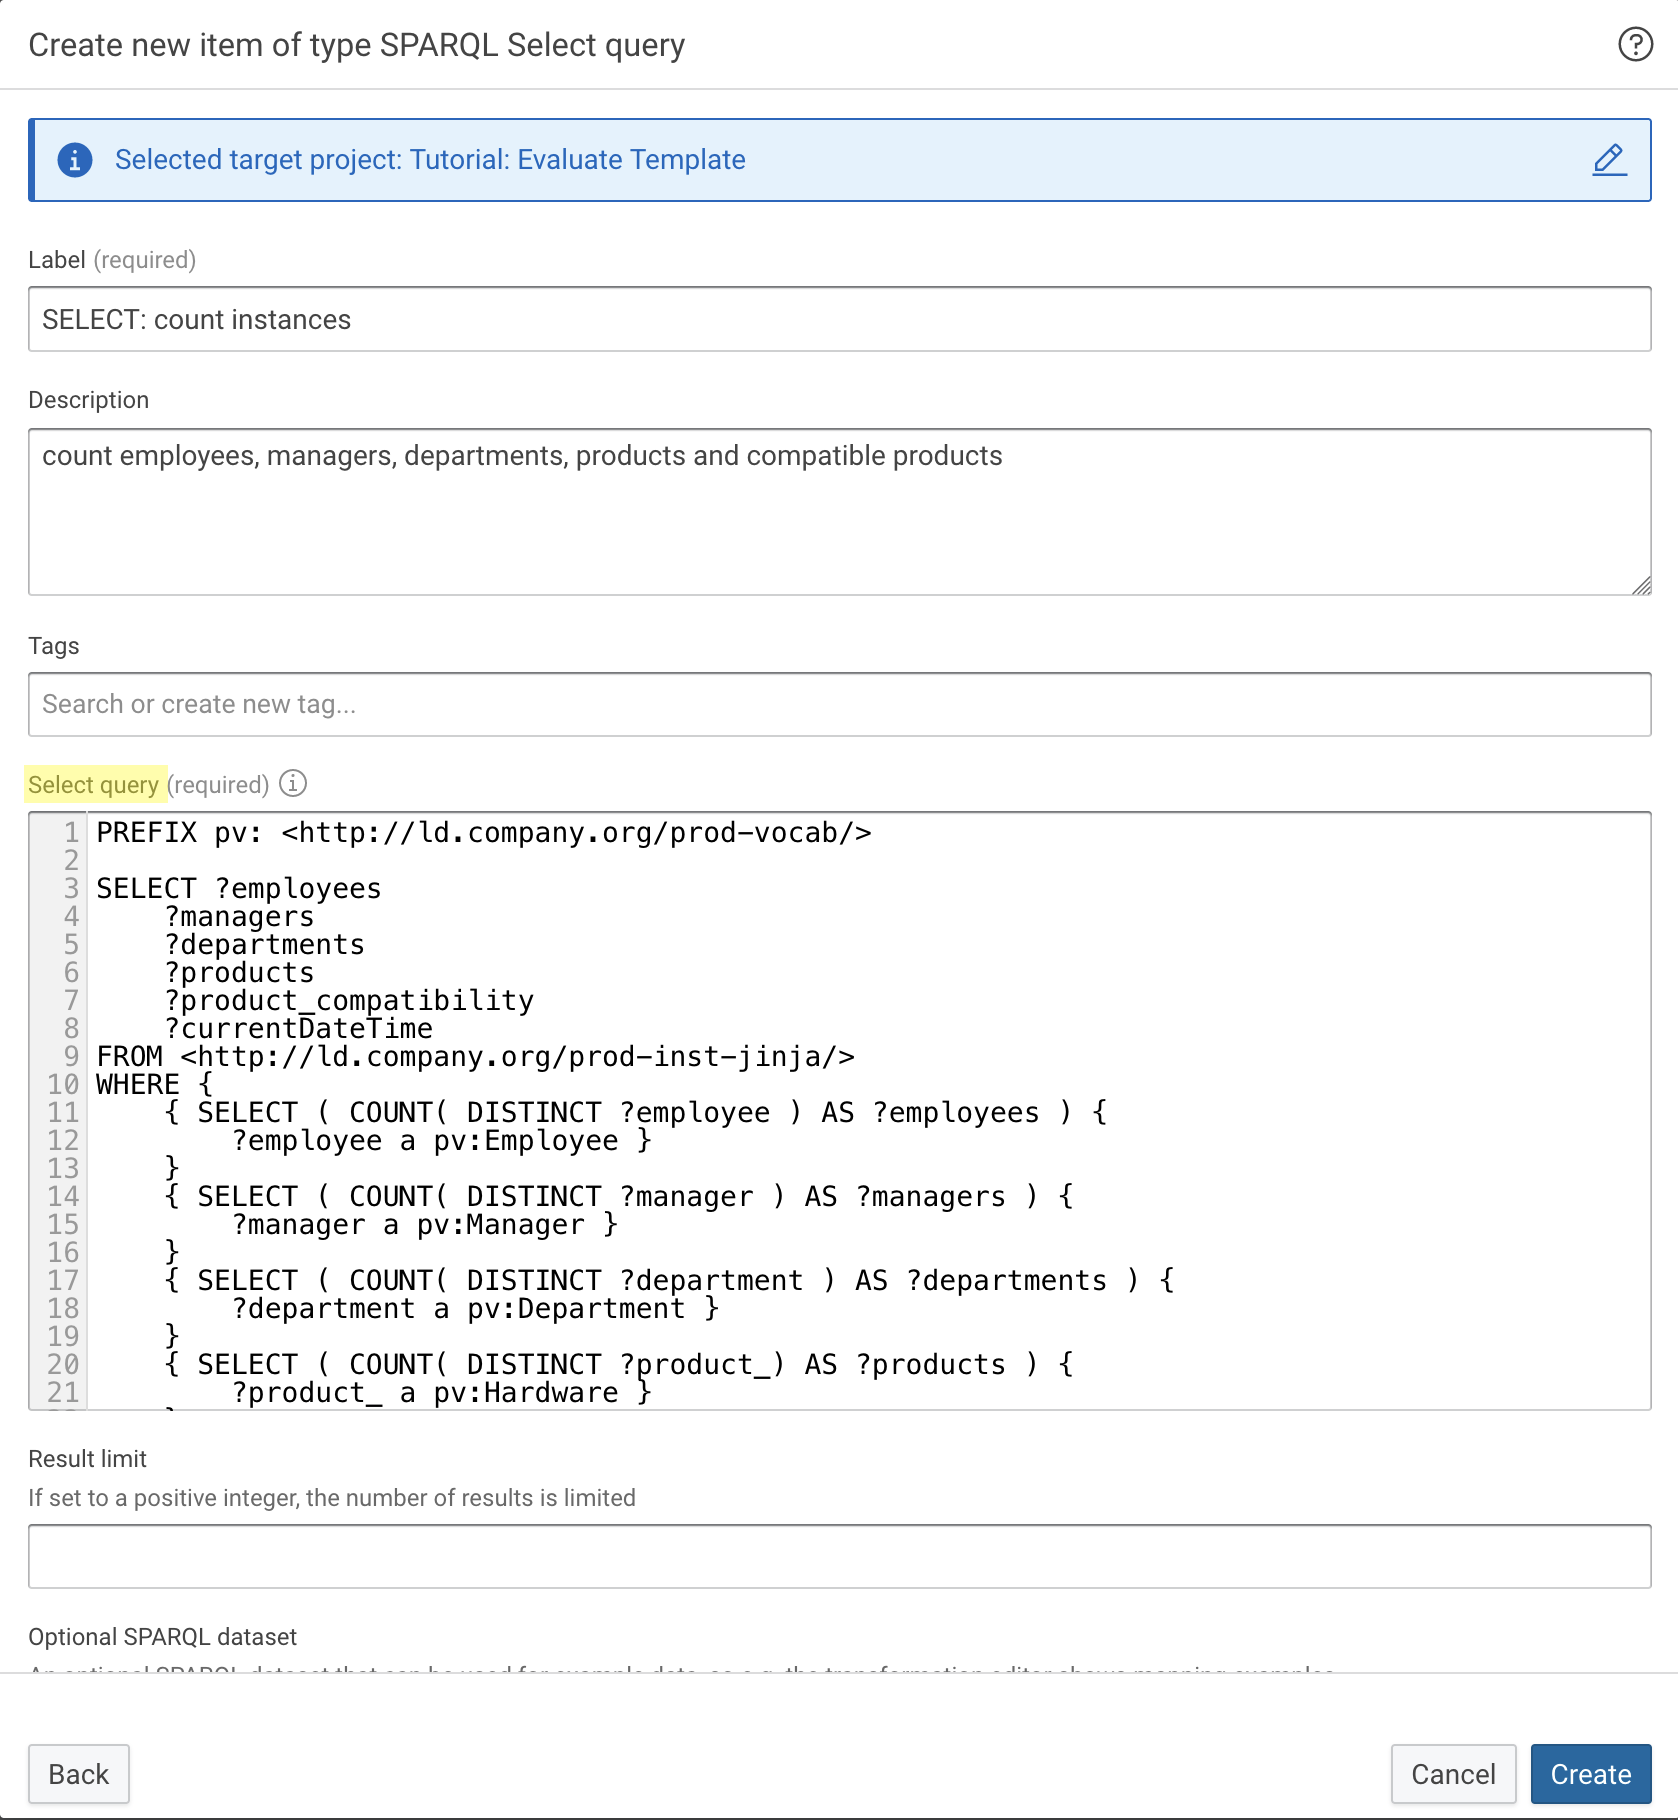
5 Create an Evaluate Template Task Item¤
Info
The Jinja template in this item acts as the template for our email message.
-
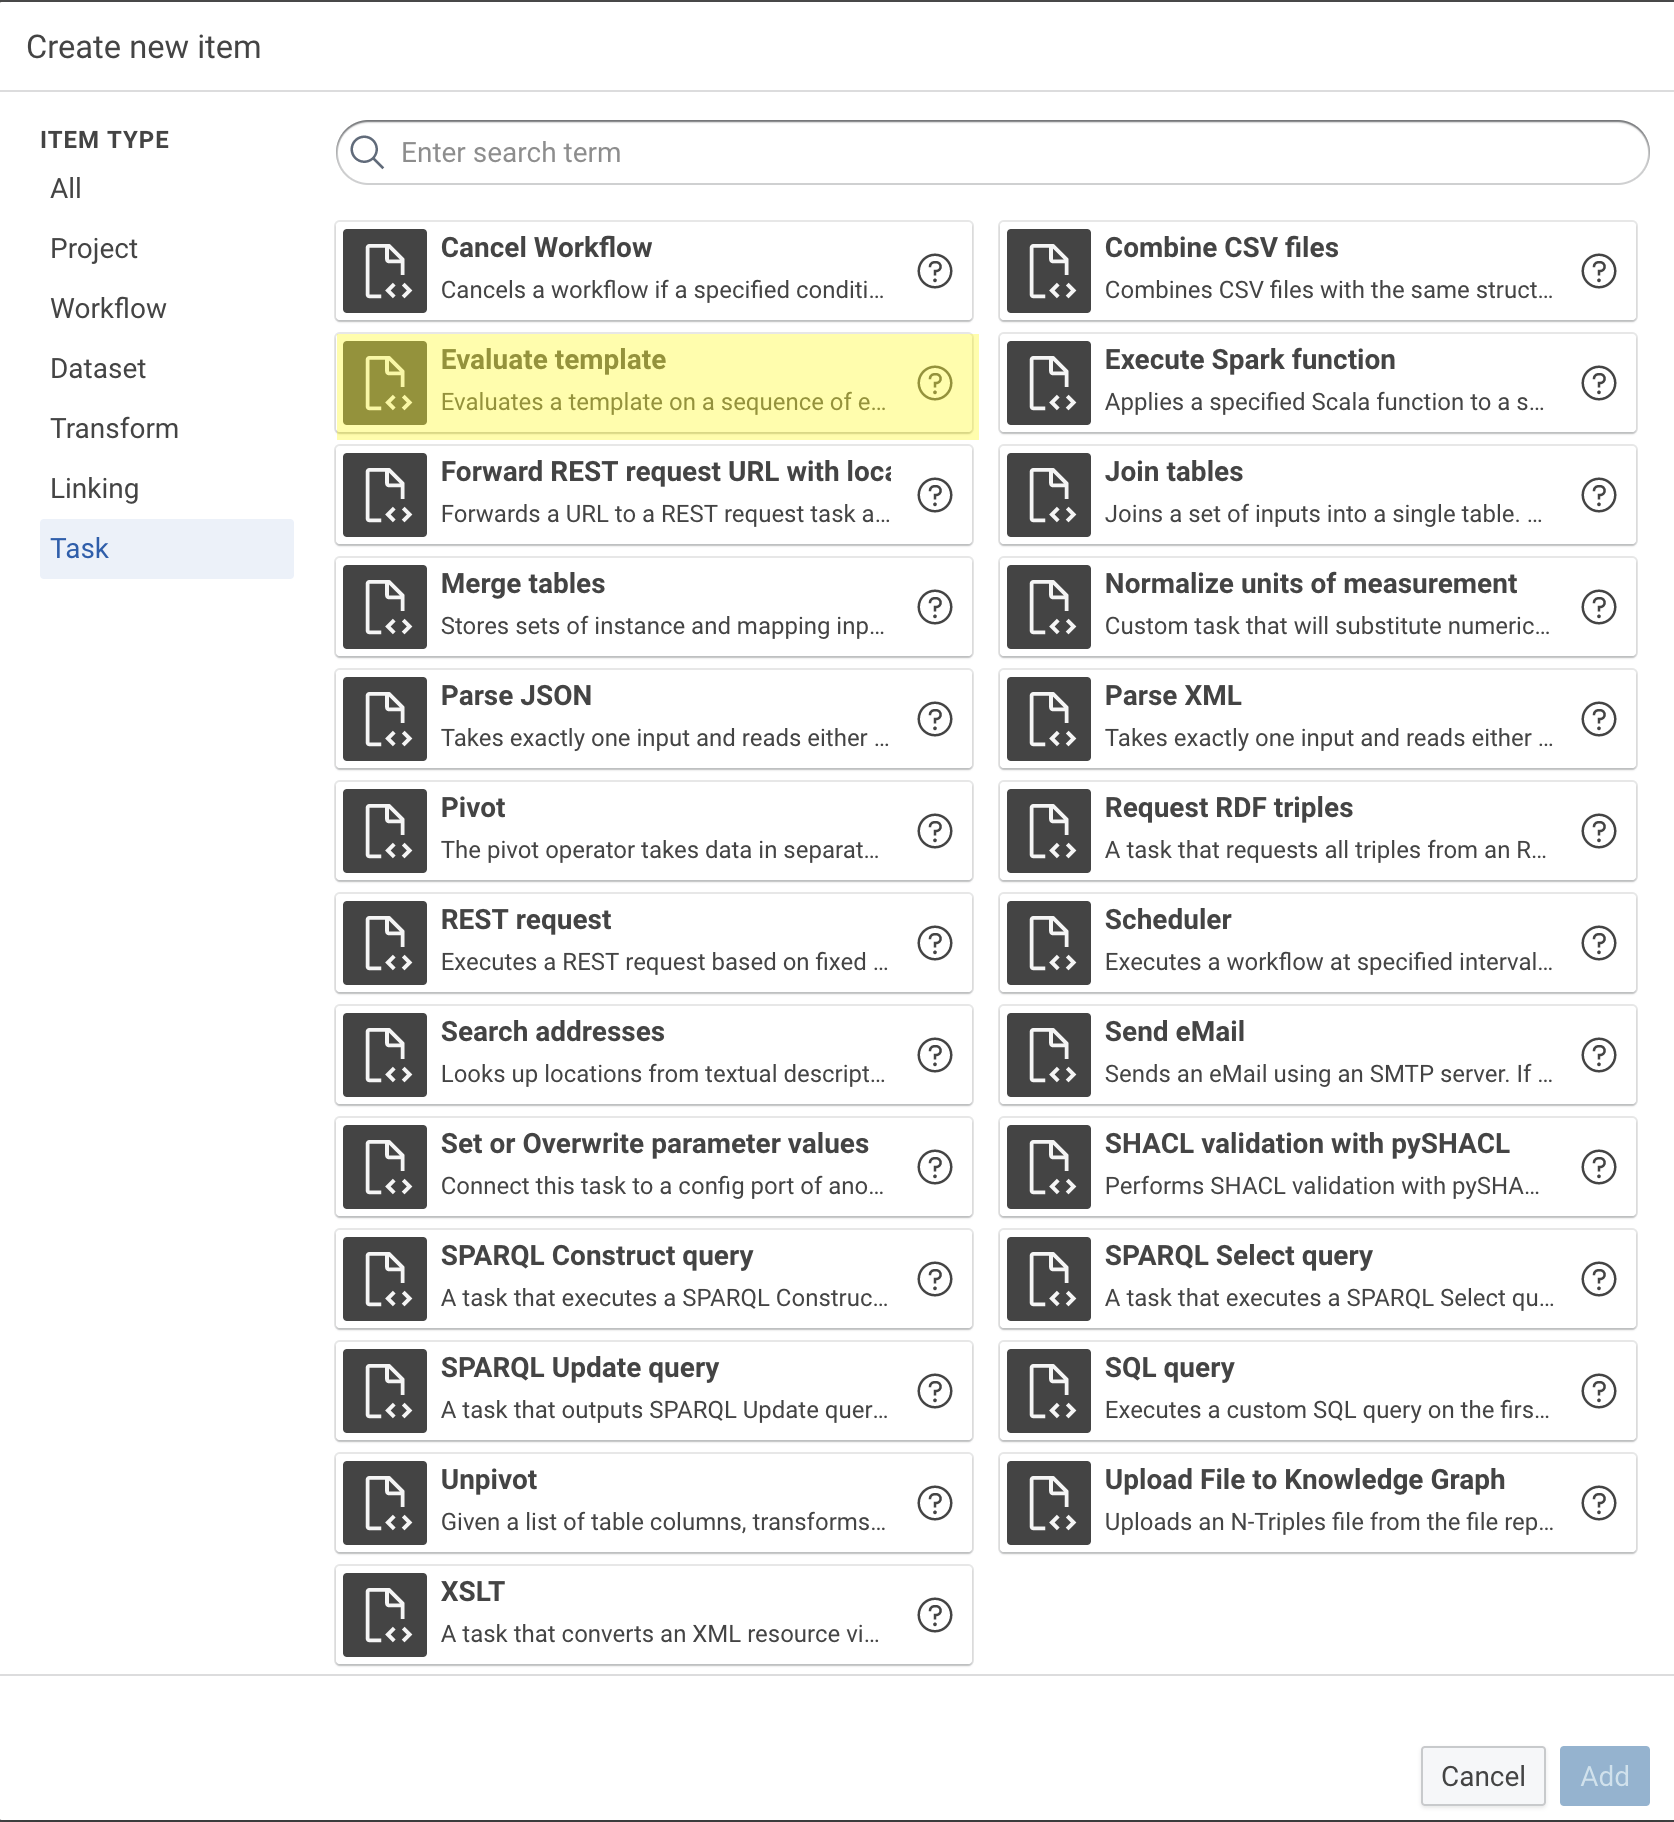
Click Create at the top of the page.
-
Select Evaluate template and click Add.
-
Fill in the required details, such as Label and Template. In the Template field enter the following Jinja template. Select jinja in the Language field. When finished, click Create.
Hi,

attached is the workflow result as an N-Triples file.
Timestamp: {{ currentDateTime }}

Product compatibility:
{{ product_compatibility }} out of {{ products }} products have compatible alternatives.

Organization information:
There are {{ managers }} managers and {{ employees }} employees in {{ departments }} departments.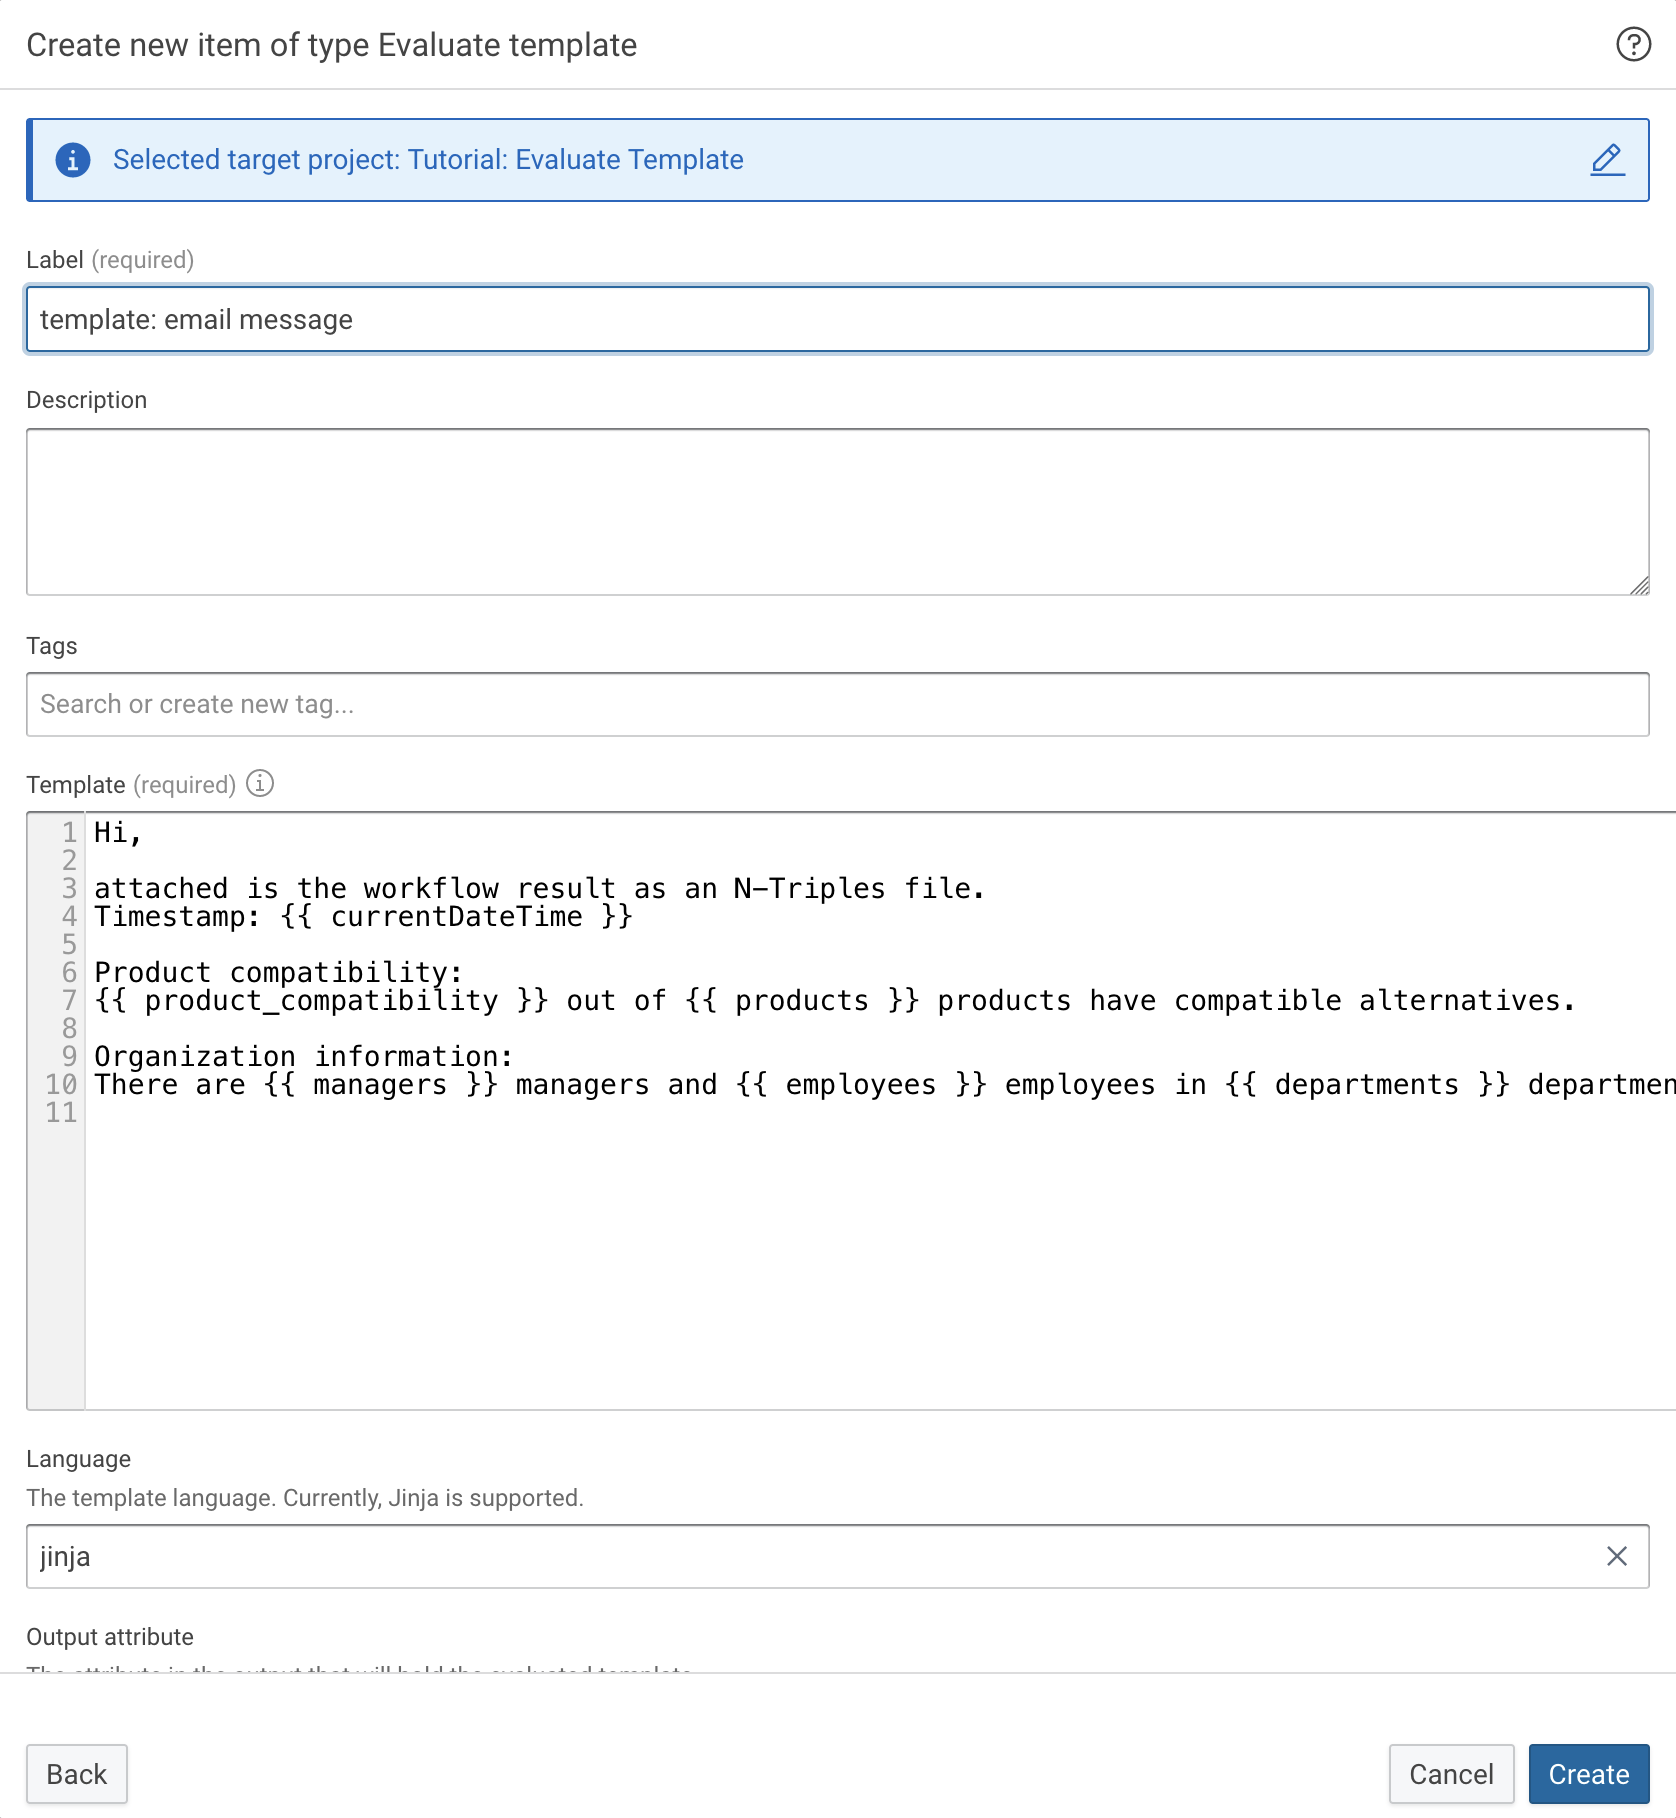
Note
The variable names correspond to those in the SPARQL query we previously created.
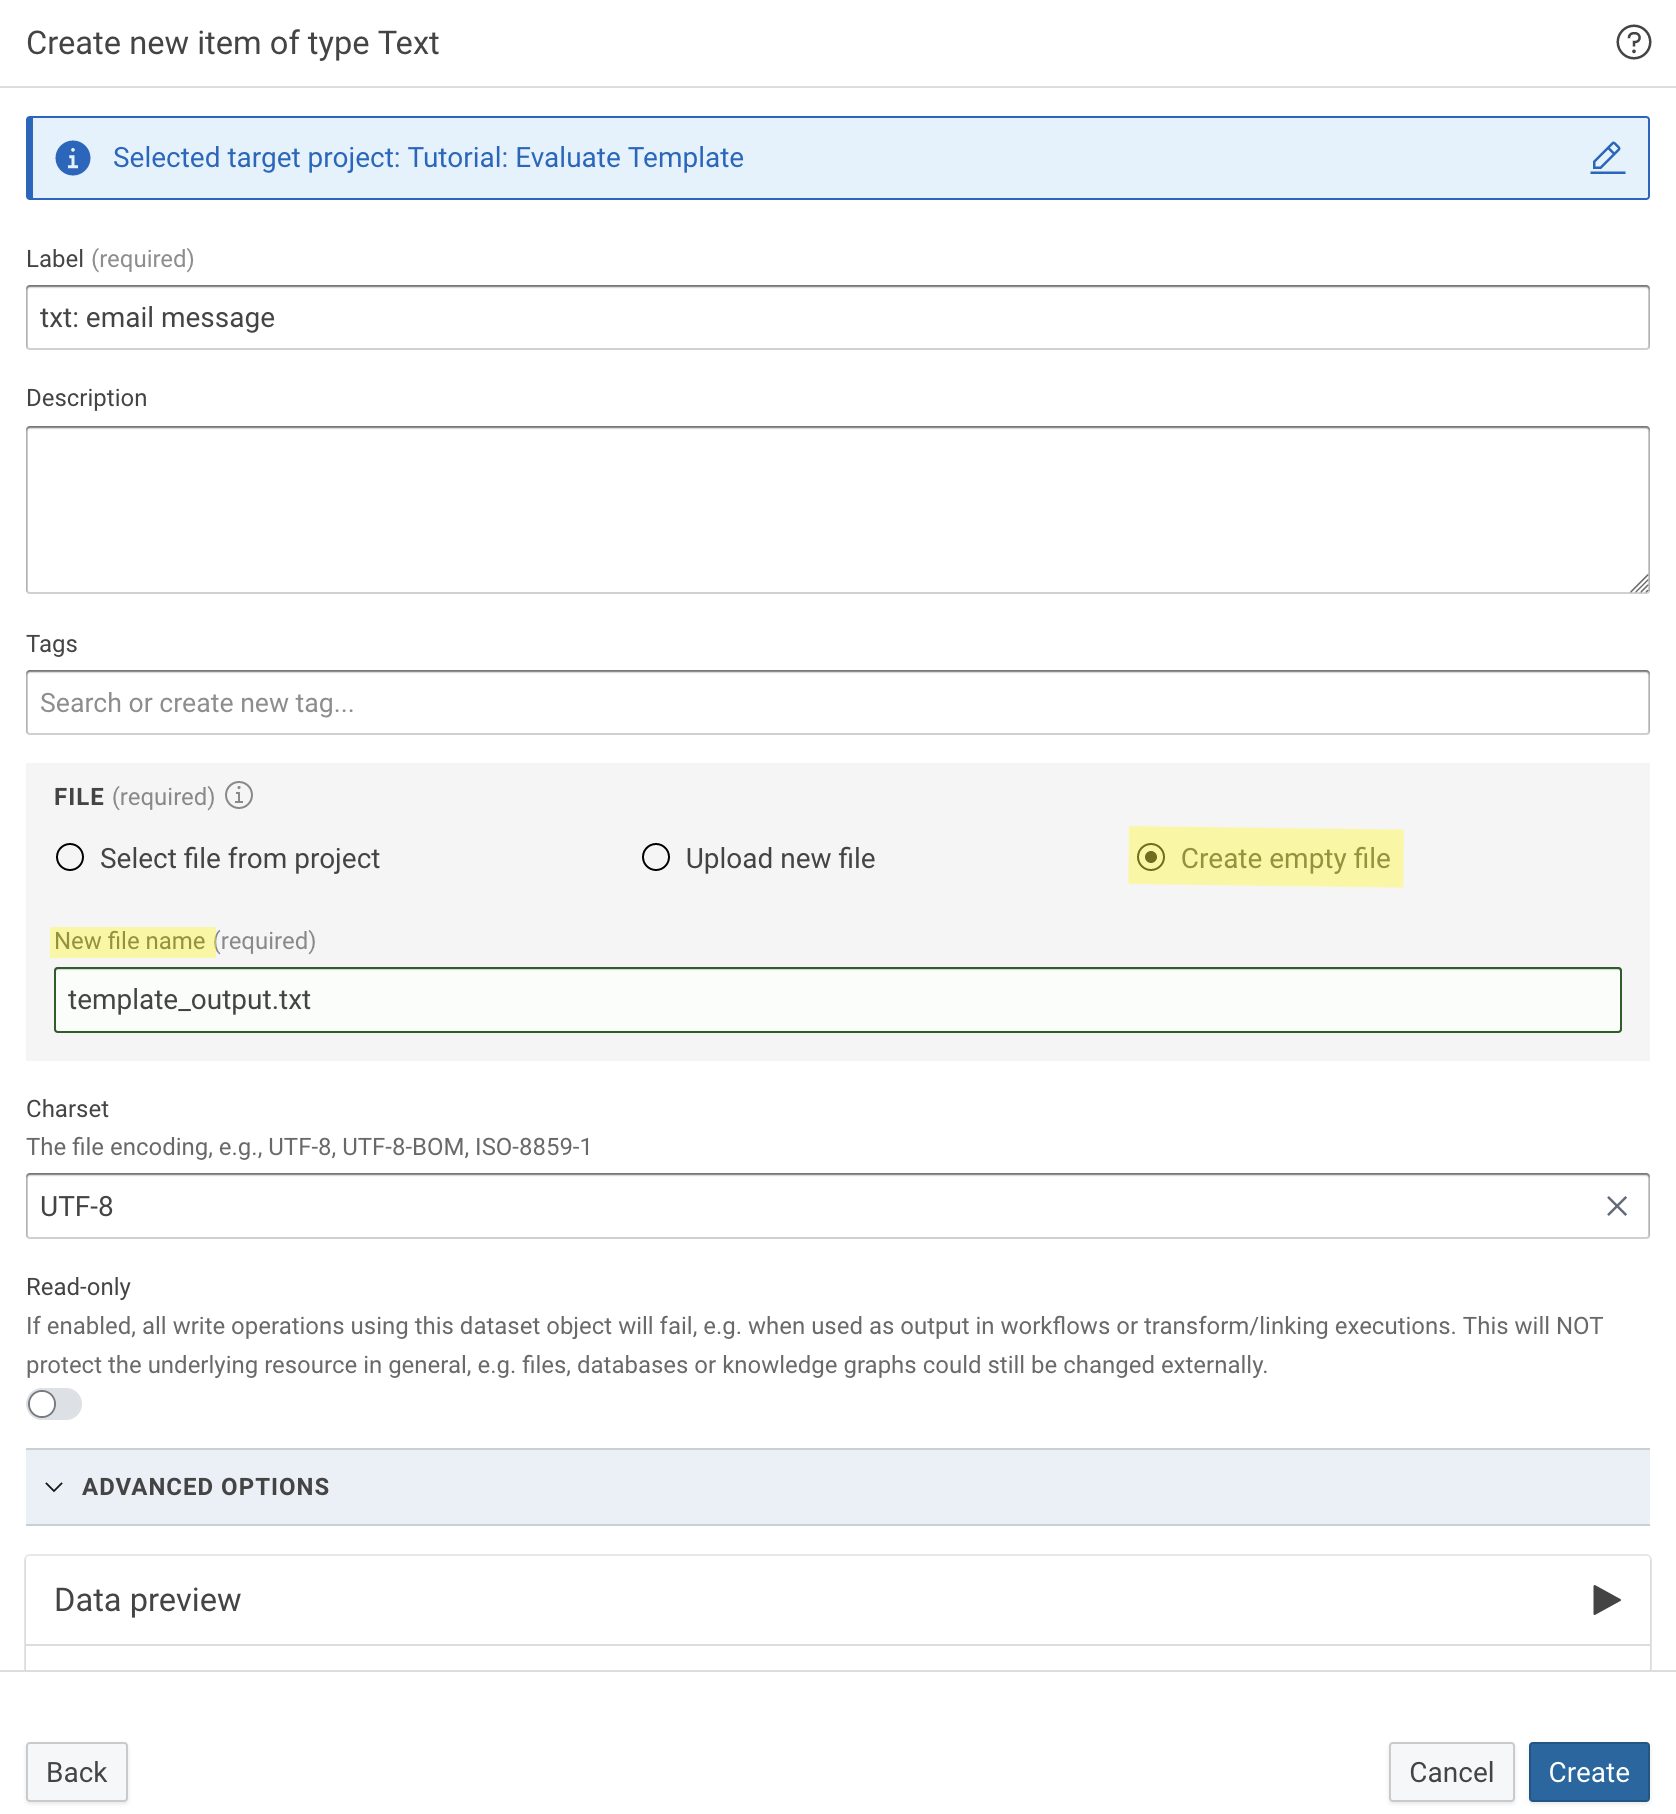
6 Create a Text Dataset¤
Info
The text dataset holds a text file that will contain the evaluated Jinja template that will be our email message.
-
Click Create at the top of the page.
-
Select Text and click Add.
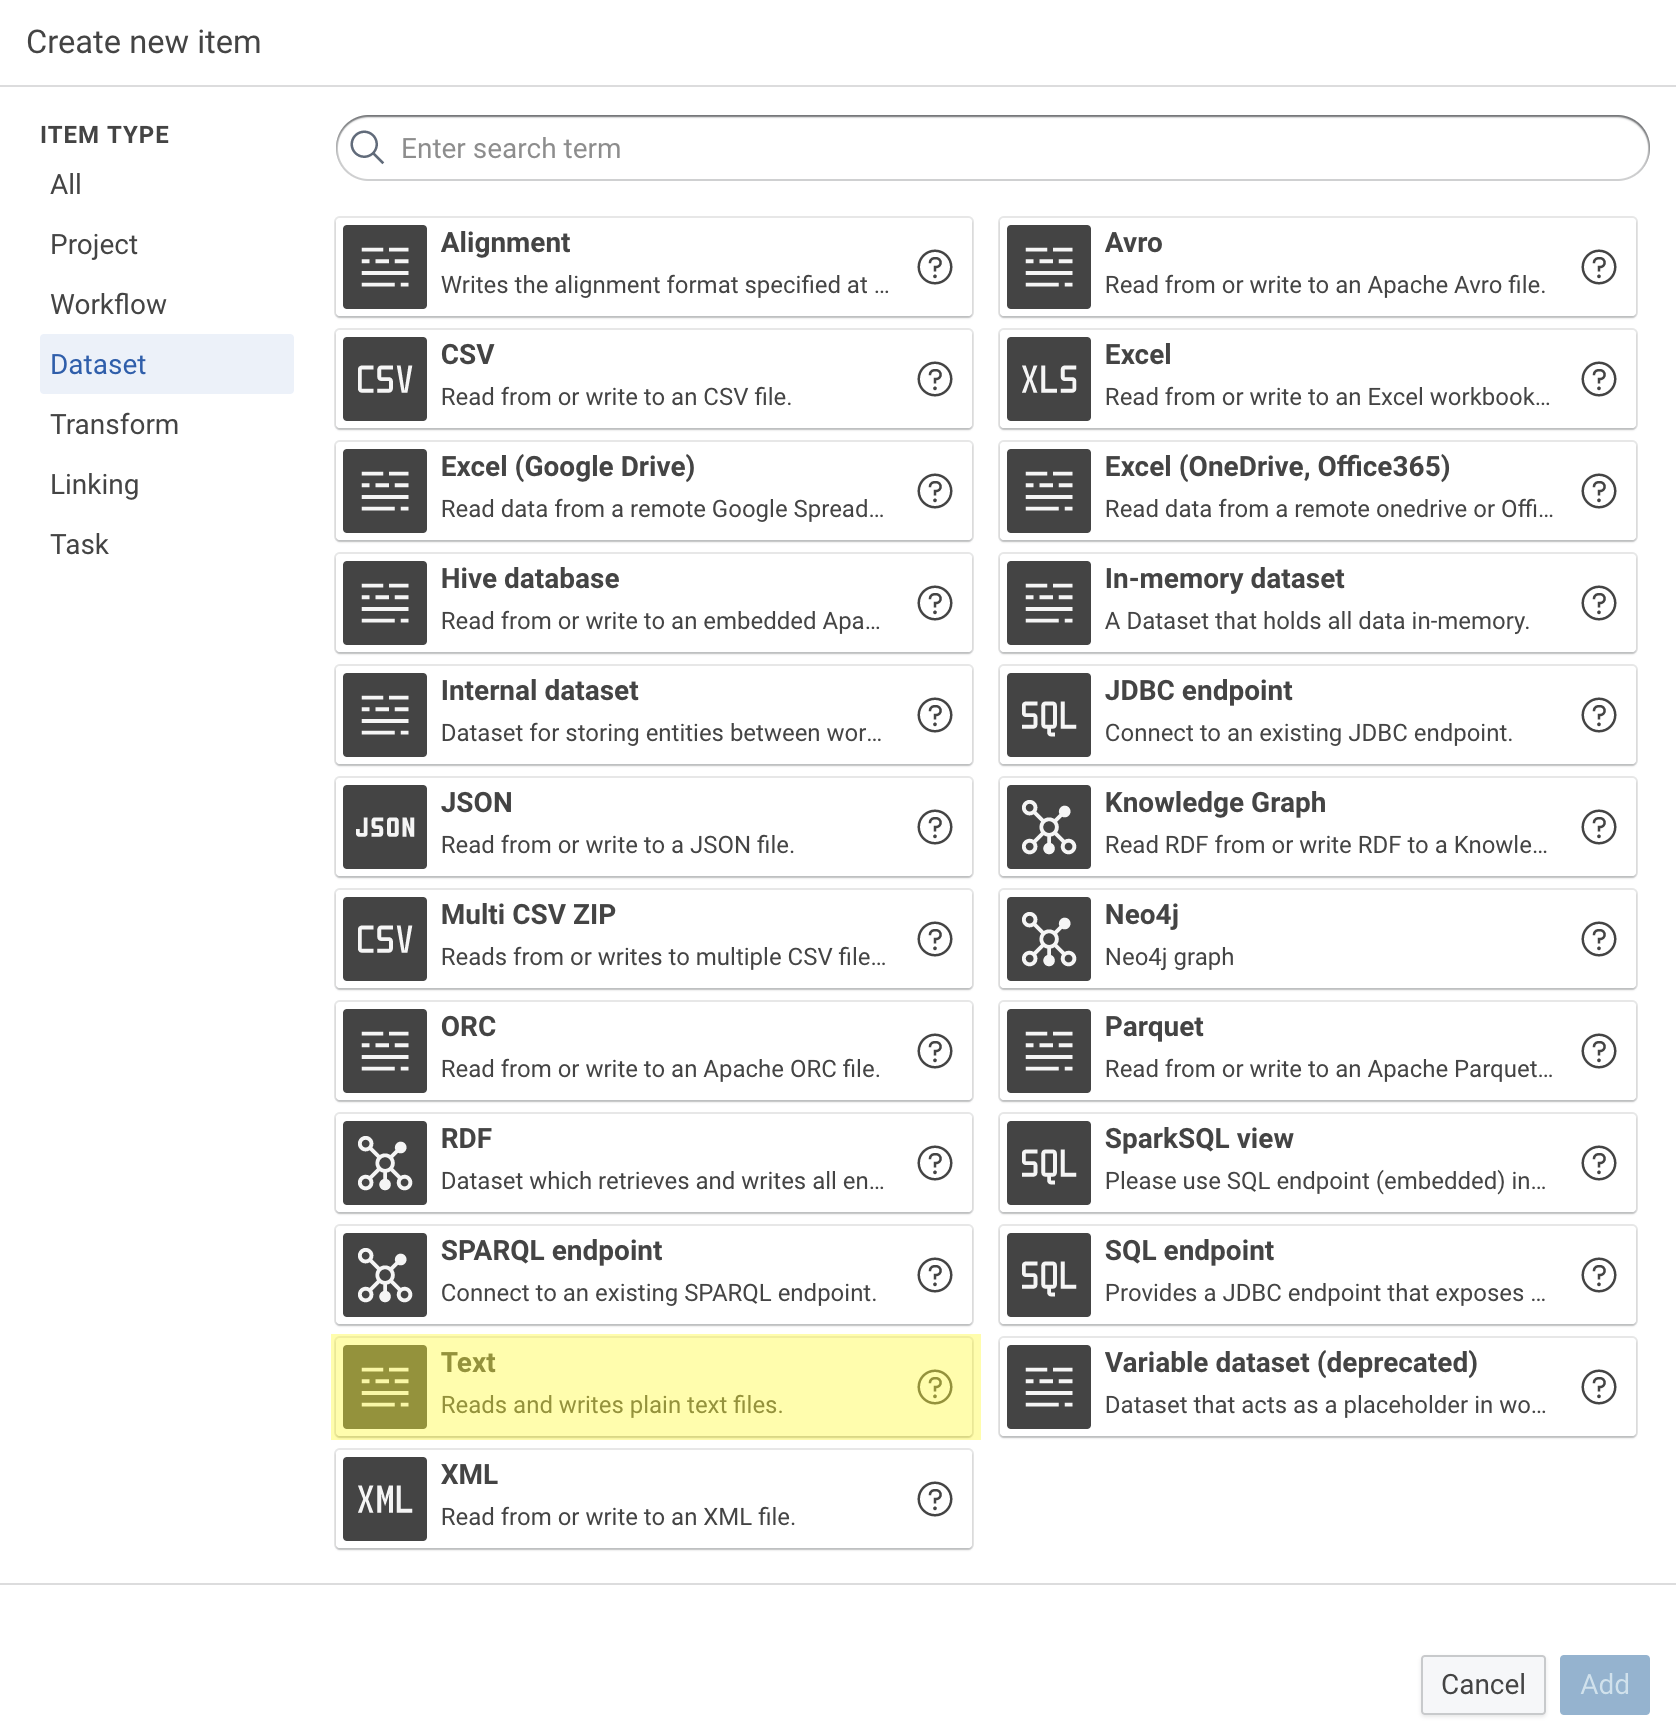
-
Fill in the required details, such as Label and FILE. Under FILE, select Create empty file and enter the filename in the New file name field. When finished, click Create.
Note
The Evaluate template operator can also be connected directly to the Transform. In this case, skip this section and enter output instead of text for the Value path of the value mapping in the Transform (see §7.6).
7 Create a Transform¤
Info
The Transform retrieves the text from the Text dataset to be sent as our email message.
-
Click Create at the top of the page.
-
Select Transform and click Add.

-
Fill in the required fields, such as Label and INPUT TASK Dataset.
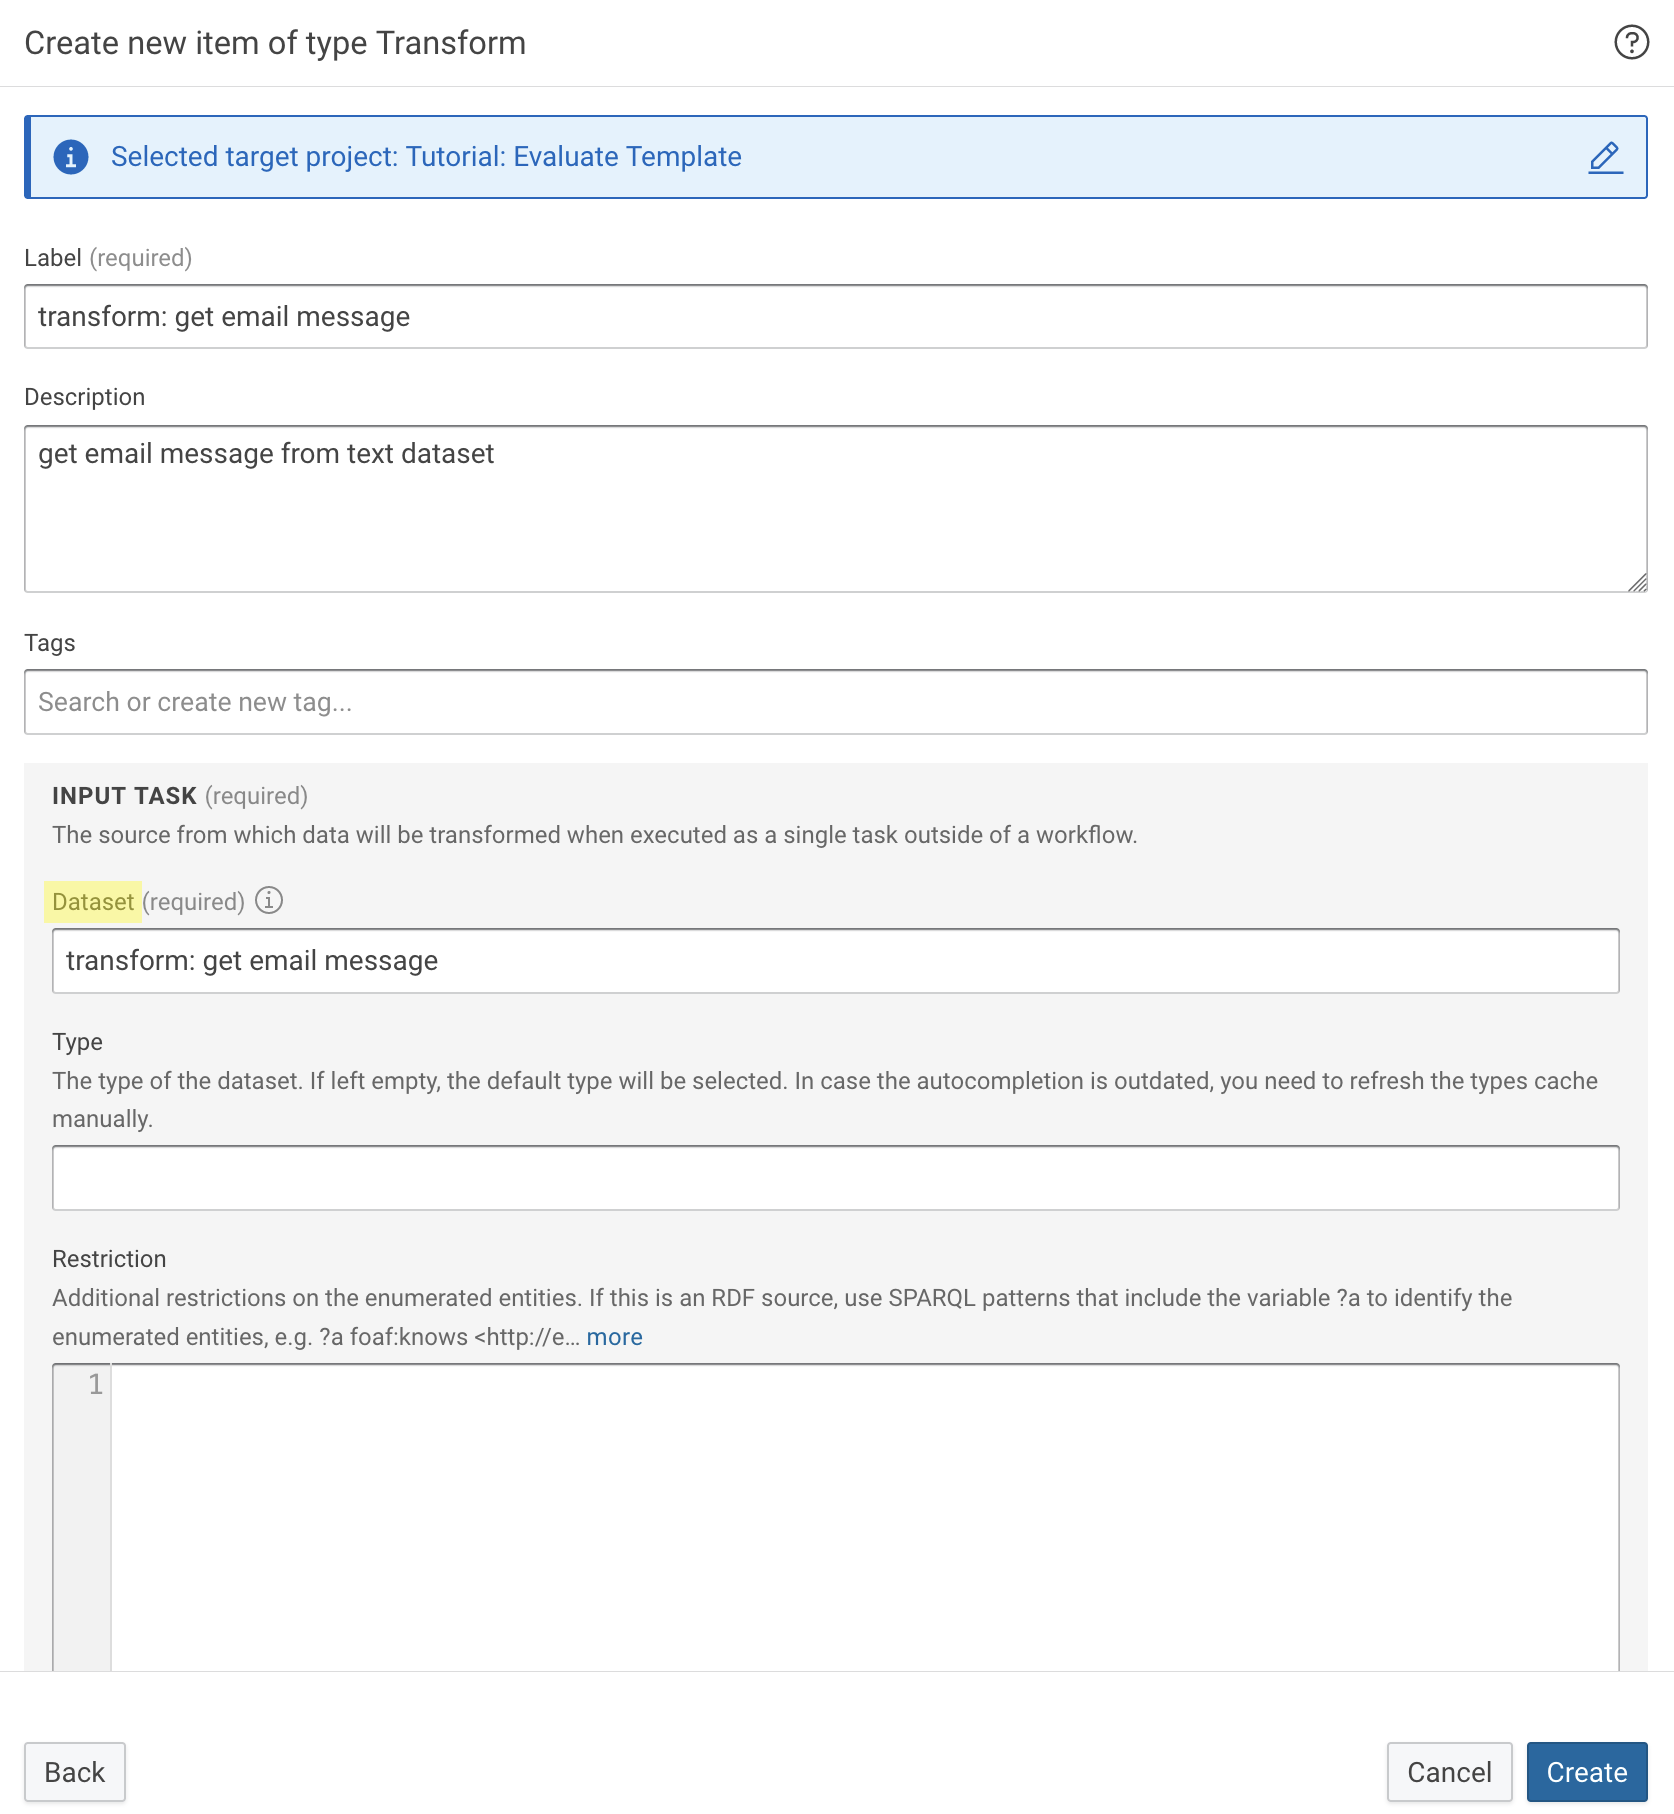
-
Expand the
 menu by clicking the arrow on the right side of the page to expand the menu.
 -
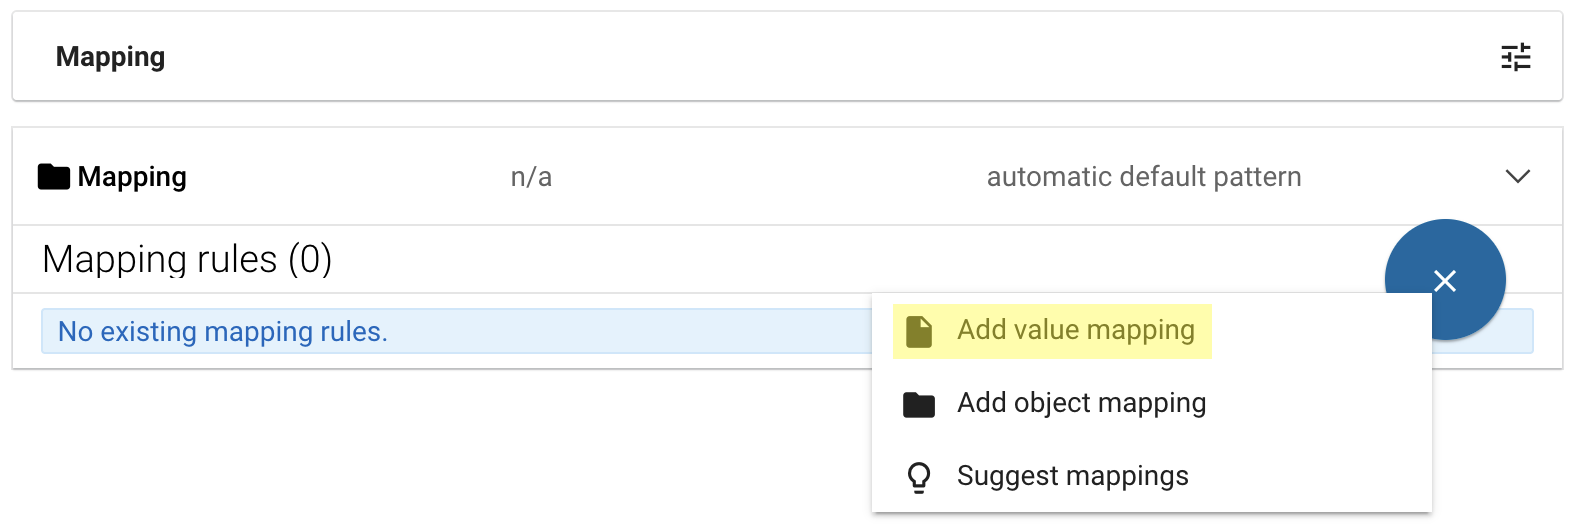
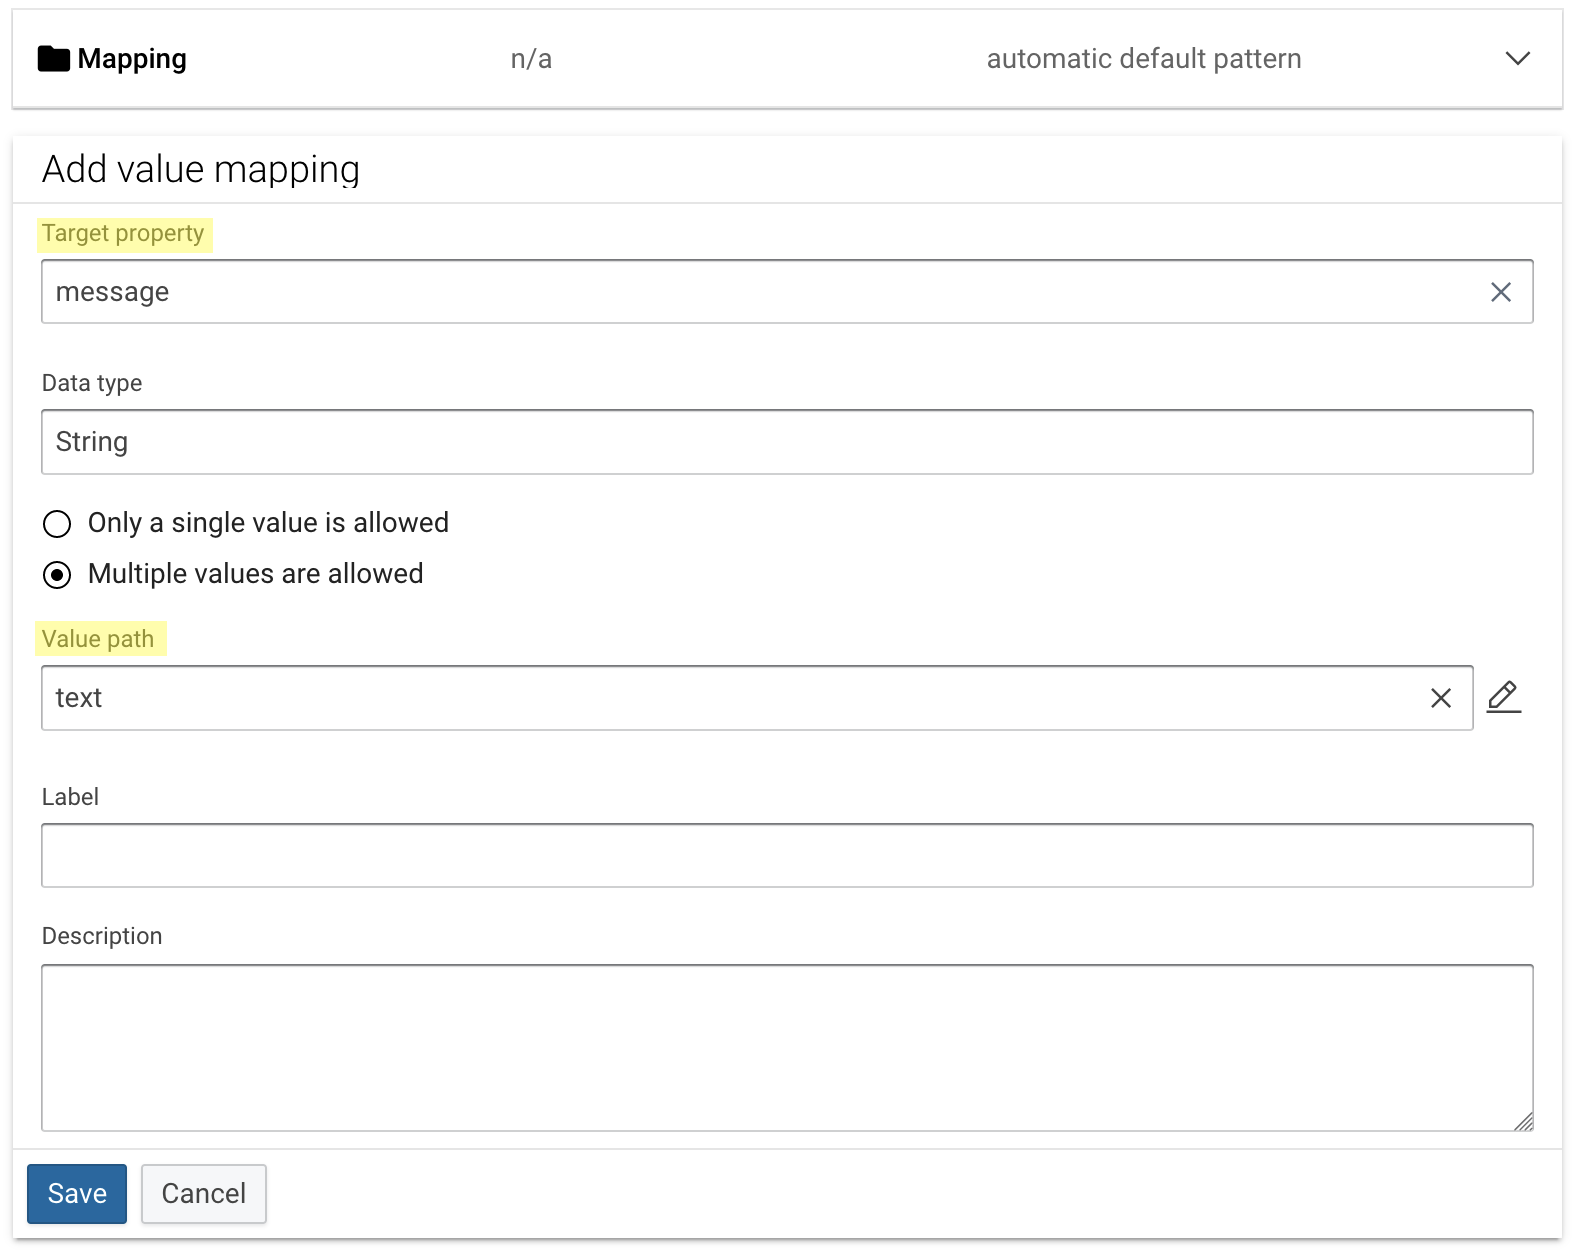
Click the circular blue + icon on the lower right and select Add value mapping.
-
In the Target property field enter message (the parameter name for the email message) and in the Value path field enter text (the path for the text in the Text dataset). When finished, click Save.
8 Create a Request RDF Triples Task Item¤
Info
The Request RDF triples task is used to write all tripled from the company graph into an RDF dataset in NTriples serialization.
-
Click Create at the top of the page.
-
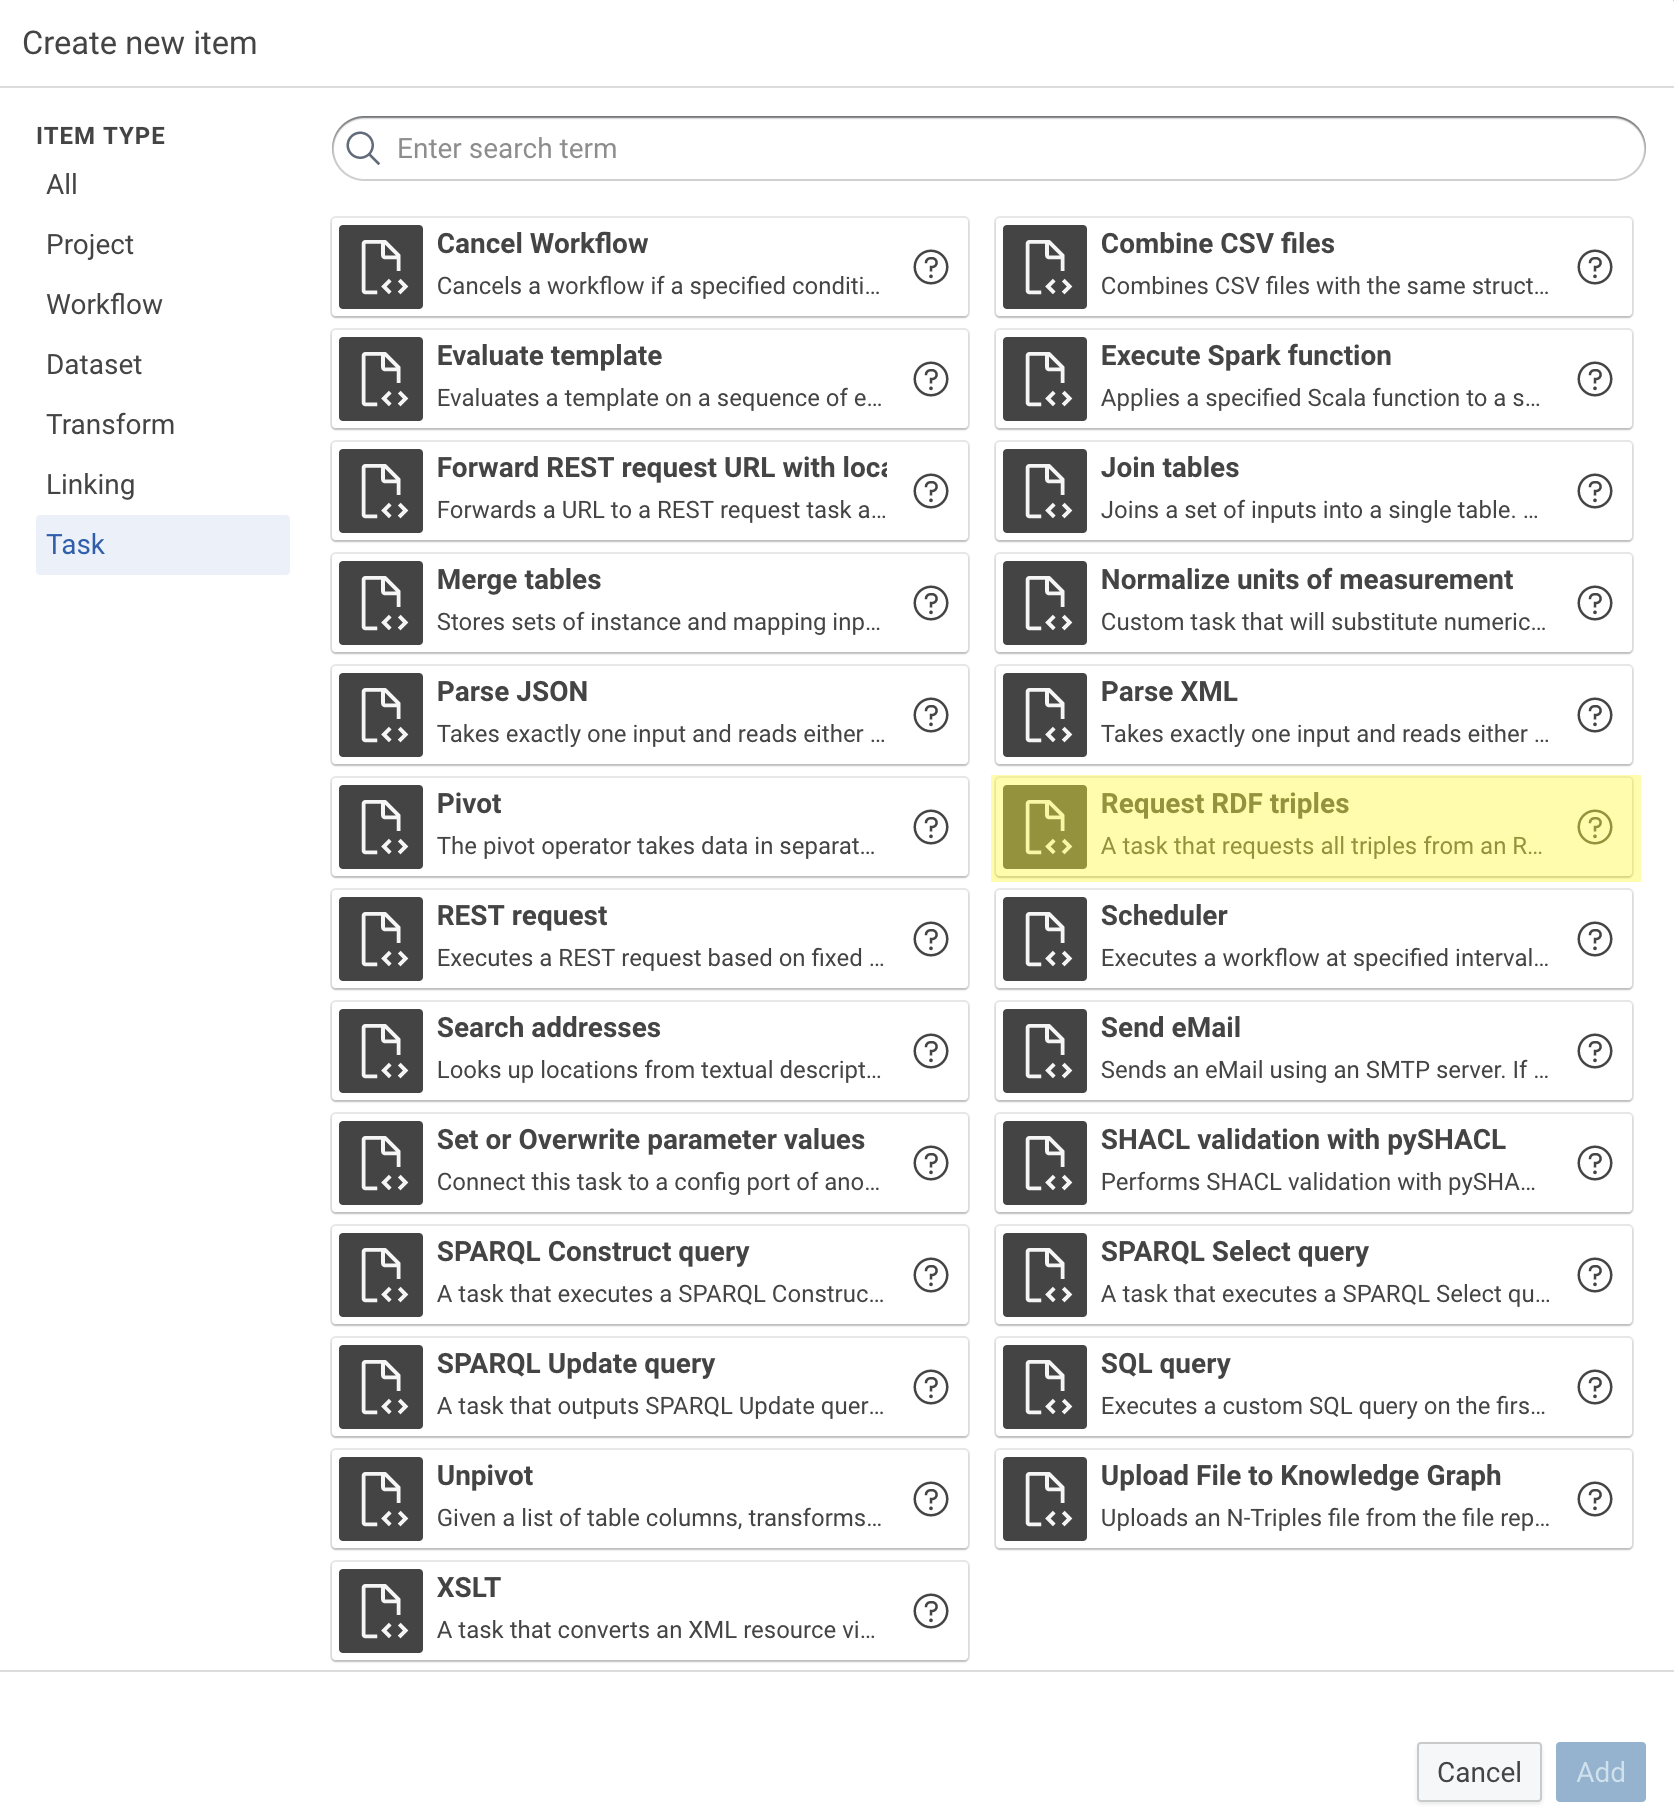
Select Request RDF triples and click Add.
-
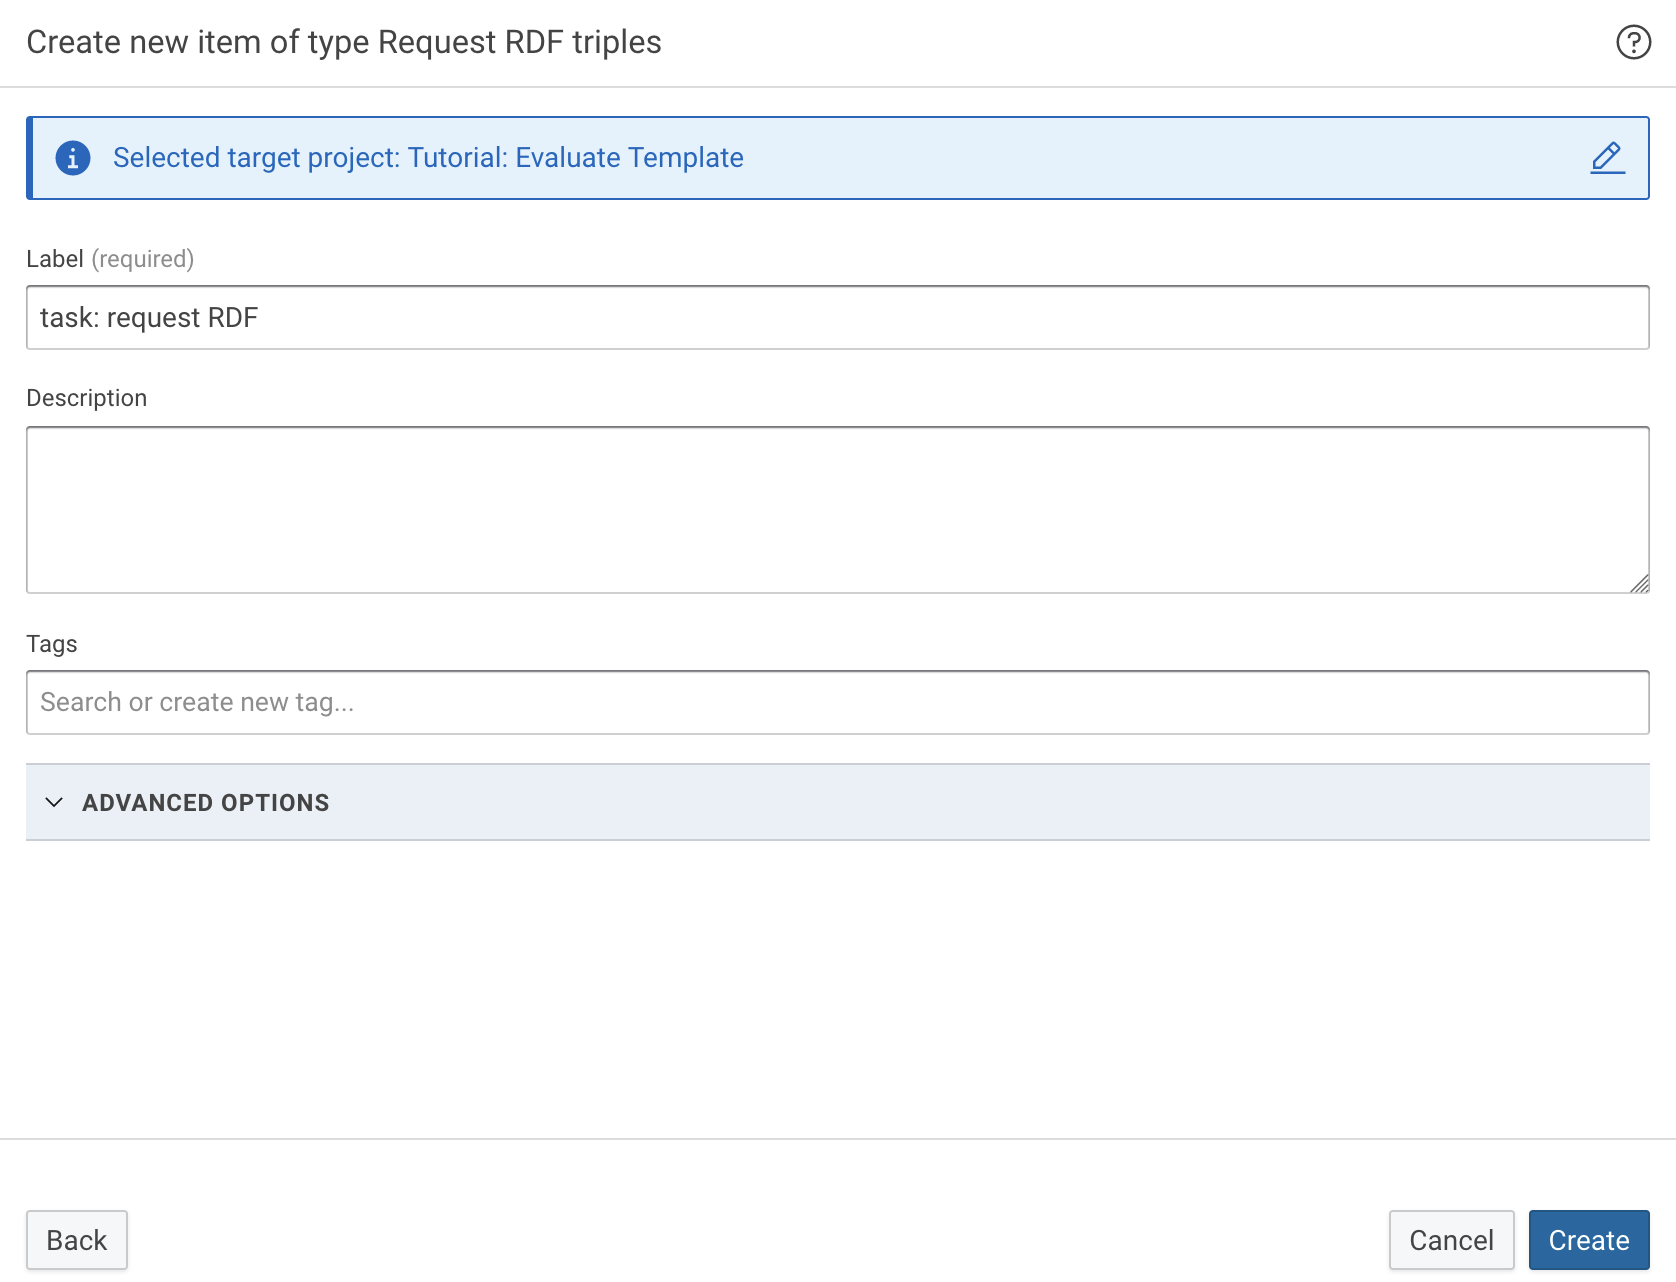
Fill in the Label field and click Create.
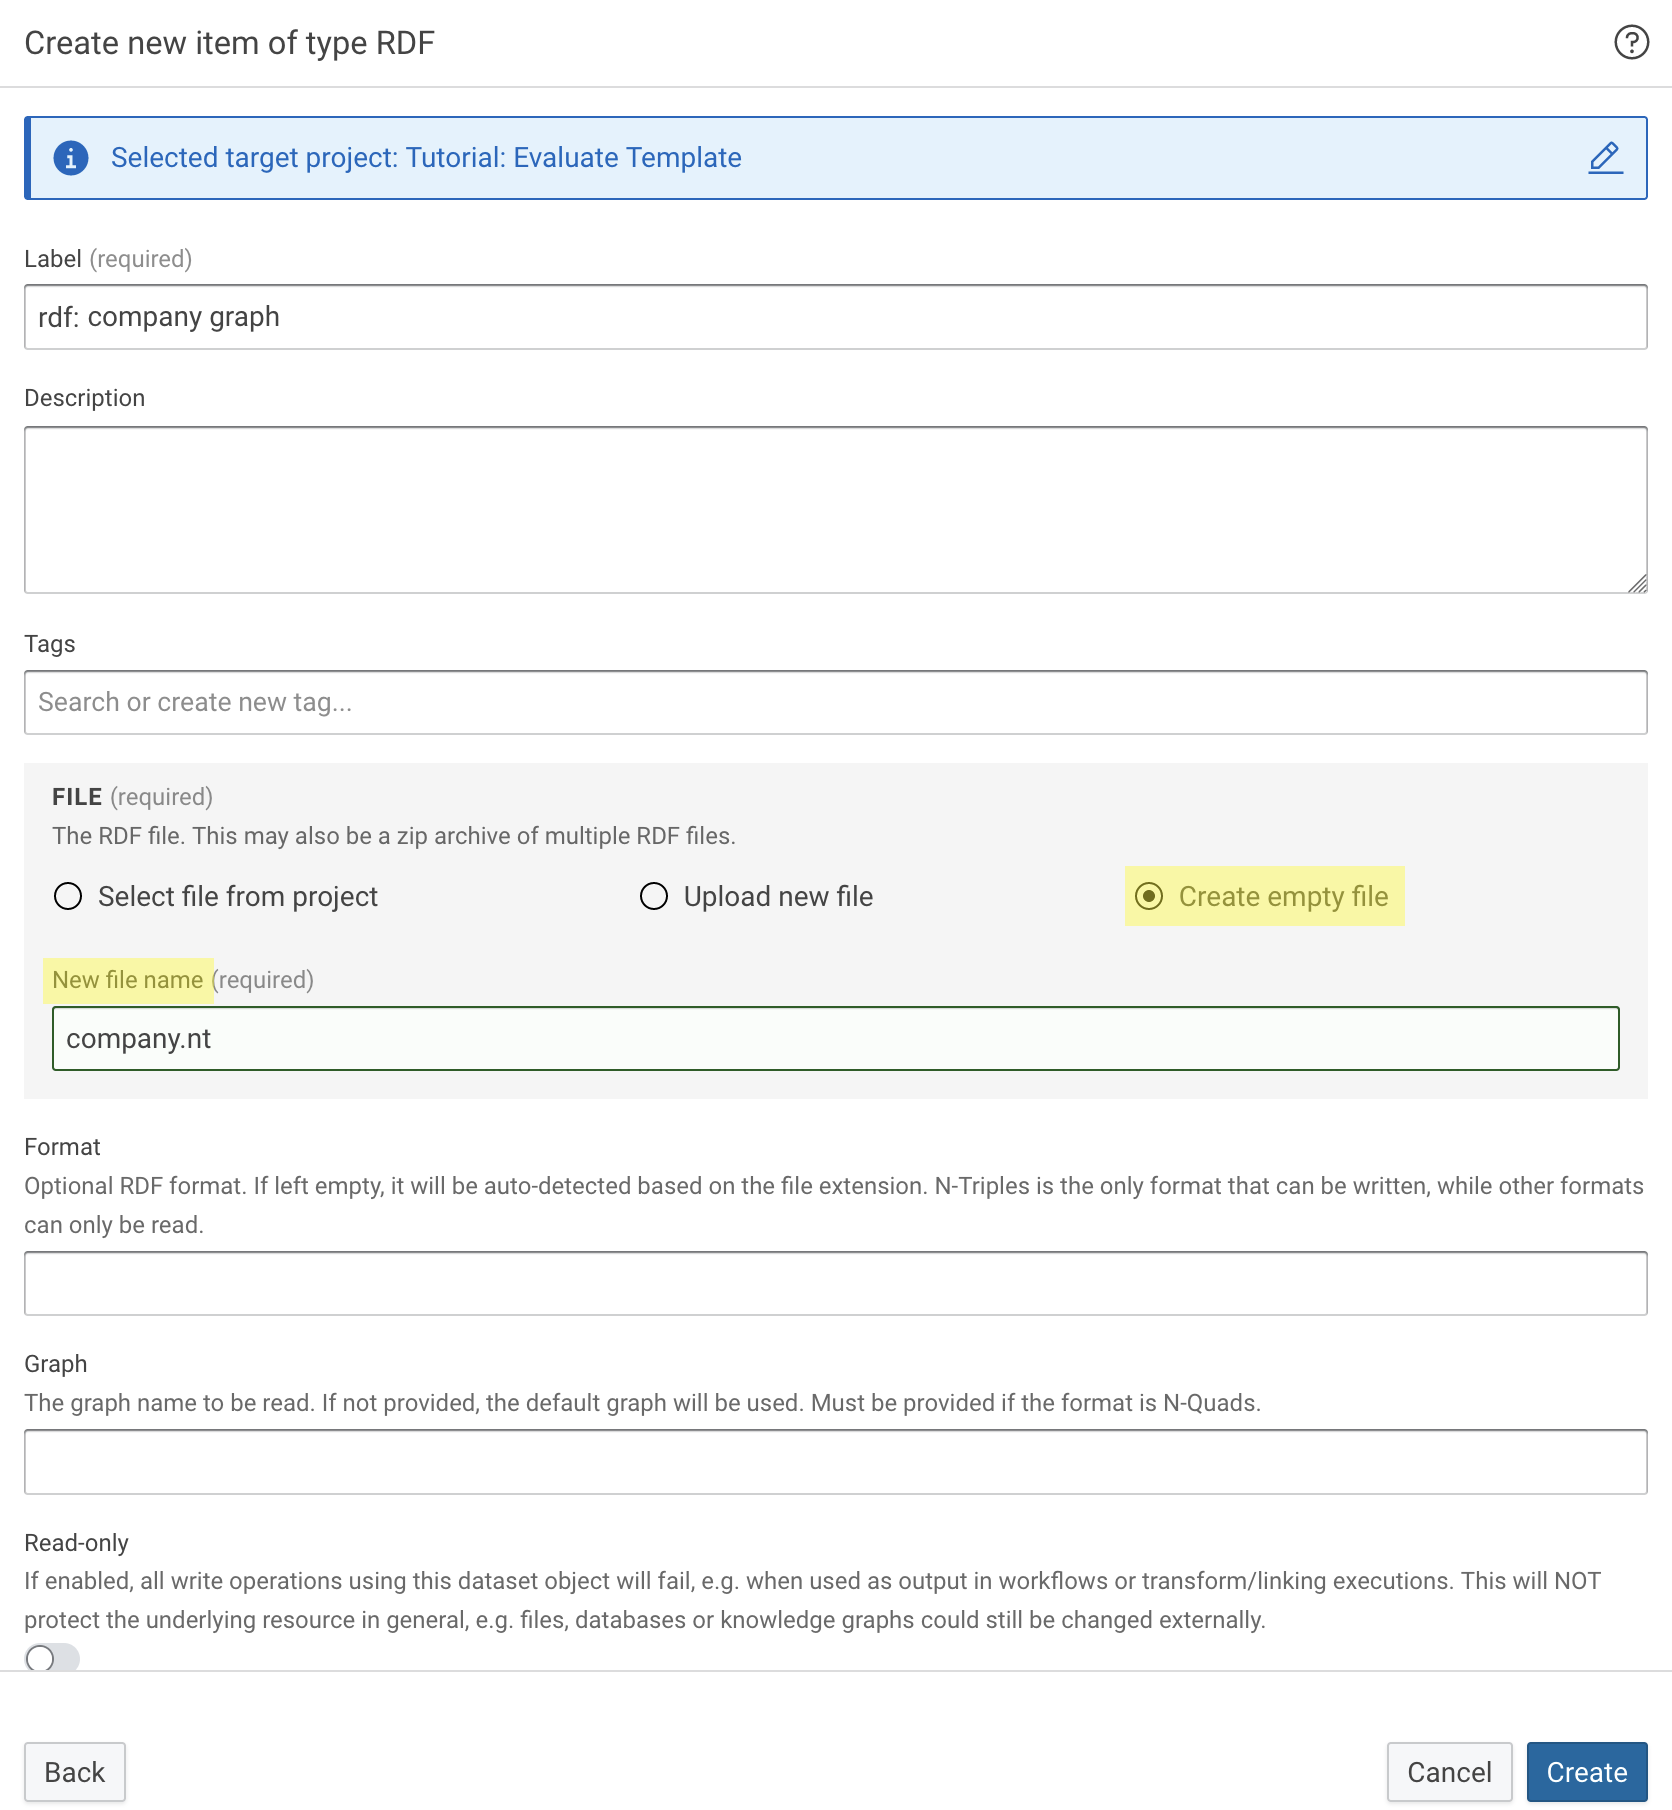
9 Create an RDF Dataset¤
Info
The RDF dataset holds an NTriples file that contains the triples requested by the Request RDF triples task, which we will send as the email attachment.
-
Click Create at the top of the page.
-
Select RDF and click Add..

-
Fill in the required details, such as Label and FILE. Under FILE, select Create empty file and enter a filename for the NTriples file in the New file name field. When finished, click Create.
10 Create a Send Email Task Item¤
-
Click Create at the top of the page.
-
Select Send eMail and click Add.
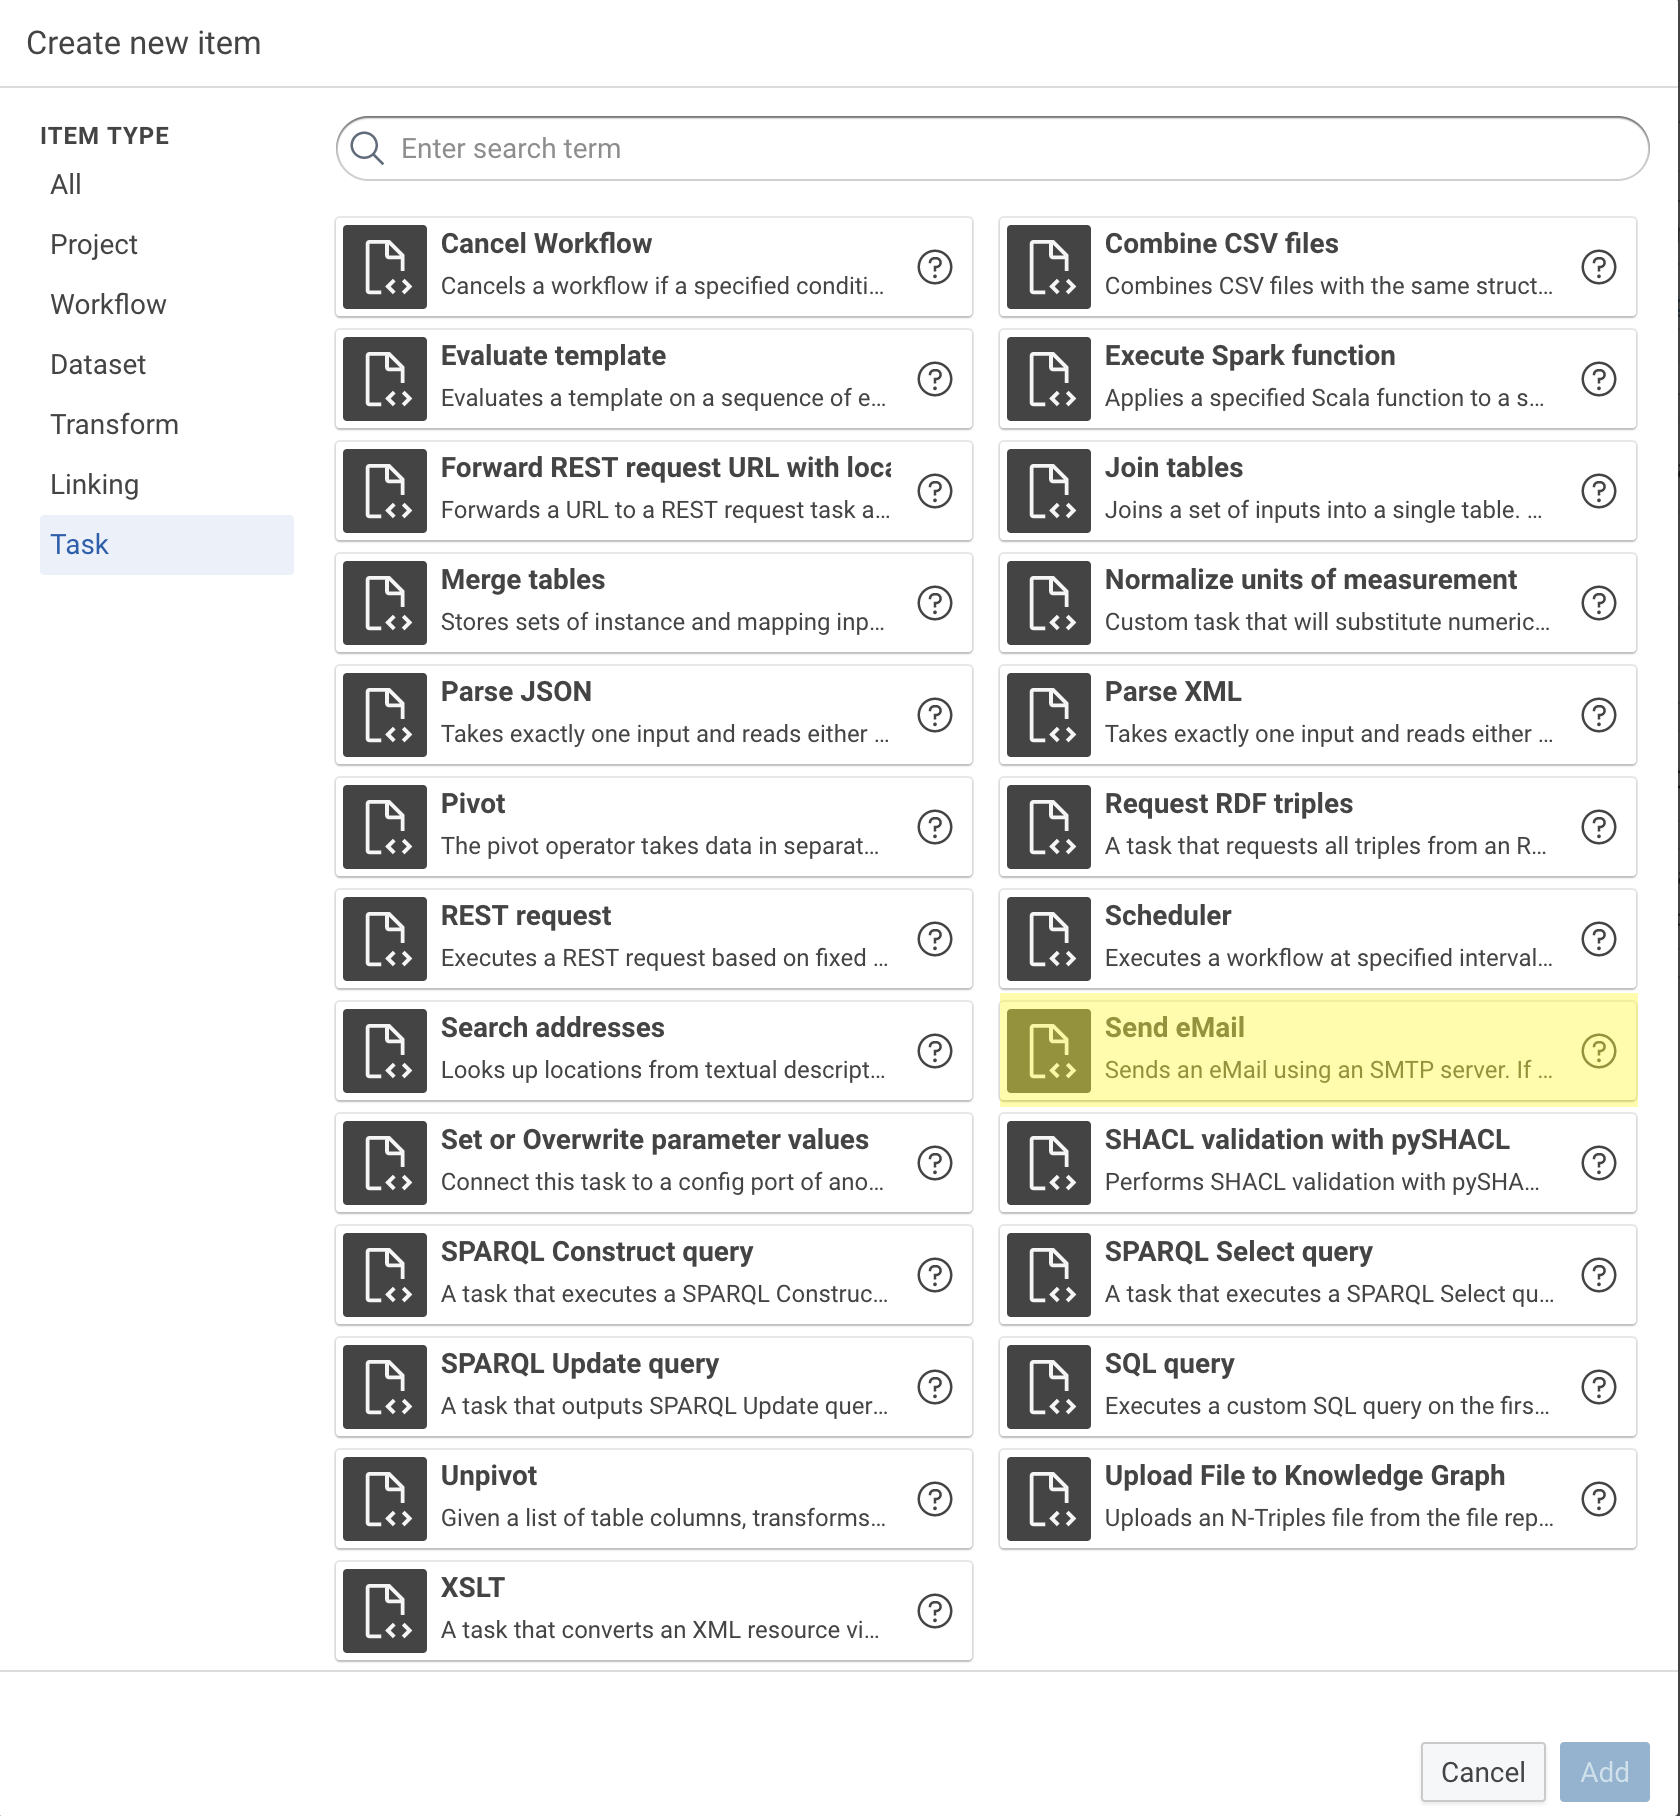
-
Fill in the required details, such as Label, your email credentials for sending, and the recipient email address(es). When finished, click Create.
- Host: The SMTP host, e.g, mail.myProvider.com
- Port: The SMTP port
- User: The username for the email account
- Password: The password for the email account
- To: The recipient email address(es)

11 Create the Workflow¤
-
Click Create at the top of the page.
-
Select Workflow and click Add.

-
Fill in the required details (Label) and click Create.

-
In the workflow editor, arrange and connect the items as shown below. Items can be dragged from the list of items on the left side onto the canvas. To connect the outputs and inputs, click and hold the output on the right side of an item and drag it to the input on the left side of another item.
- The Knowledge Graph dataset connects to the Request RDF triples task and the SPARQL Select query task.
- The Request RDF triples task connects to the RDF dataset. It requests all triples from the products graph and sends them to the dataset.
- The RDF dataset connects to the Send eMail task. It holds the NTriples file that will be attached to the email.
- The SPARQL Select query task connects to the Evaluate template task. Note that the graph to be queried is specified in the SPARQL query itself with the FROM clause, while the input only triggers its execution. The query results are sent to its output.
- The Evaluate template task connects to the Text dataset. It receives the SPARQL query results and sends the evaluated Jinja template to its output.
- The Text dataset connects to the Transform. It holds the text file with the evaluated Jinja template and acts as input for the Transform.
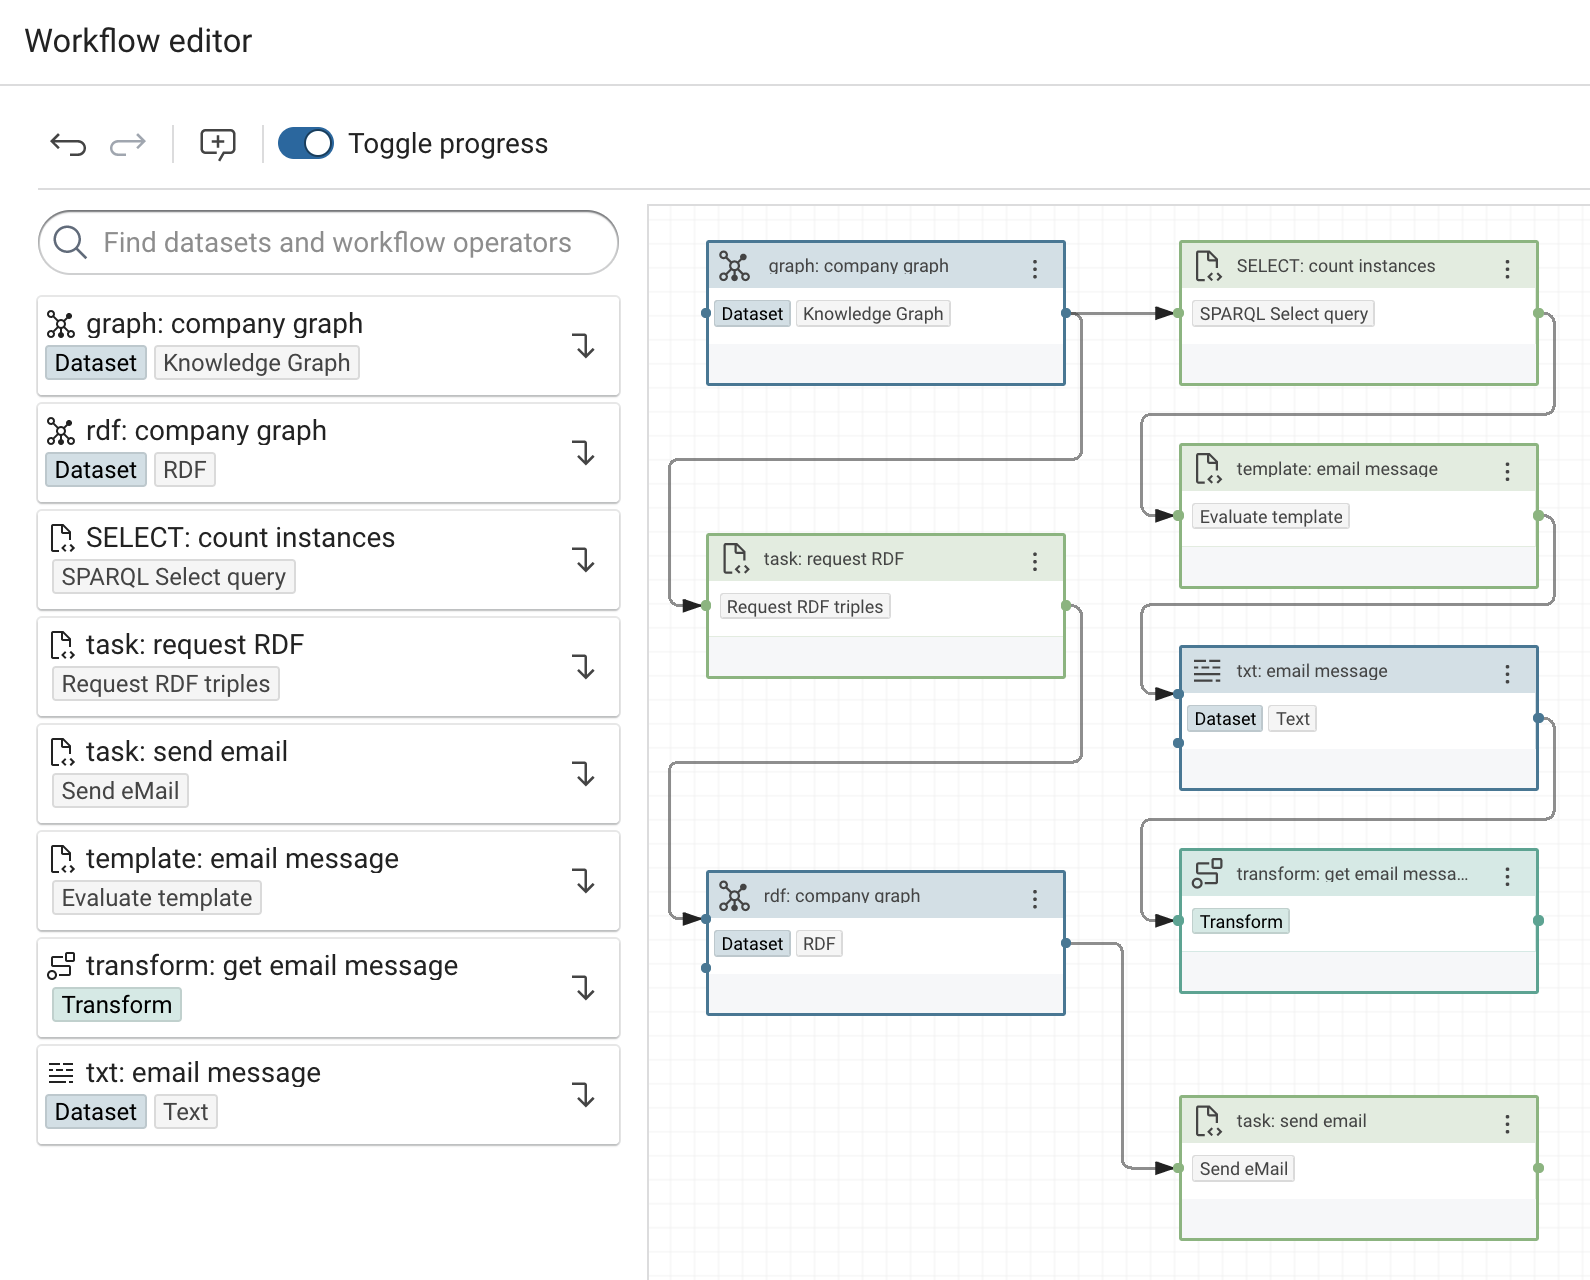
-
Click on three dots of the Send eMail task, select Config and tick the check box to enable the config port.
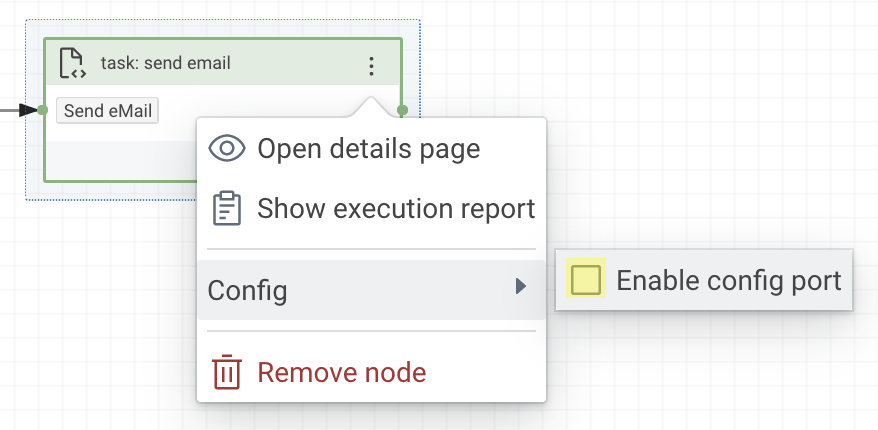
-
Connect the output of the Transform to the config port located on the top of the Send eMail task. When finished, click Save. The complete workflow now looks as shown below.
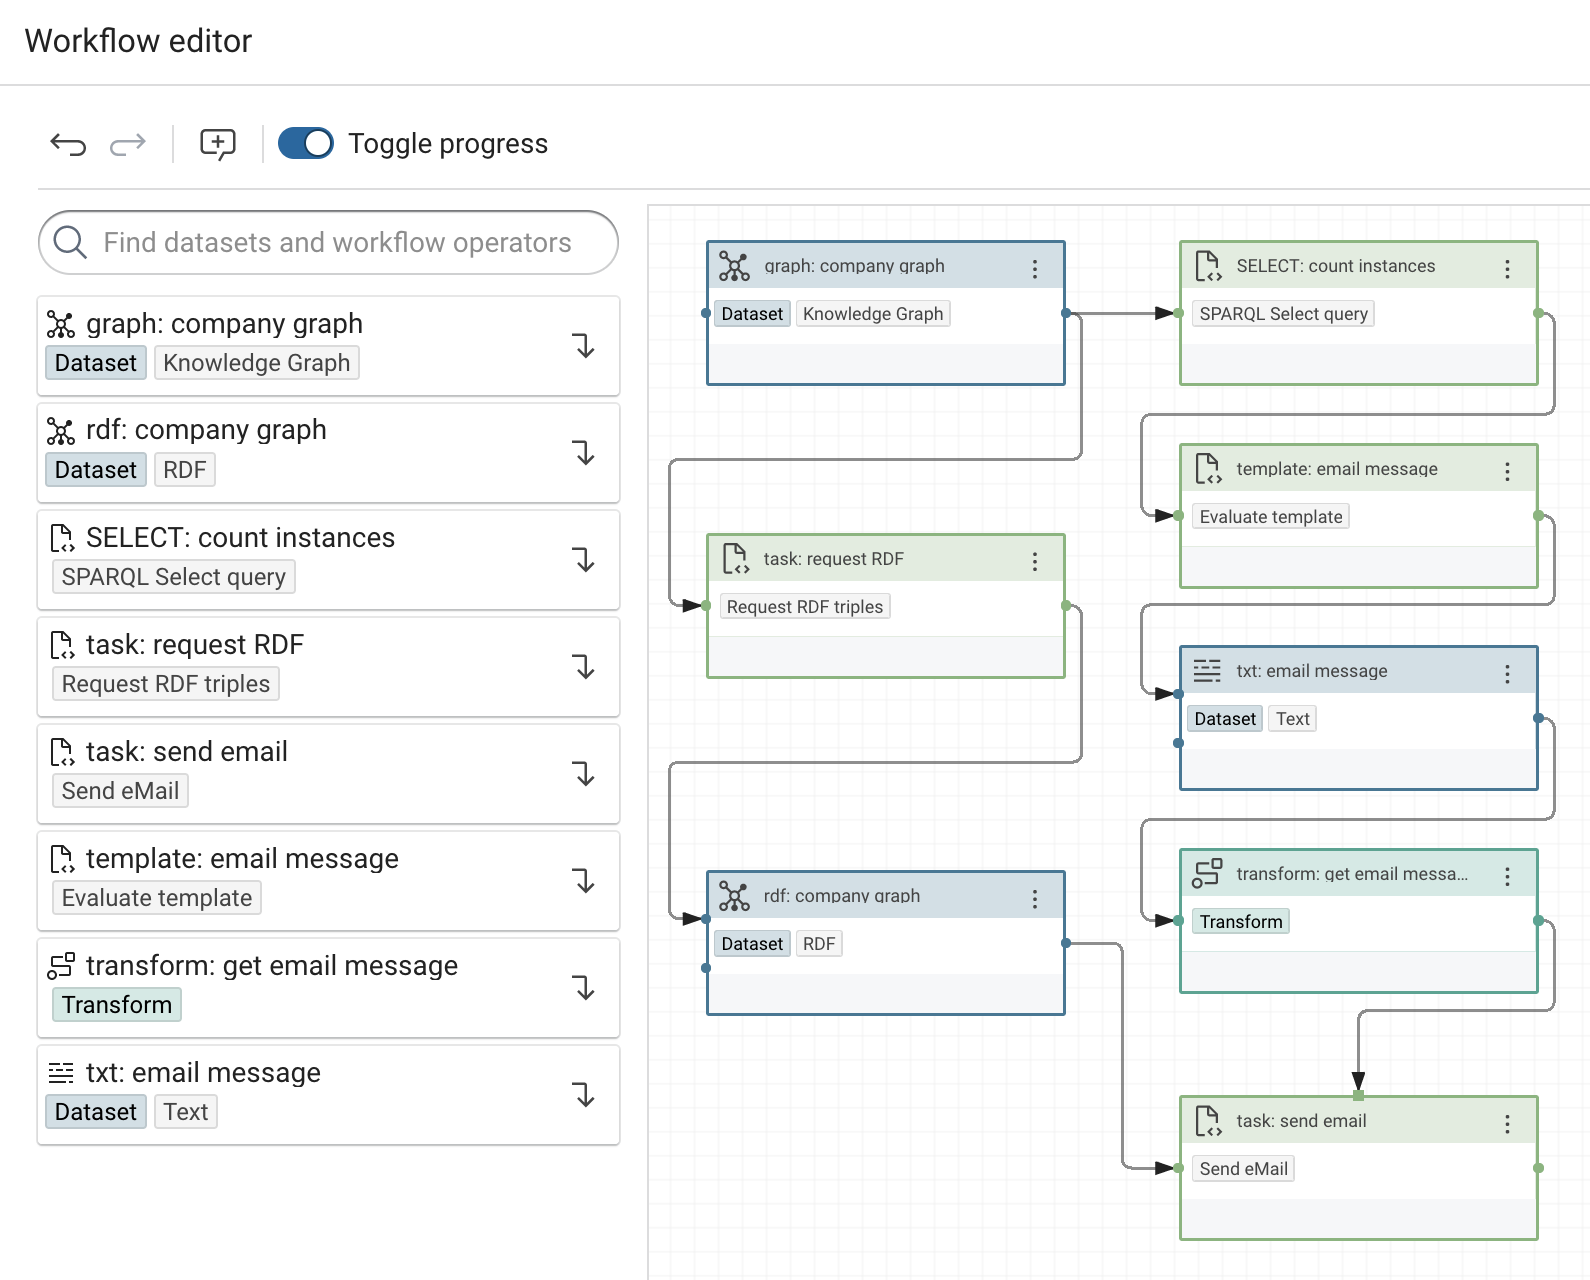
Info
The Transform sends the message parameter with our message text as its value to the Send eMail task.
12 Execute the Workflow¤
-
Execute the Workflow by clicking the play button (▶).
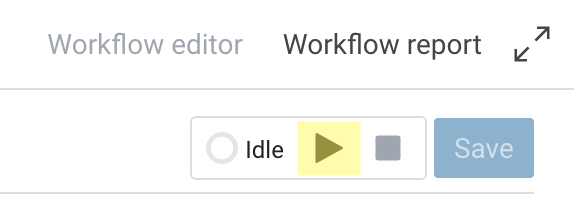
Info
After the workflow has finished you can find an email in the mailbox of the recipient address you specified for the Send eMail task.